Tl;dr – take me to the pictures!
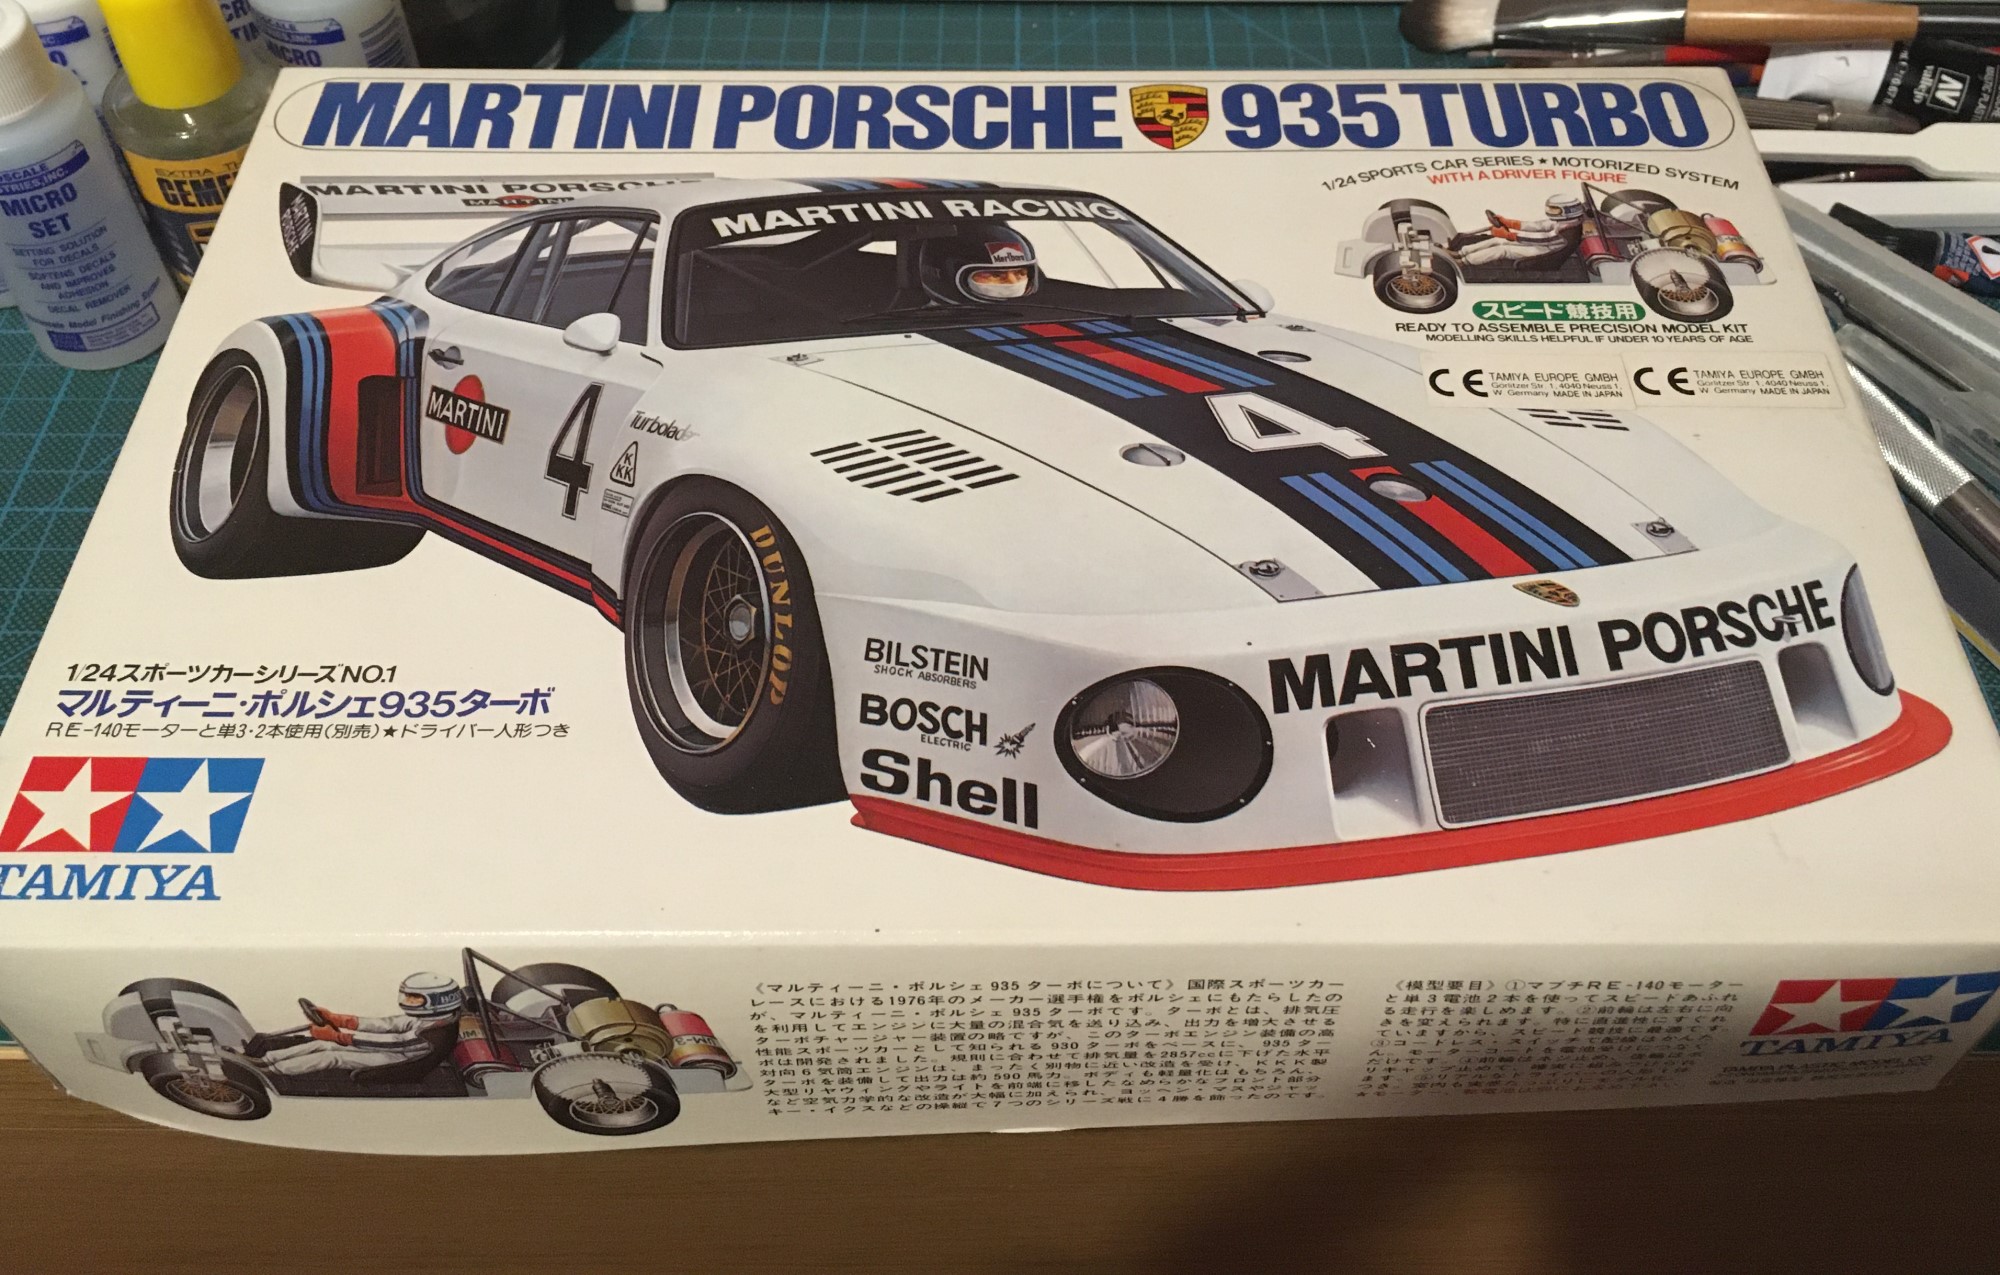
Tamiya’s 1:24 scale sports car series is a staple of the Japanese company’s model kit offering. Numbering over 300 models, the series has covered everything from ordinary road cars to the ultimate endurance and rally cars. The very first kit of the 1:24 sports car series was the Tamiya Porsche 935 Turbo.
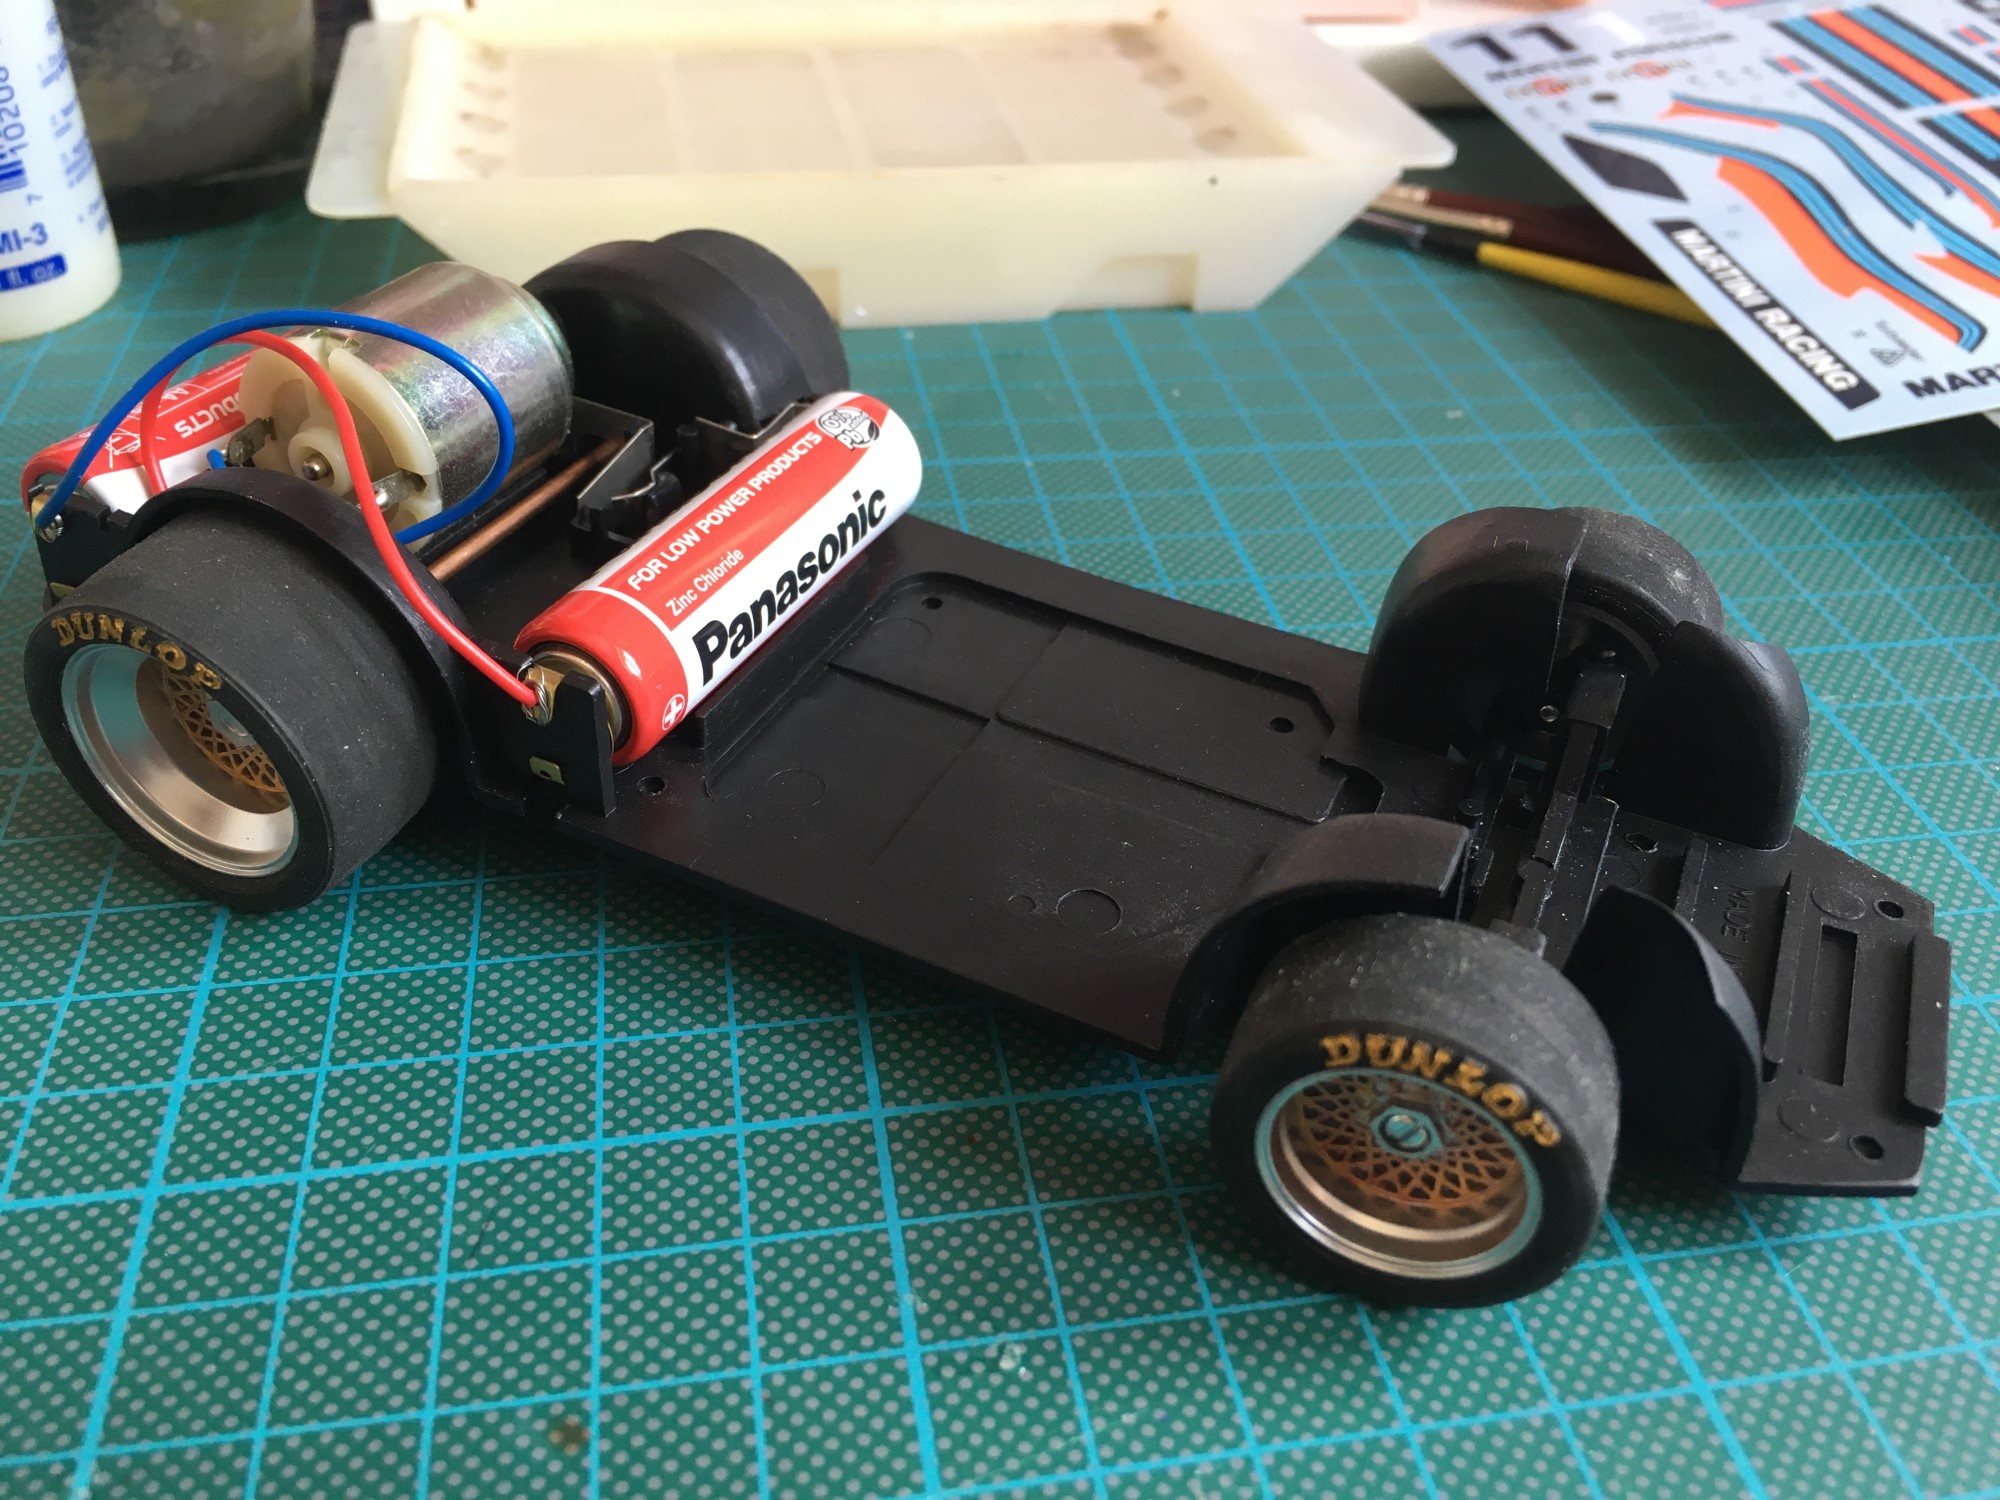
Tamiya’s early car kits featured electric motors. This involved a rudimentary RC-style kit using two batteries and an electric motor. The reason Tamiya used 1:20 scale for their F1 cars was because they couldn’t fit these motors in the smaller confines of a 1:24 F1 car. Roomier sports car cockpits and bodywork didn’t suffer that problem. Released in 1976, the Martini Porsche 935 Turbo made space for the motor at the rear of the car between the cabin and engine bay. This obscures the area where normally there’d be an engine to display. Accommodating the motor and batteries compromises detail on the car, a common theme of older Tamiya kits. As such, these early kits are not as highly rated from a modelling perspective and certainly not accurate. But they are extremely sought after and collectible, with early 1:24 sports car series kits selling for over £50 to collectors.
I had absolutely no intention of leaving my 935 in its box on a shelf though. These kits exist to be built! I also have another early Tamiya kit on the to-do list as well, the Alpine Renault A442 Turbo. Looking at the prices of these kits now on eBay is scary, but somehow I found the 935 by chance for £25 a few years ago.
The assembly phase
The 935 is a quite straightforward model kit to build. The floor, cockpit and body were each formed with one large main piece and a number of smaller detail parts. For the floor, this amounted to the front axle and mounting points, and the bits and pieces for the electric motor. The cockpit was little more than a base plate, some rollcage parts, door cards, the seat, driver, dashboard and steering wheel. If you were short on time, you could have this kit thrown together in an hour!
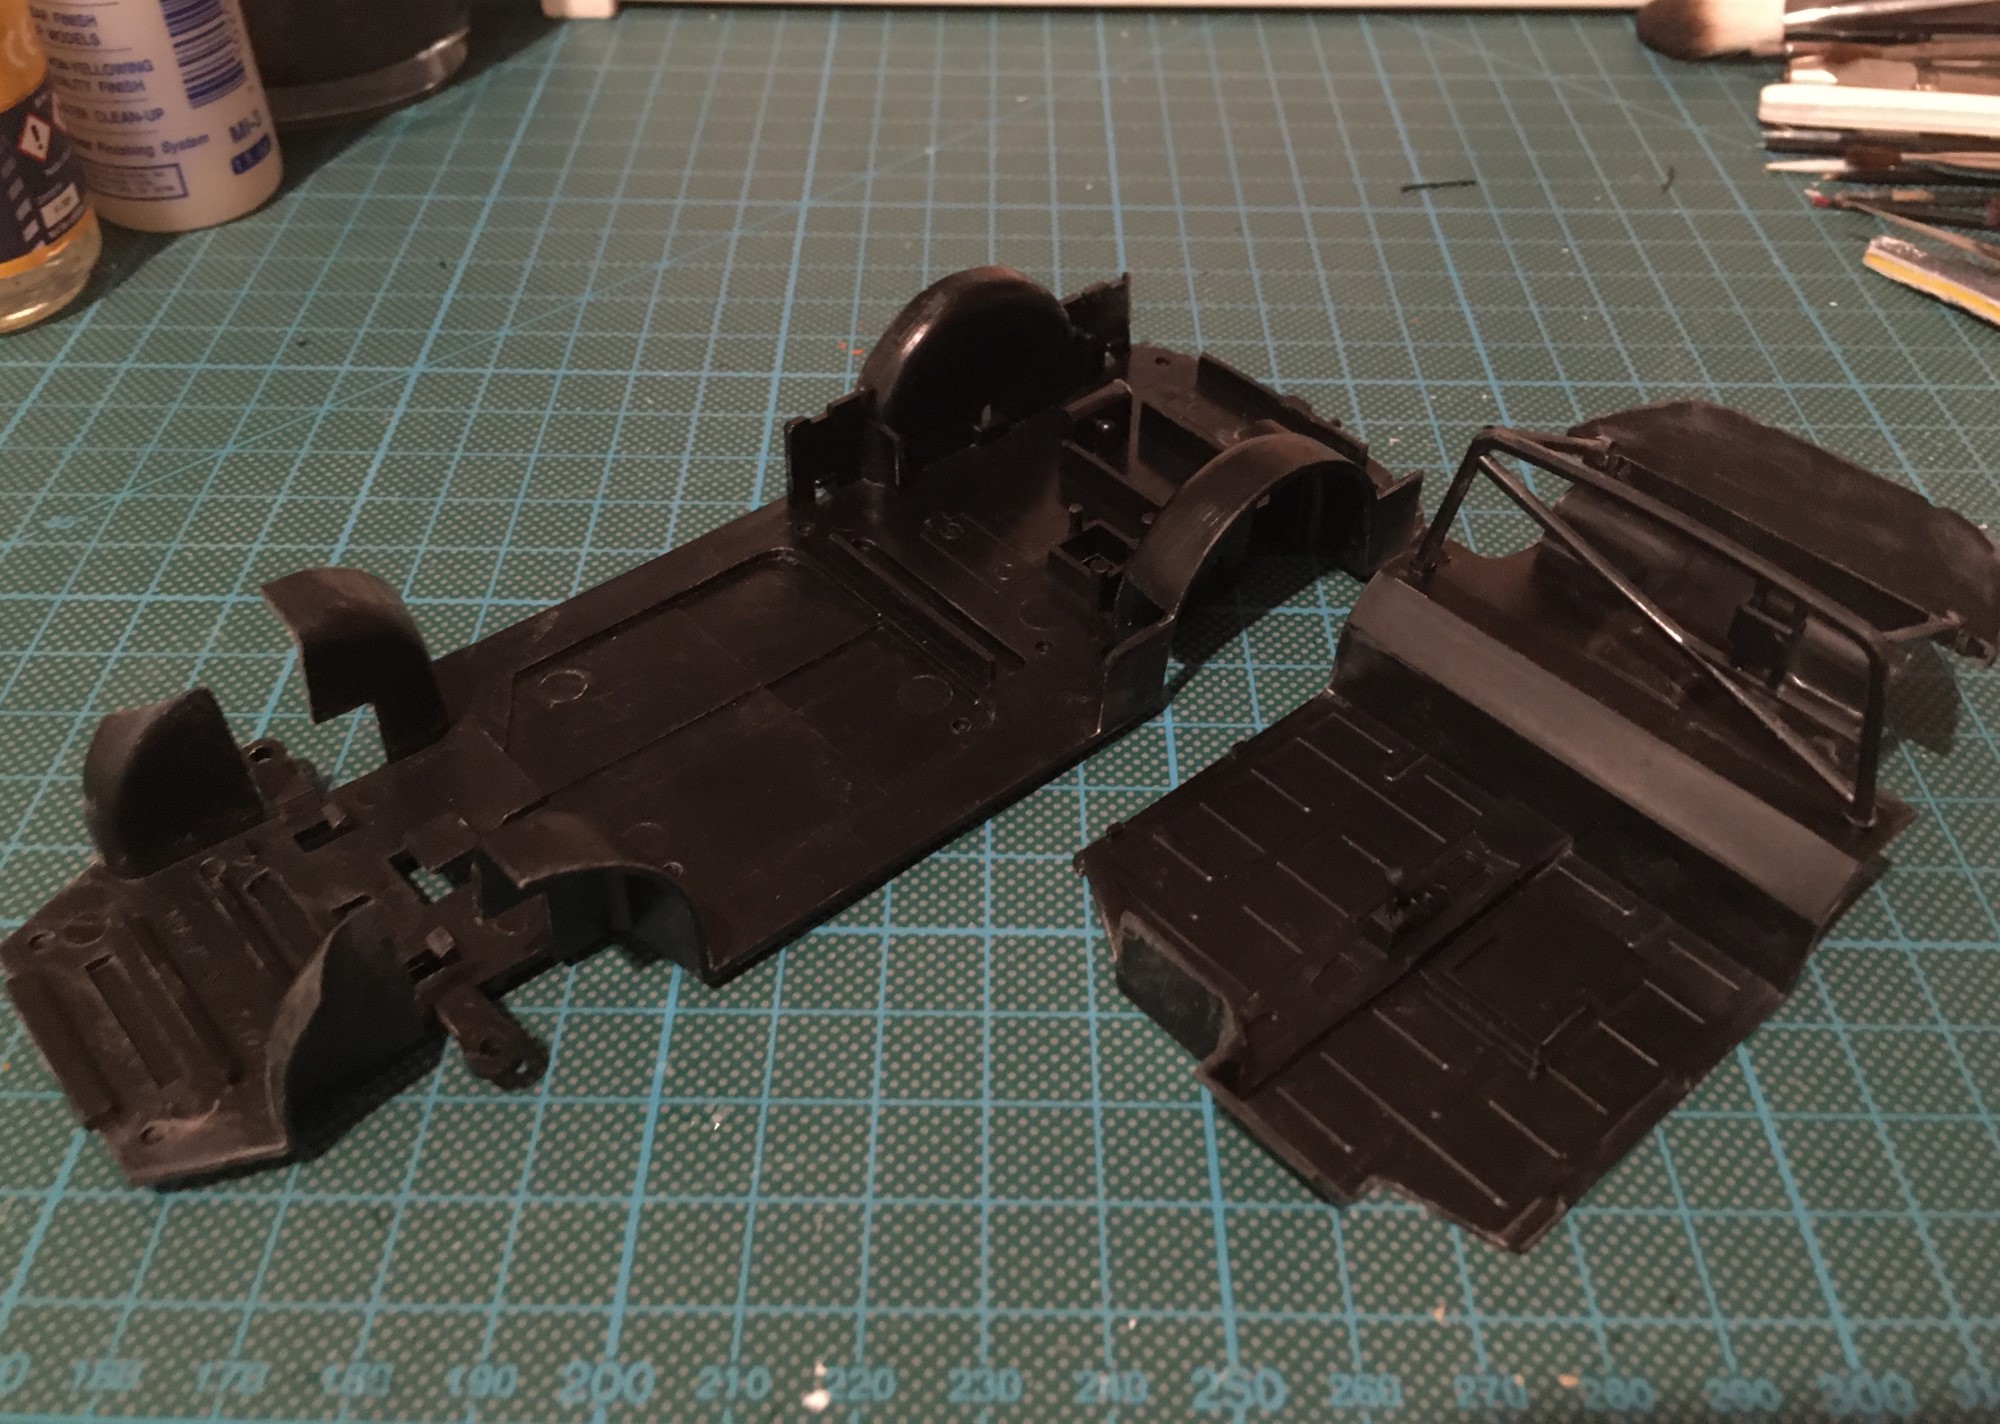
Despite its age, parts fitment was generally very good. There were some mould lines and excess plastic to clear up, but not as much as you might expect from a 45 year old kit. There were no warped parts either. I made one critical error during the kit build however. I mistook the lines running either side of the car above the doors and along the roof as mould lines when in fact they were part of the body. So my Porsche 935 is very smooth!
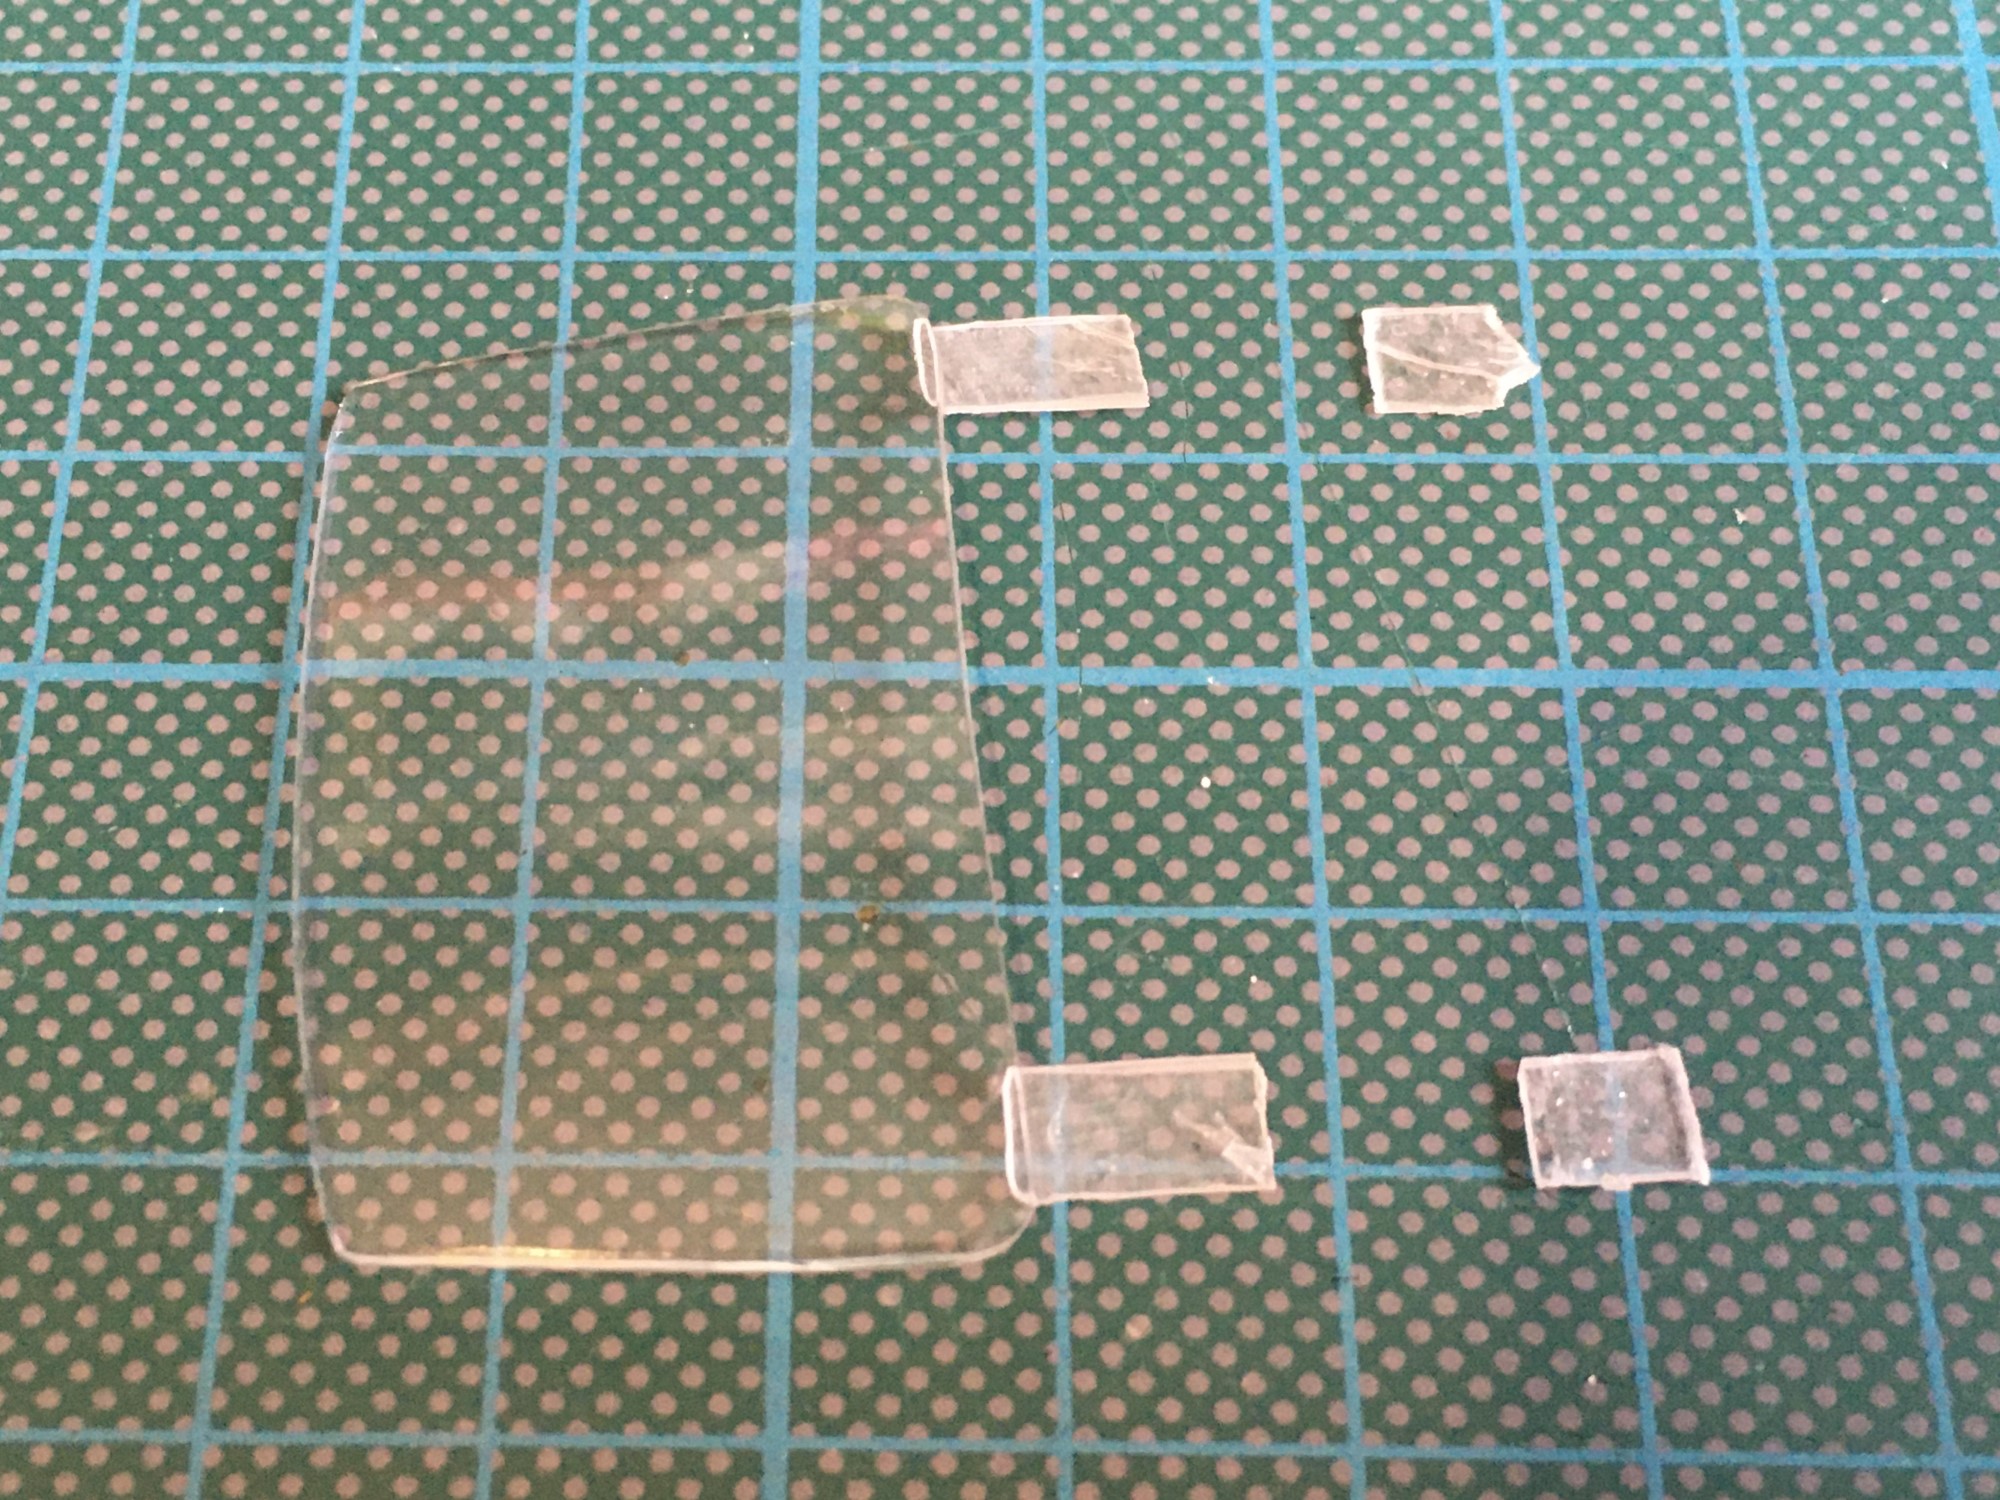
The only fitment issue I encountered was related to the clear part for the front and rear windscreens. It has two thick tabs running front to back connecting the two pieces together, but these were too long. Unaltered, they left an unsightly gap between the top of the body and the windscreens and therefore needed to be shortened. I cut a section out of each tab and attached each windscreen separately, allowing me to place each one as desired.
Powering up the Porsche
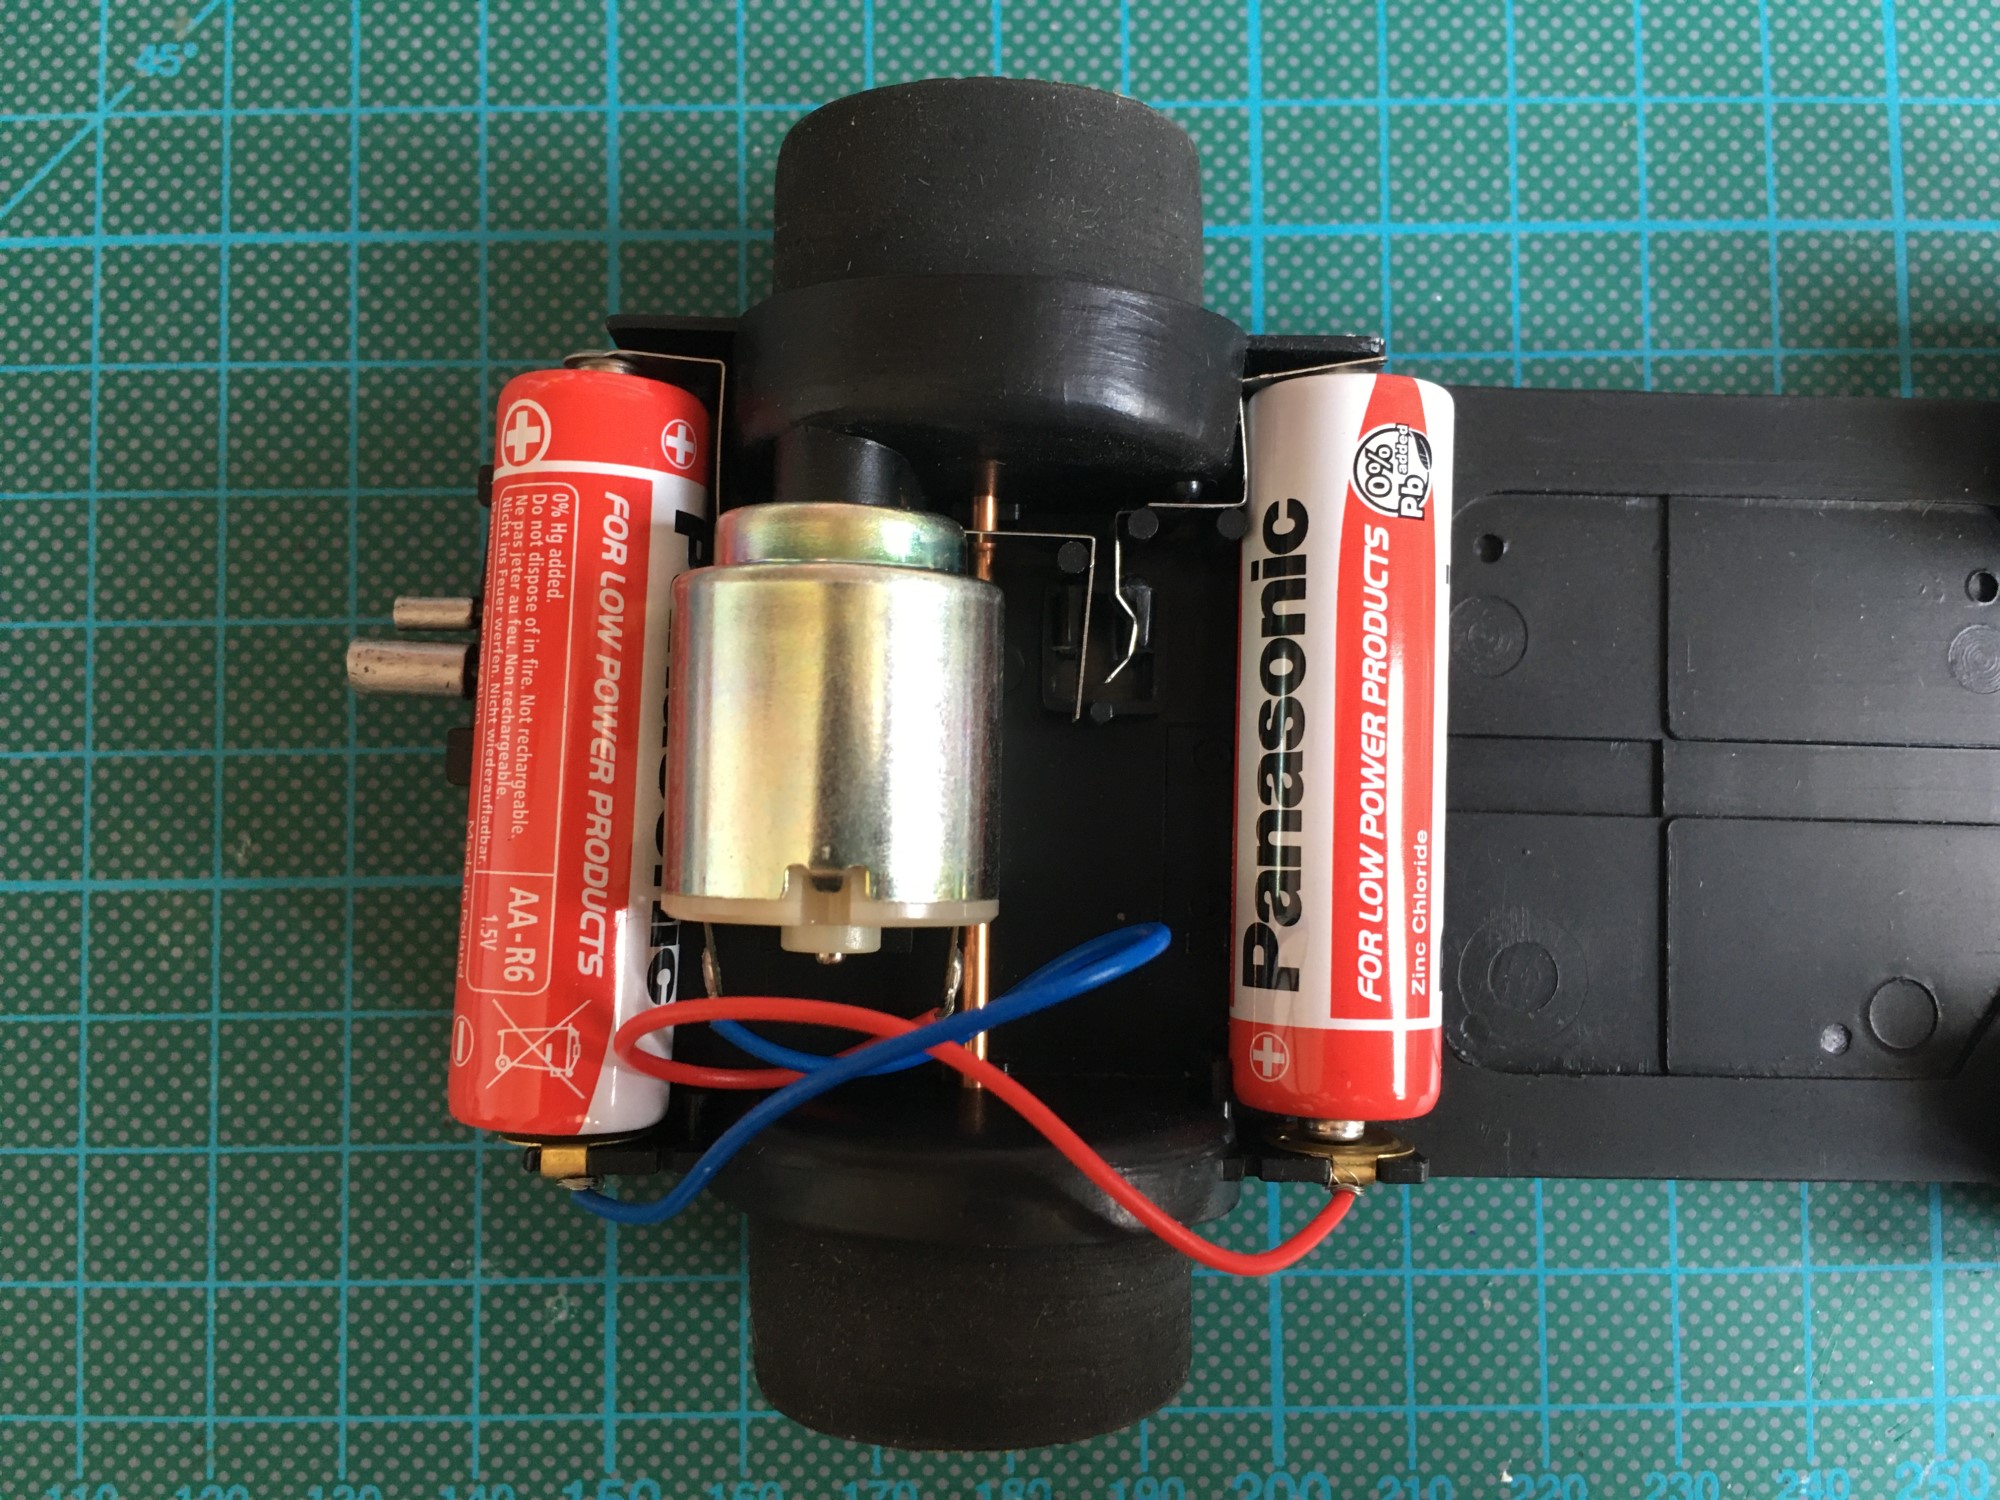
I had to include the electric motor on my finished model. There’s plenty of re-released Tamiya Porsche 935 Turbo kits out there without the motor and it didn’t seem right to skip it for this build. As an original Tamiya kit, the motor is as important as any other part on it.
Installing the motor and the associated parts onto the floor section is very simple. It’s a basic system that uses a switch on the underside as the only control. You switch the car either on or off and you have to catch it to stop it from running! I stuck a couple of batteries in and gave it a few test runs – it was quite rapid. I chose to run these tests with nothing but the floor and wheels attached. You wouldn’t want to spend countless hours on the bodywork only to have it smash into a table leg or the skirting board!
You’ll need more than just white paint
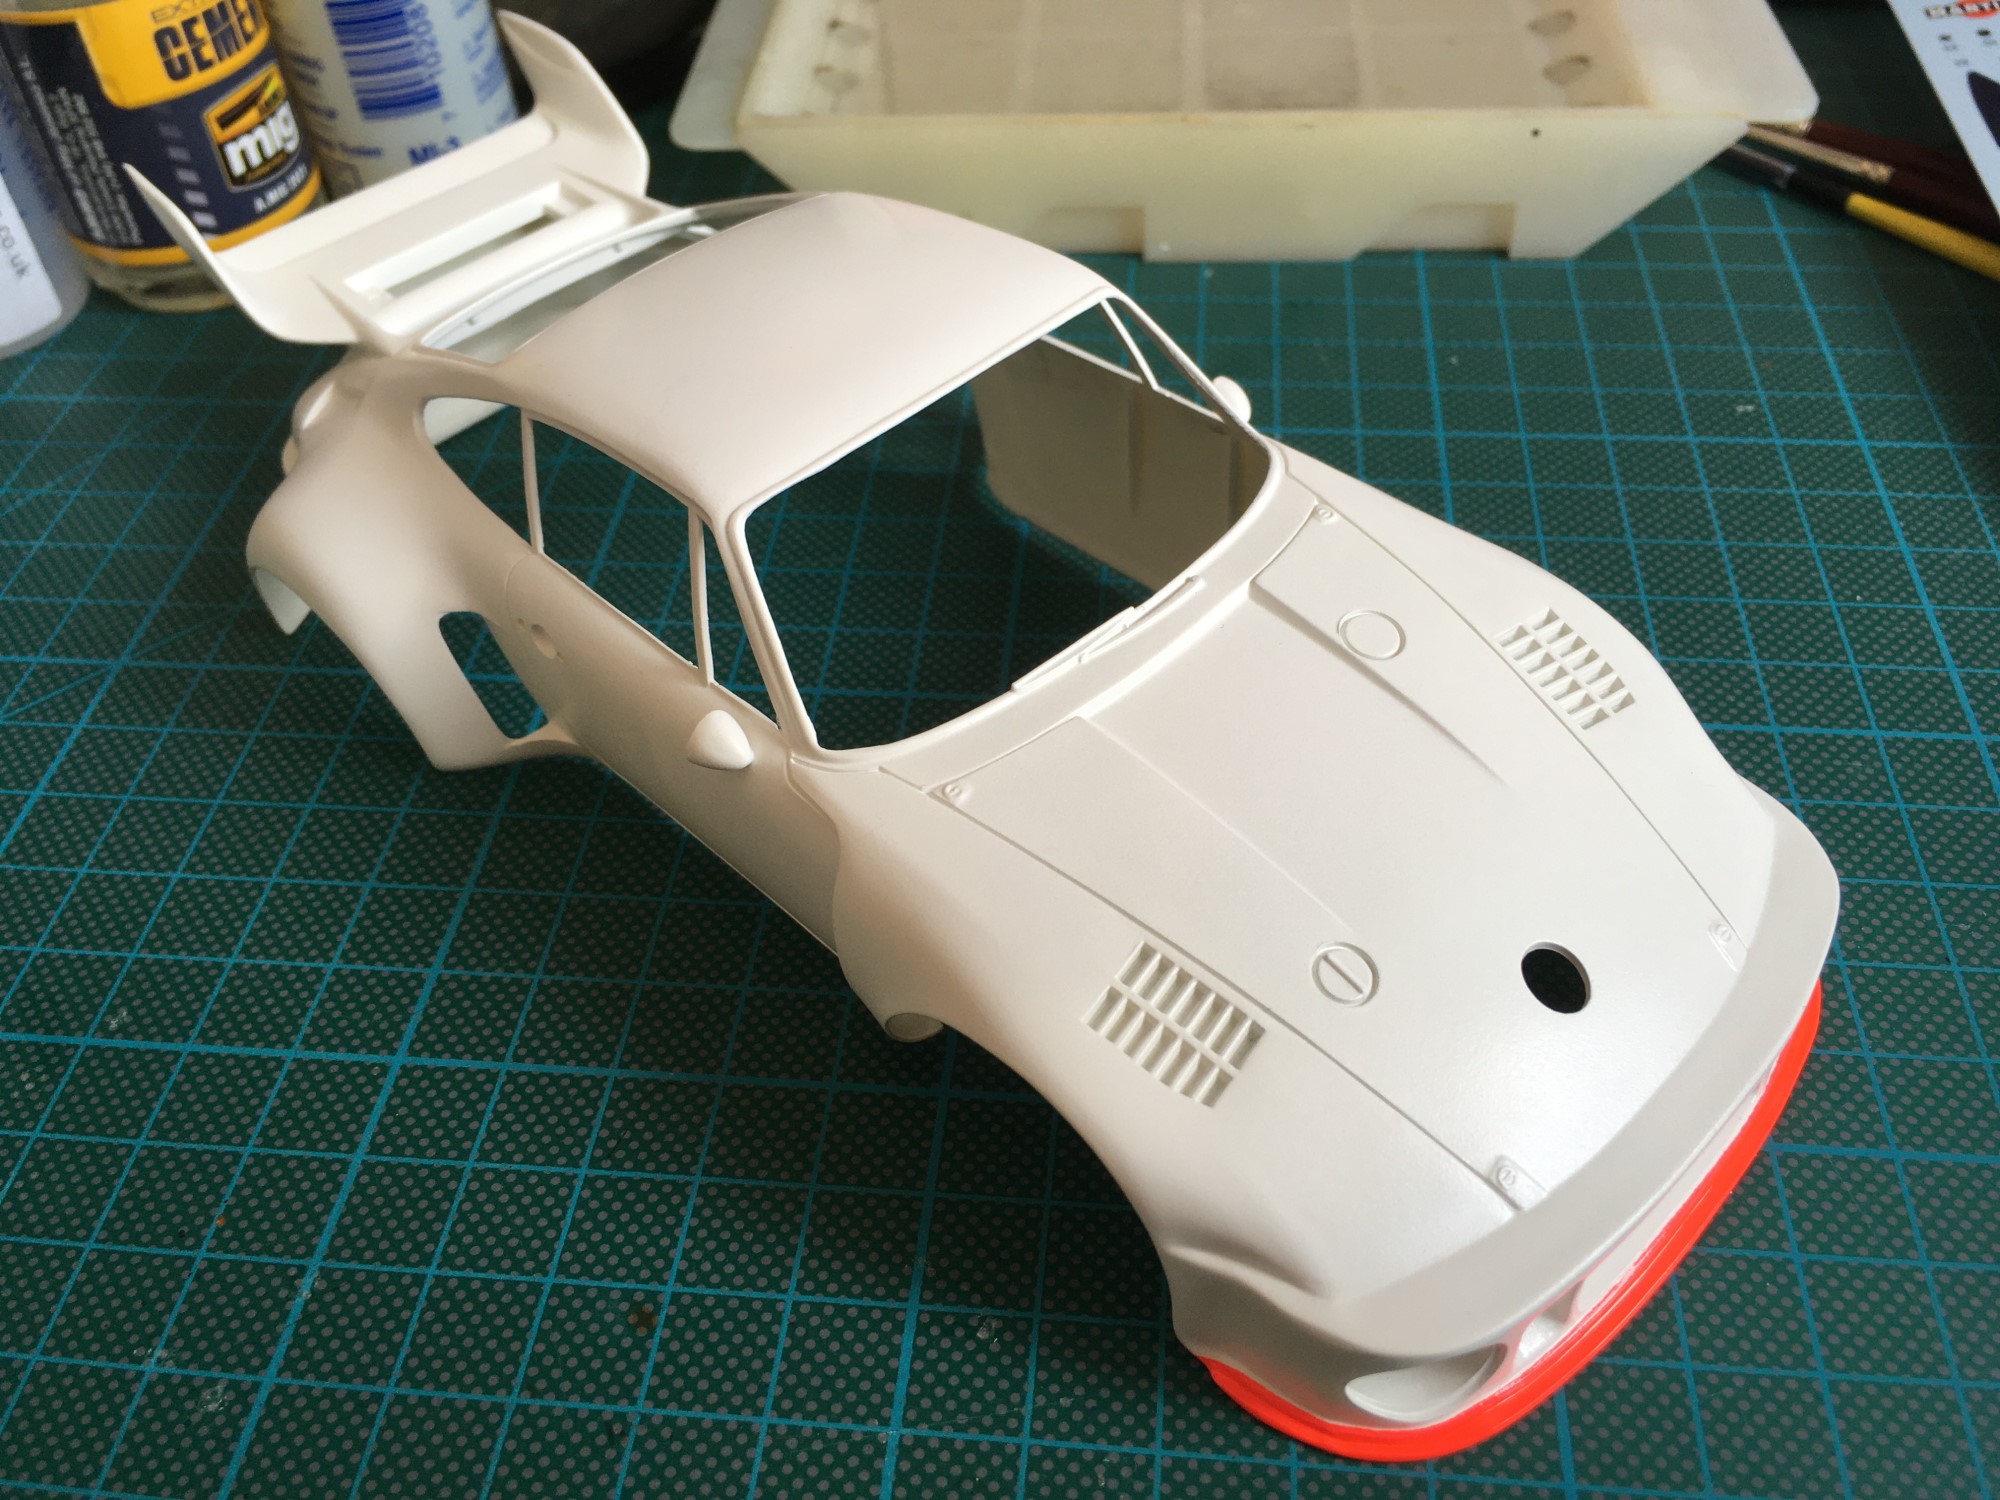
With the decal job still to come (read on for that!) there was still work to be done to paint the body. I pre-assembled most of the bodywork, leaving only the rear wing beam separate. Leaving it separate meant it wouldn’t obscure any areas of the body underneath it when spraying. I used Tamiya TS26 Pure White straight out of the can for a nice smooth white finish.
Next was the orange strip on the splitter at the front of the car. This is the only orange area not catered for with a decal so must be painted. I used TS36 Fluorescent Red to do the job. It’s often used for the Marlboro dayglo orange of the McLaren F1 cars and it’s a close match for the replacement decals I ordered.
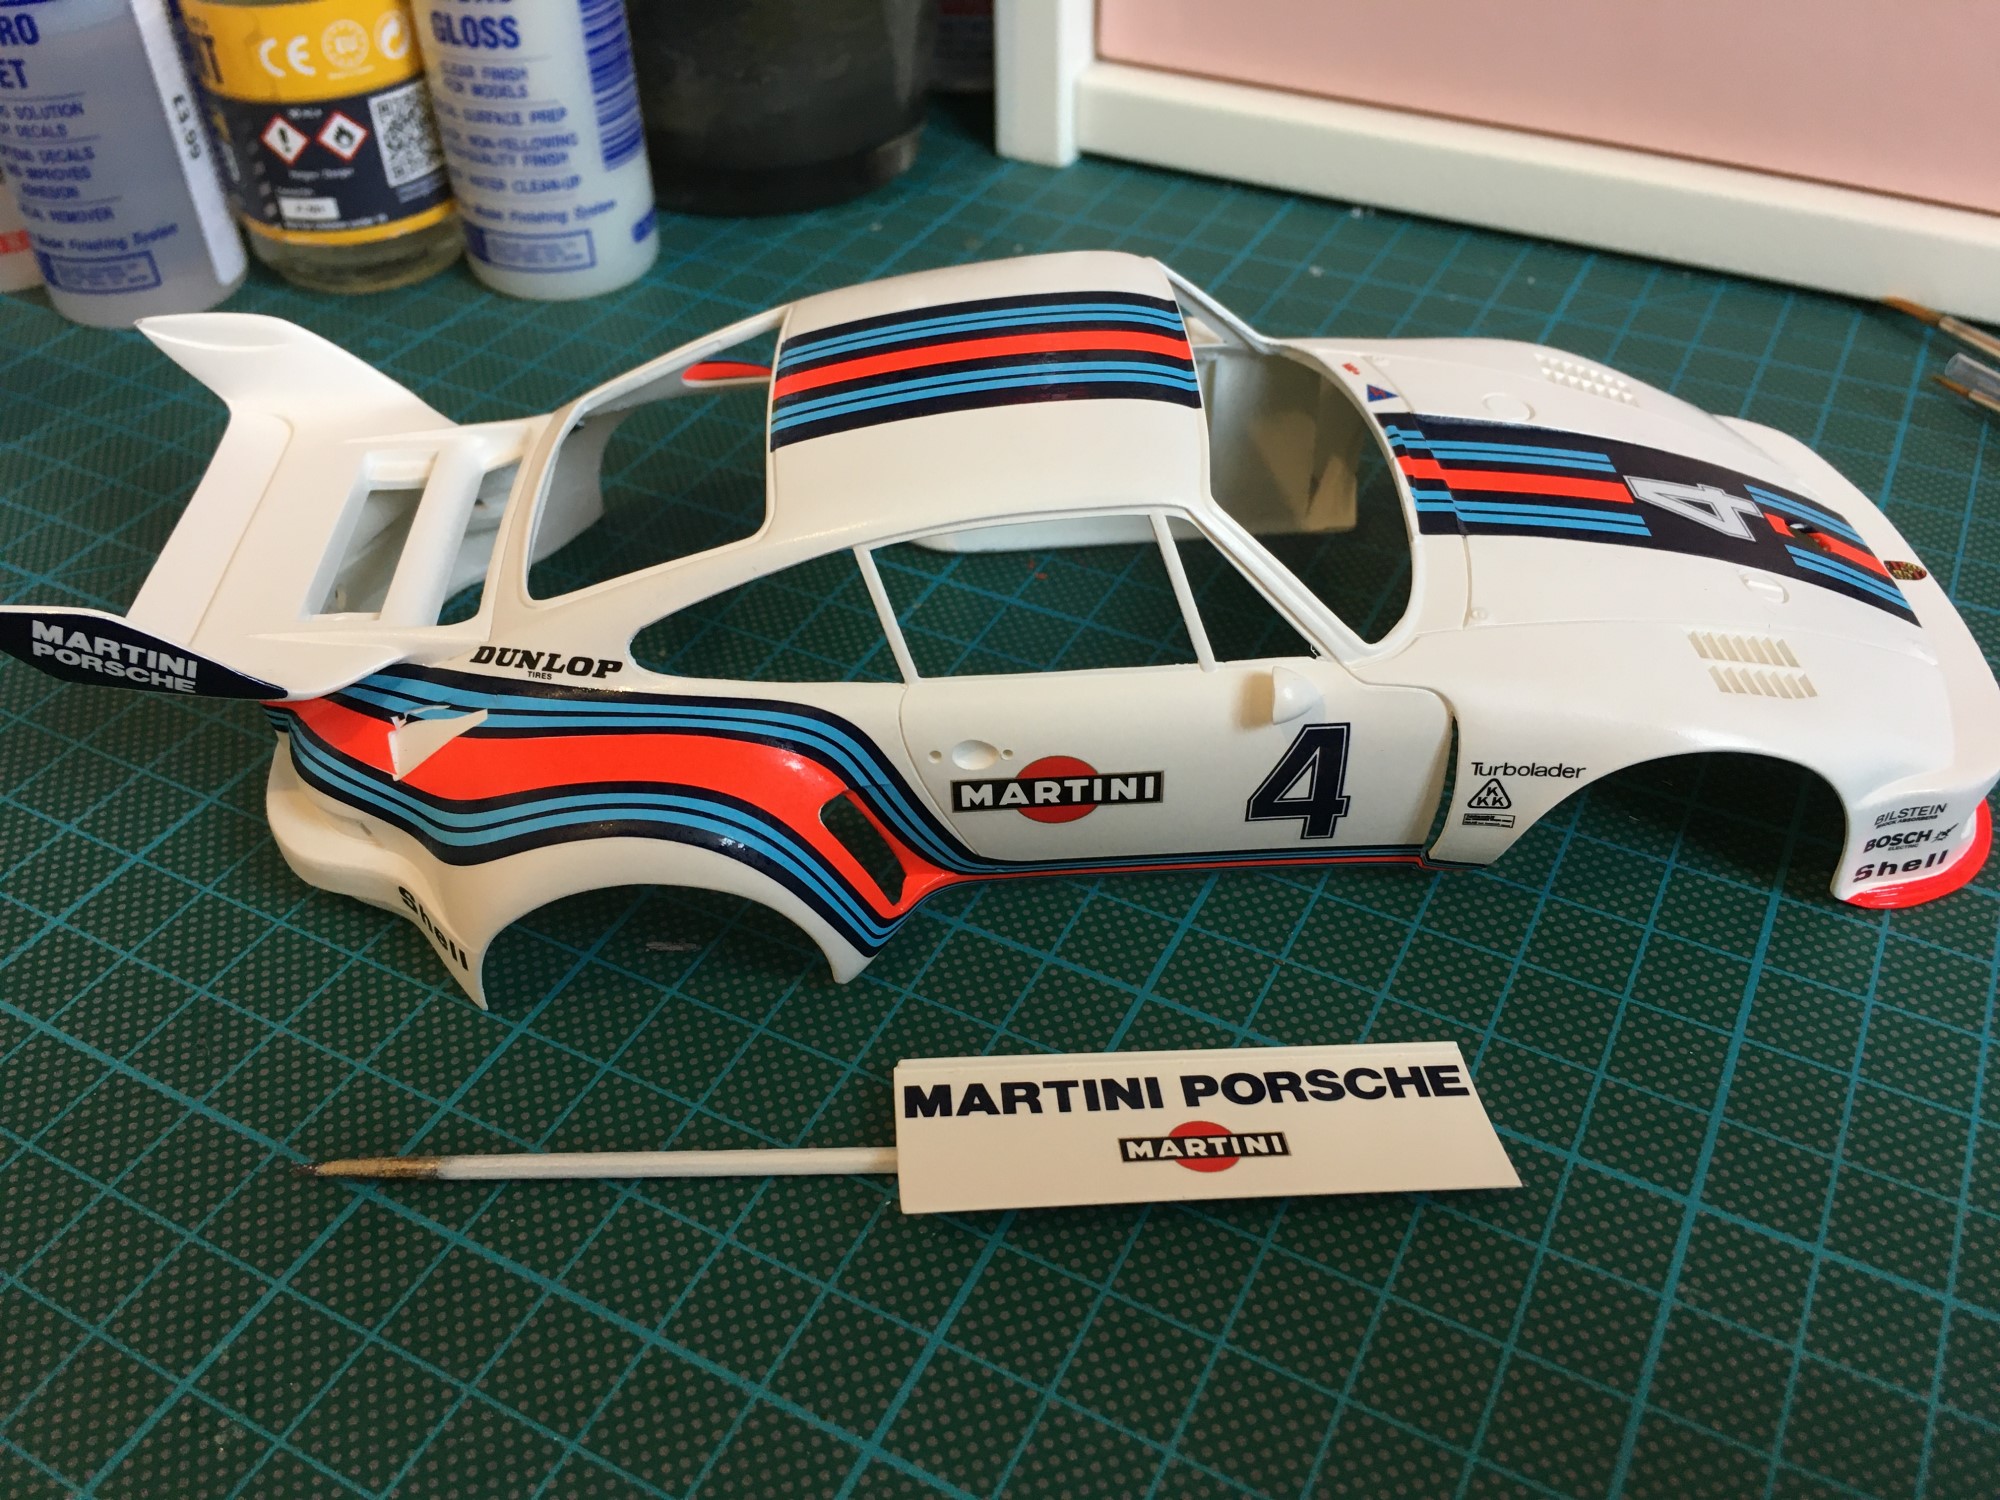
Some serious Martini stripe action
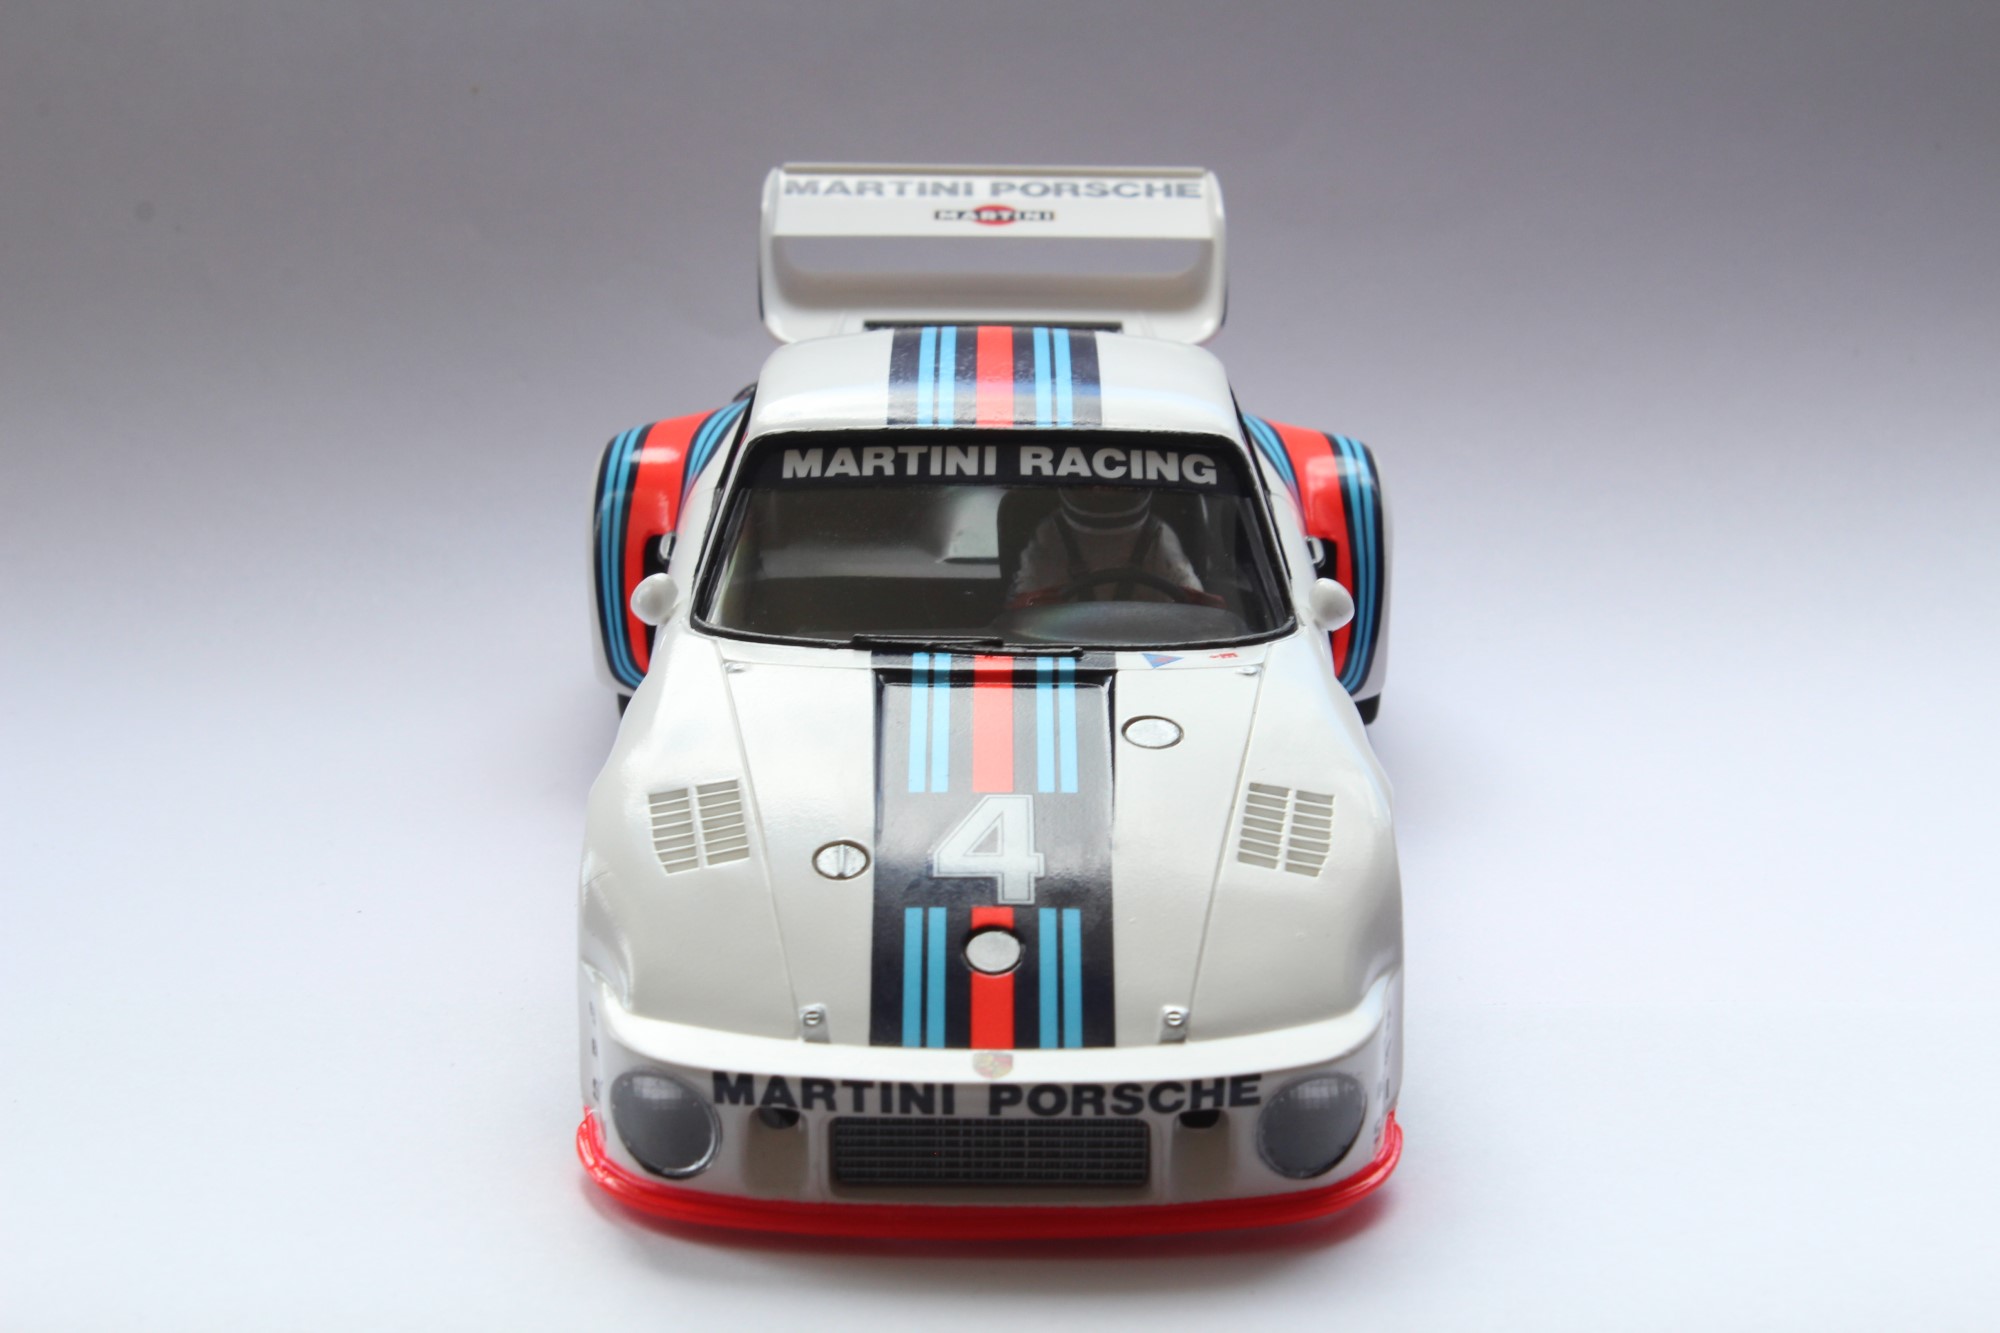
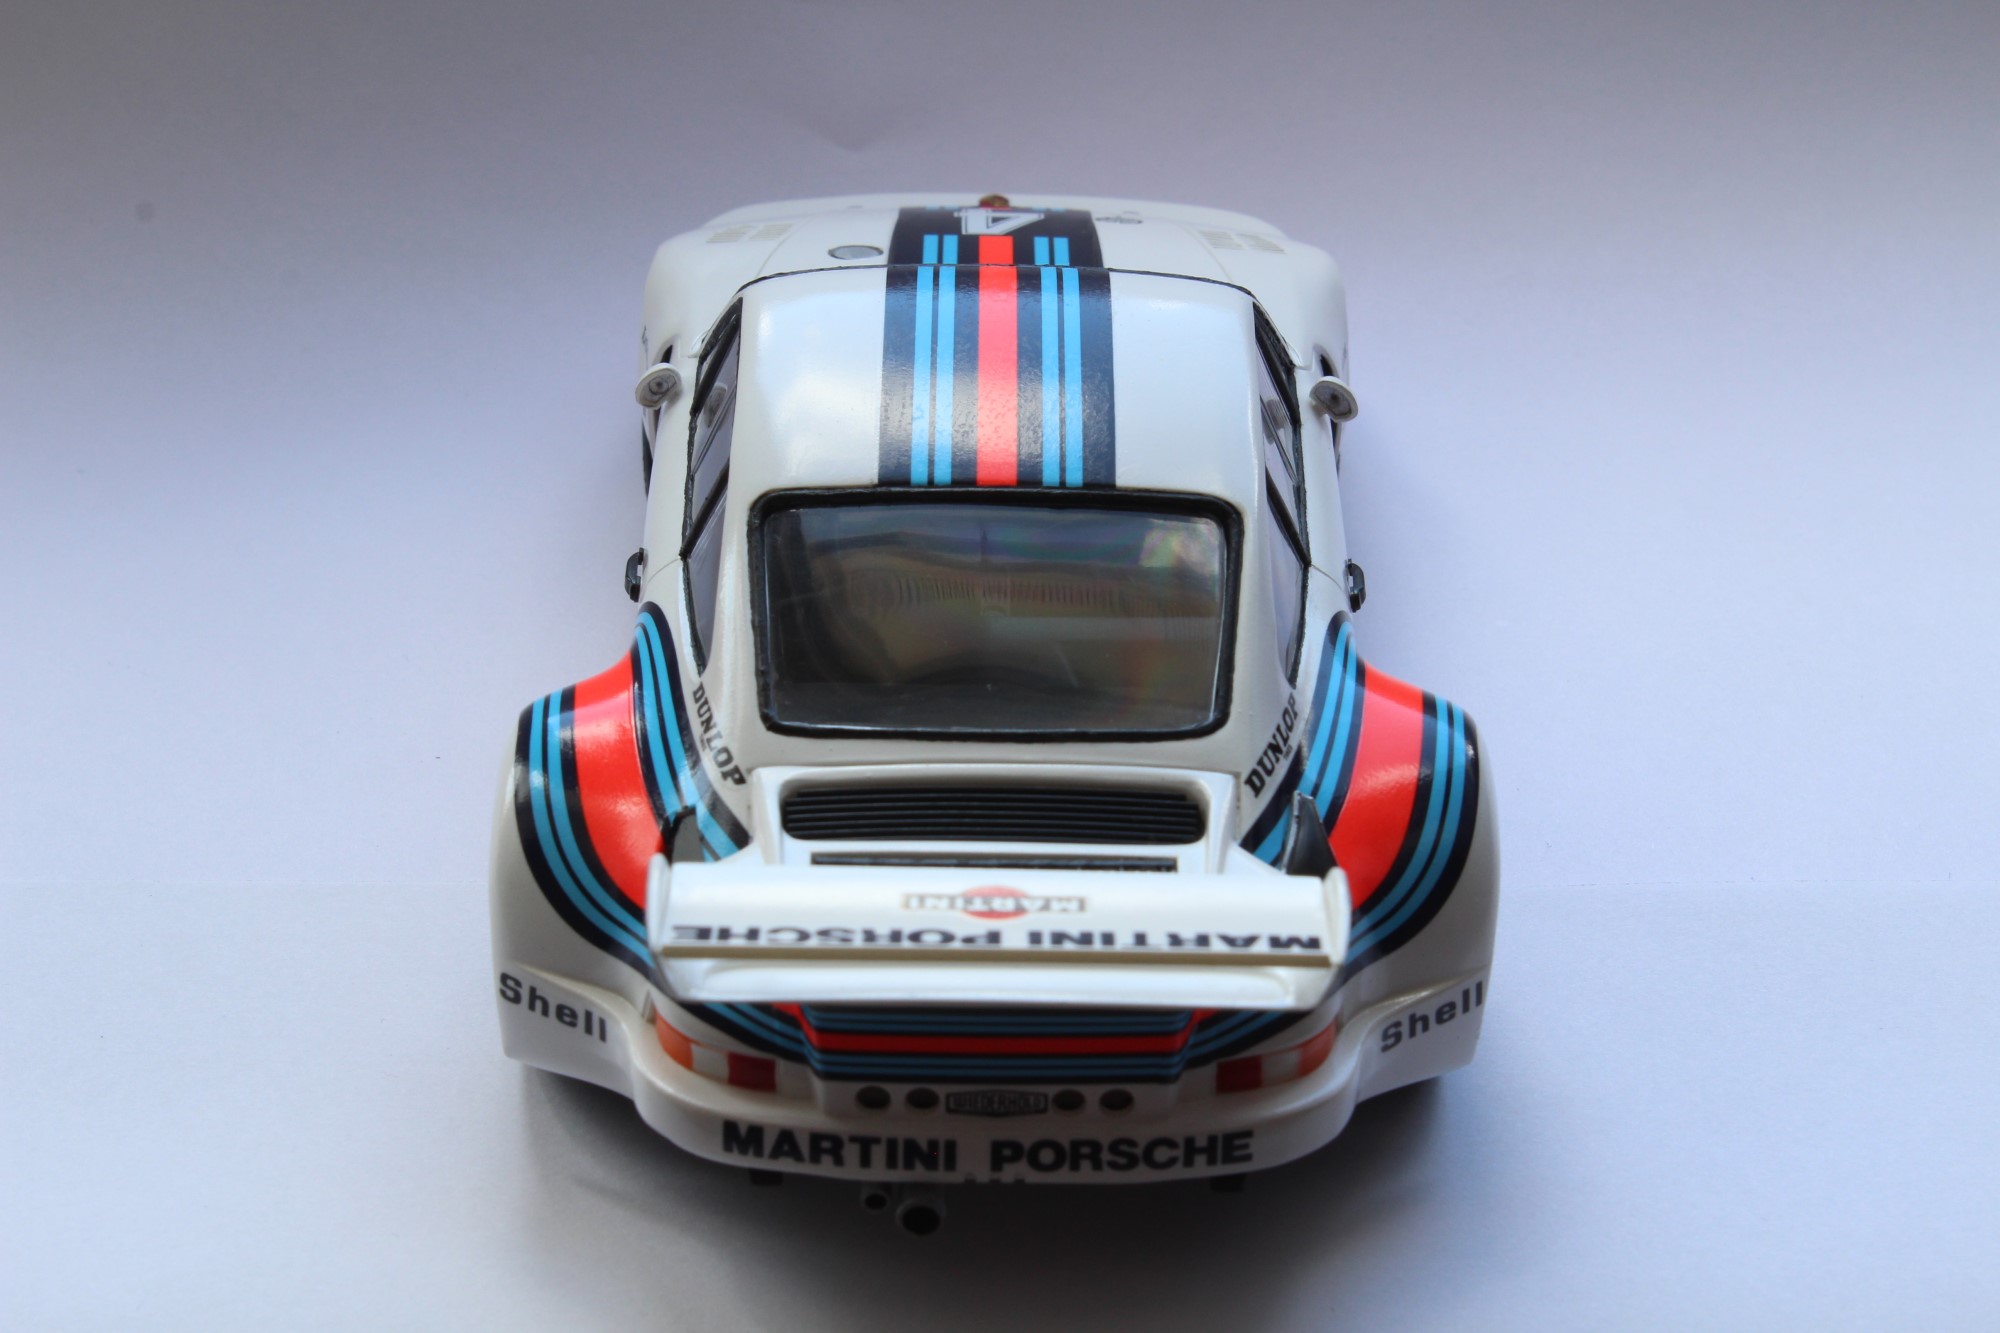
Unsurprisingly, the original Tamiya decal sheet included in the kit was past its sell by date. Though in fairness, it didn’t look too bad aside from some staining. My main concern was actually the shade of red used for the Martini stripes. It looked too dark. I chose to order a replacement sheet and was able to find one (and only one!) which was at Spotmodel, in Spain. This was the Shunko decal sheet, specifically SHK-D384. The difference in colour is quite noticeable.
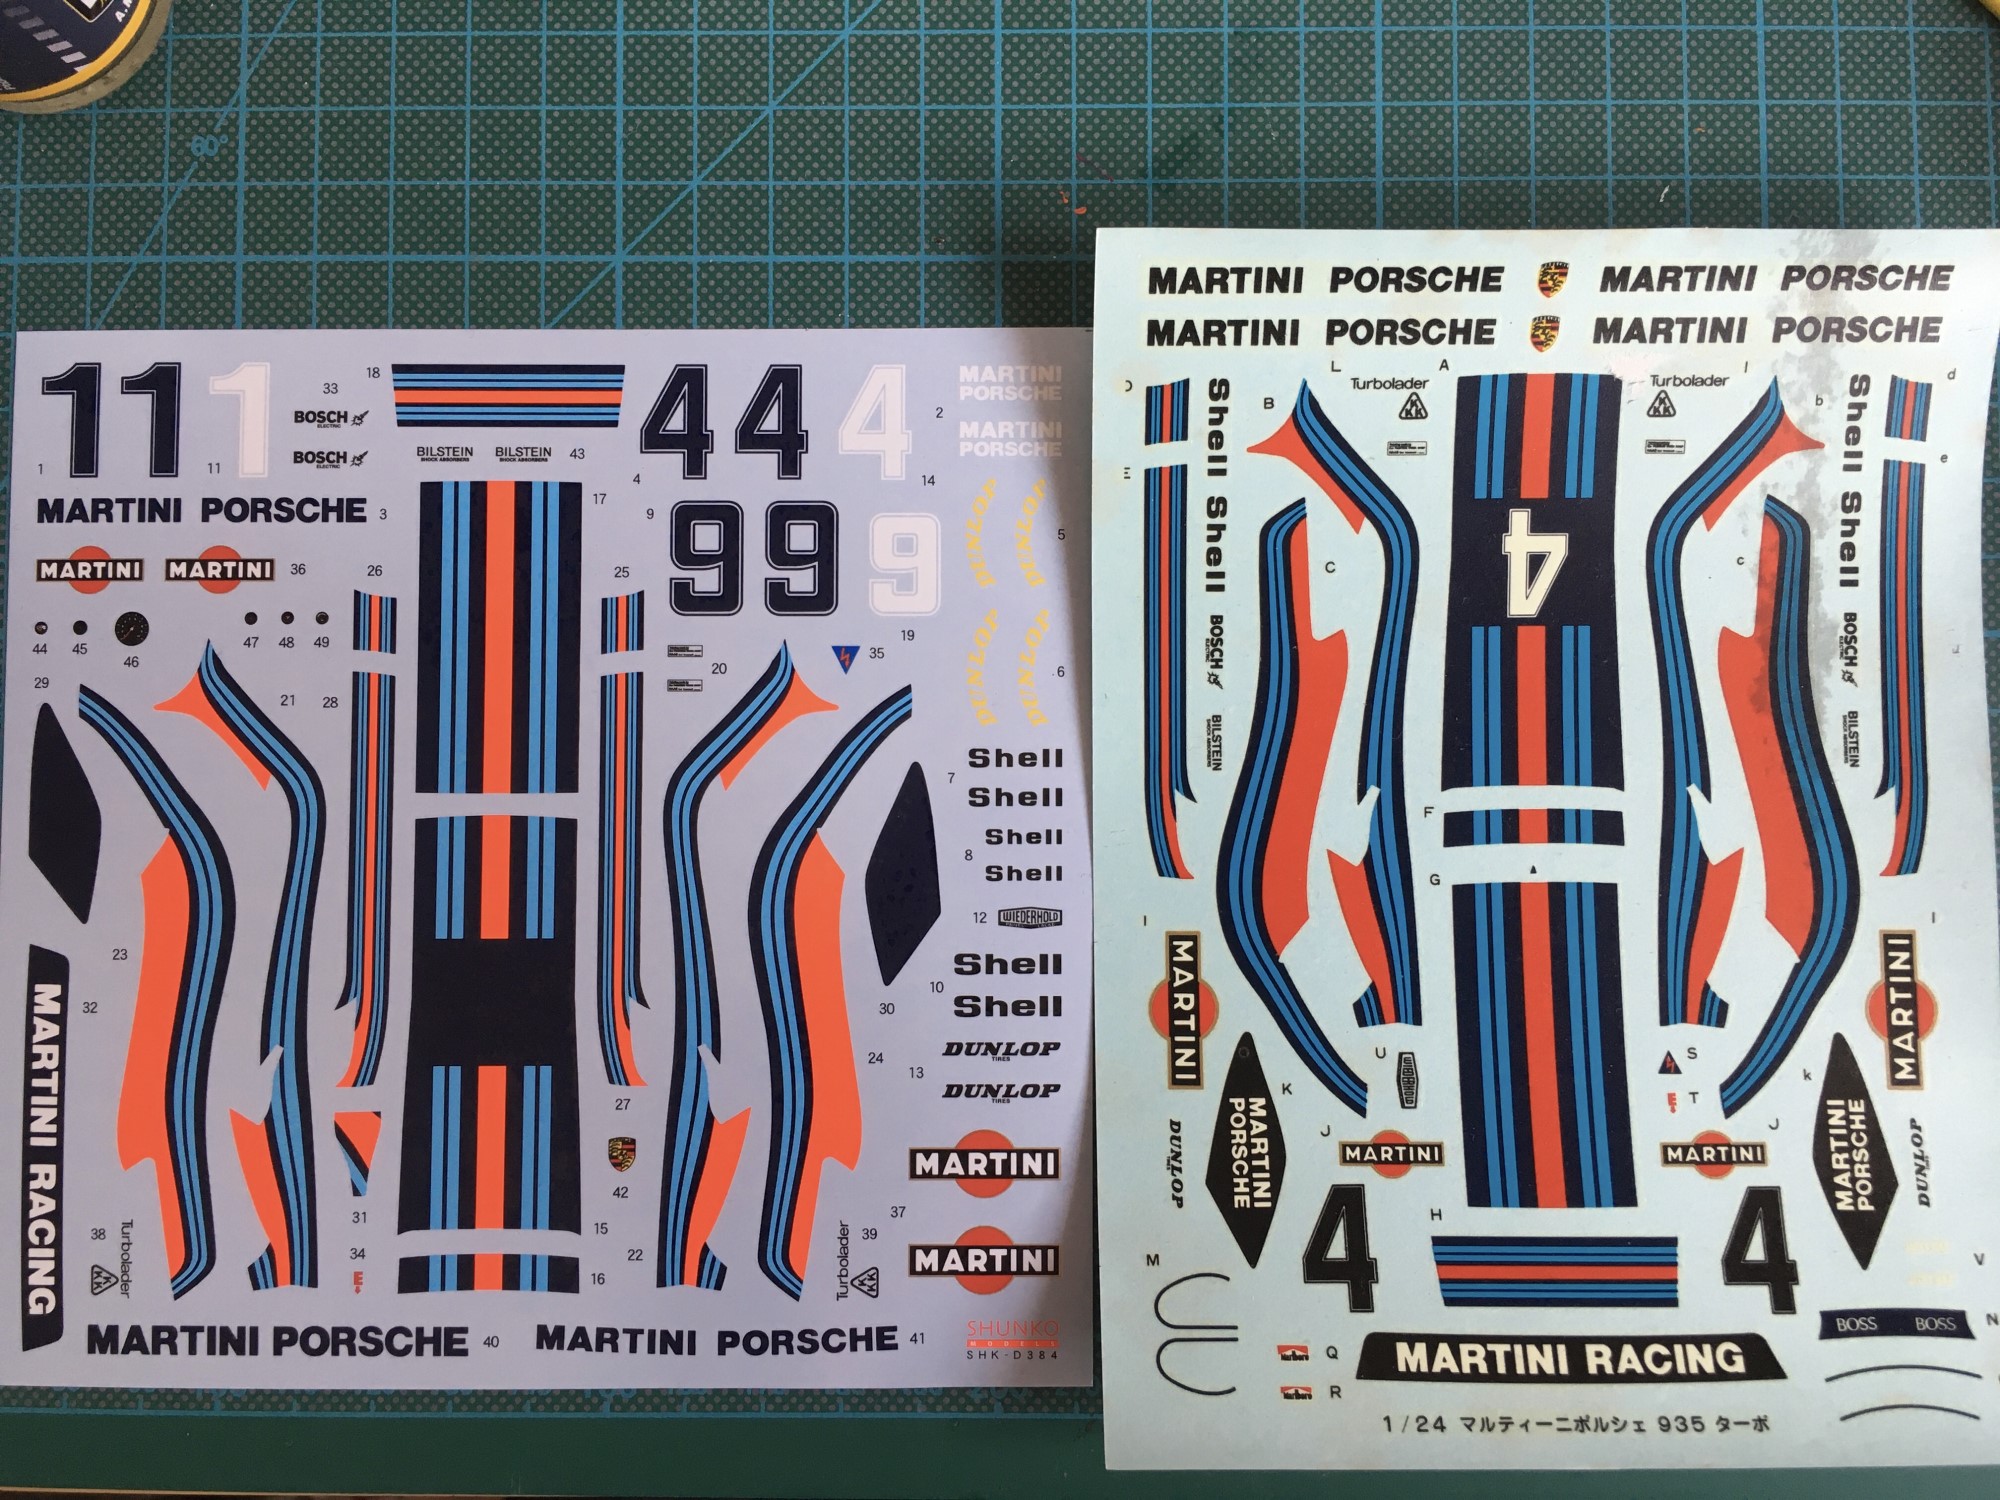
The correct shade of red/orange to use for the Martini stripes is up for debate. Certainly on the later Lancias in the 1980s the stripes are red and match the Martini logo roundel, but contemporary pictures of the 935 Turbo in action suggest the stripes were lighter on this car. Note the difference between the stripe and the red of the Martini logo on this photo from the 1976 Dijon 6 Hours for instance.
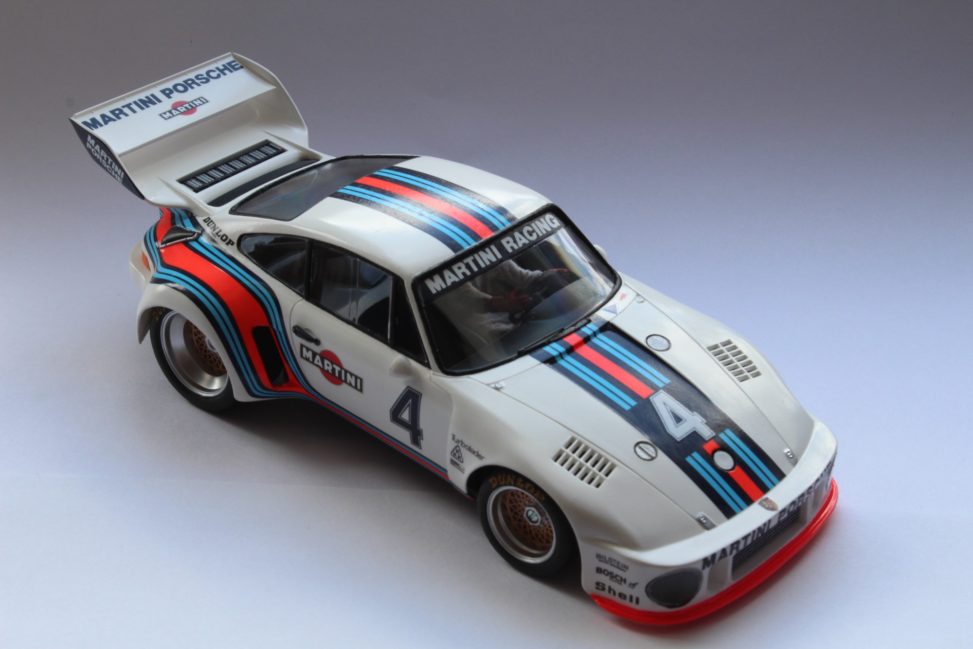
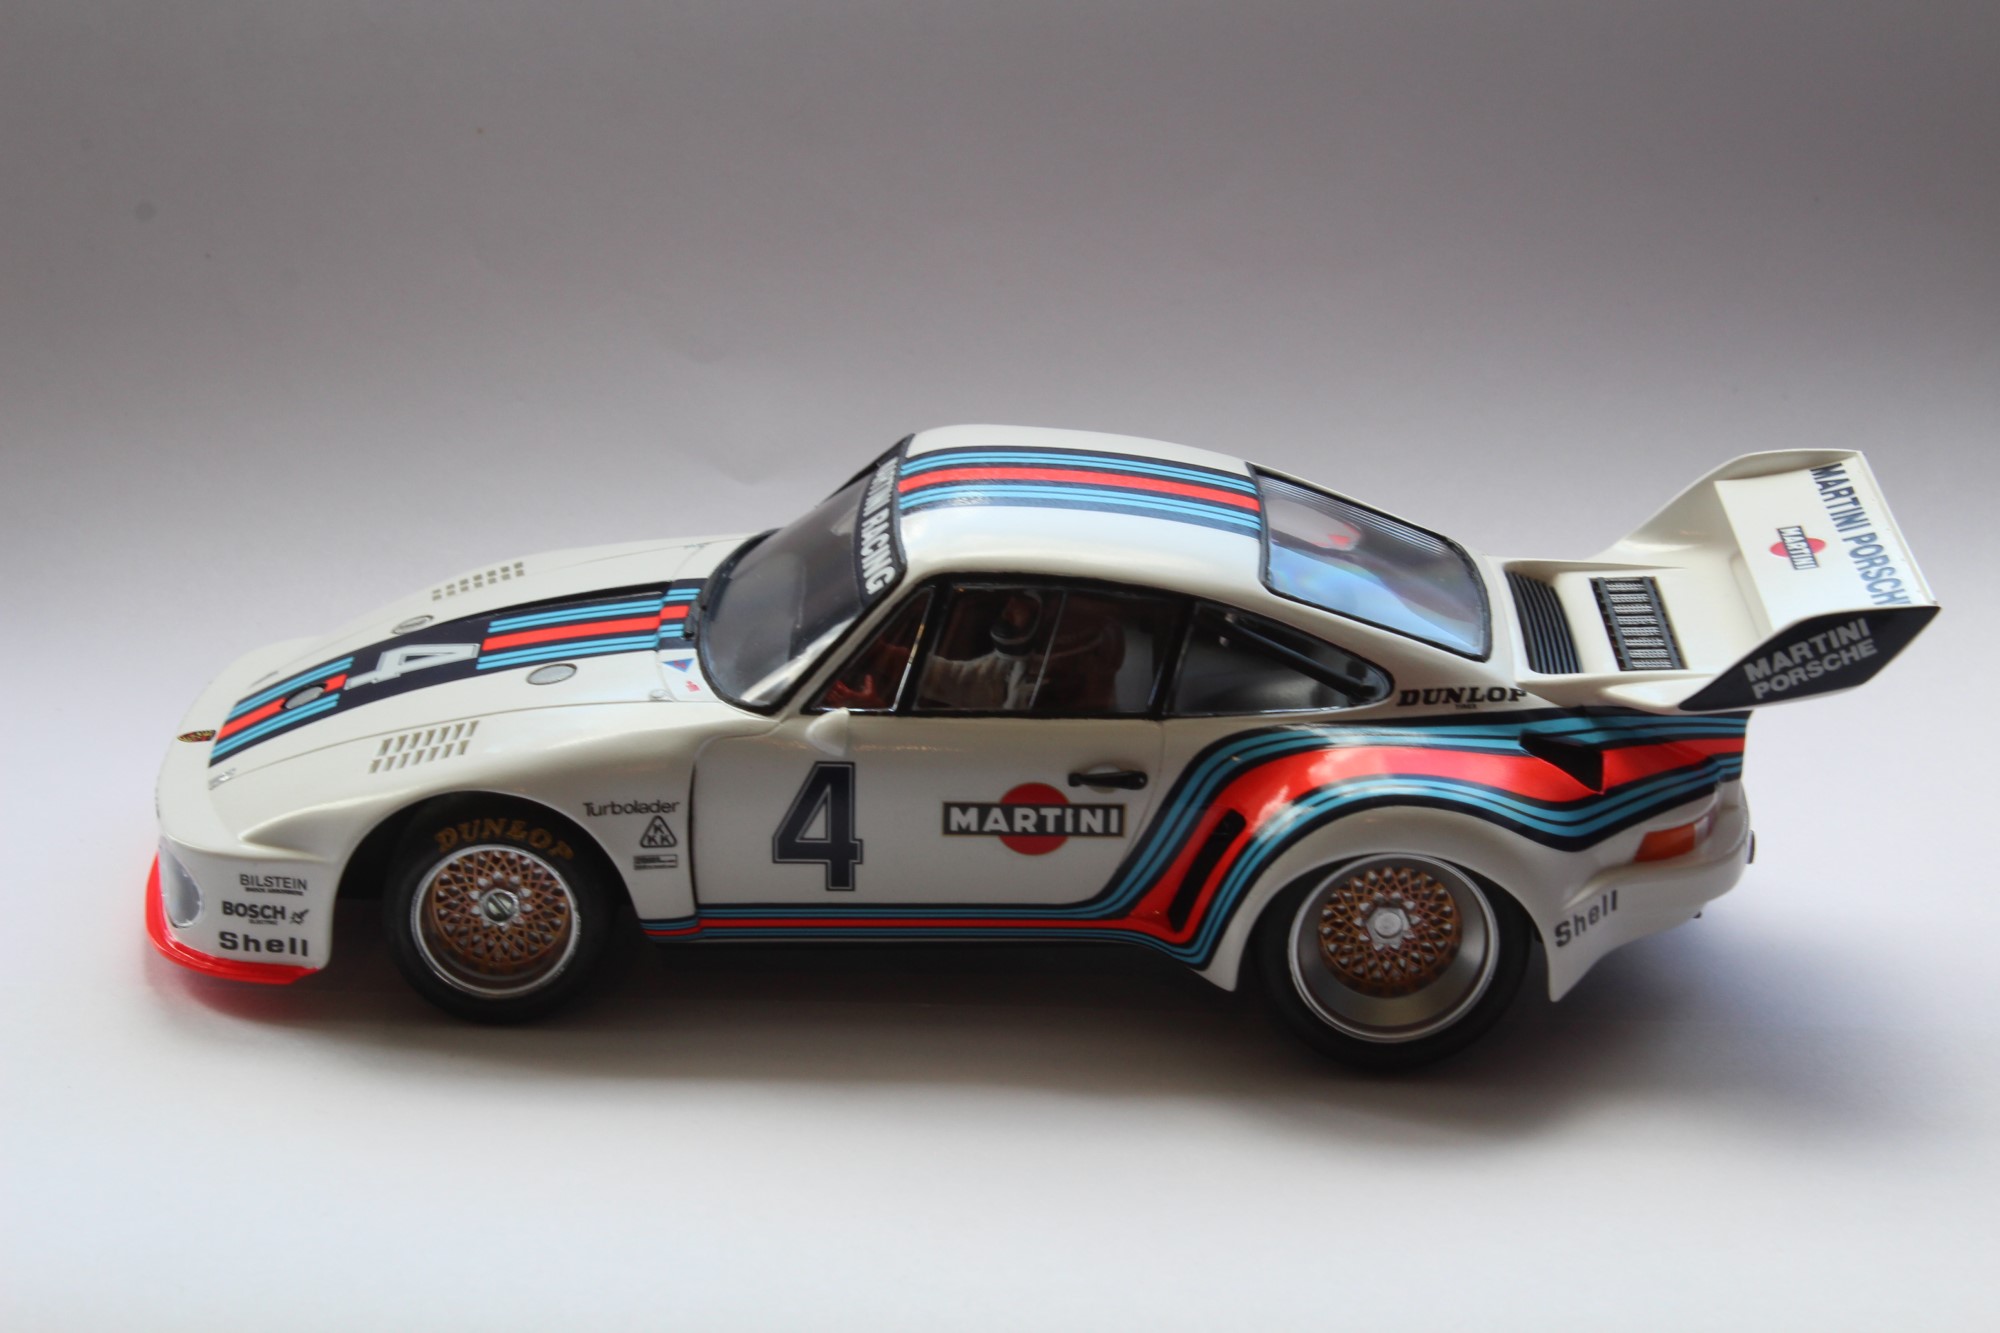
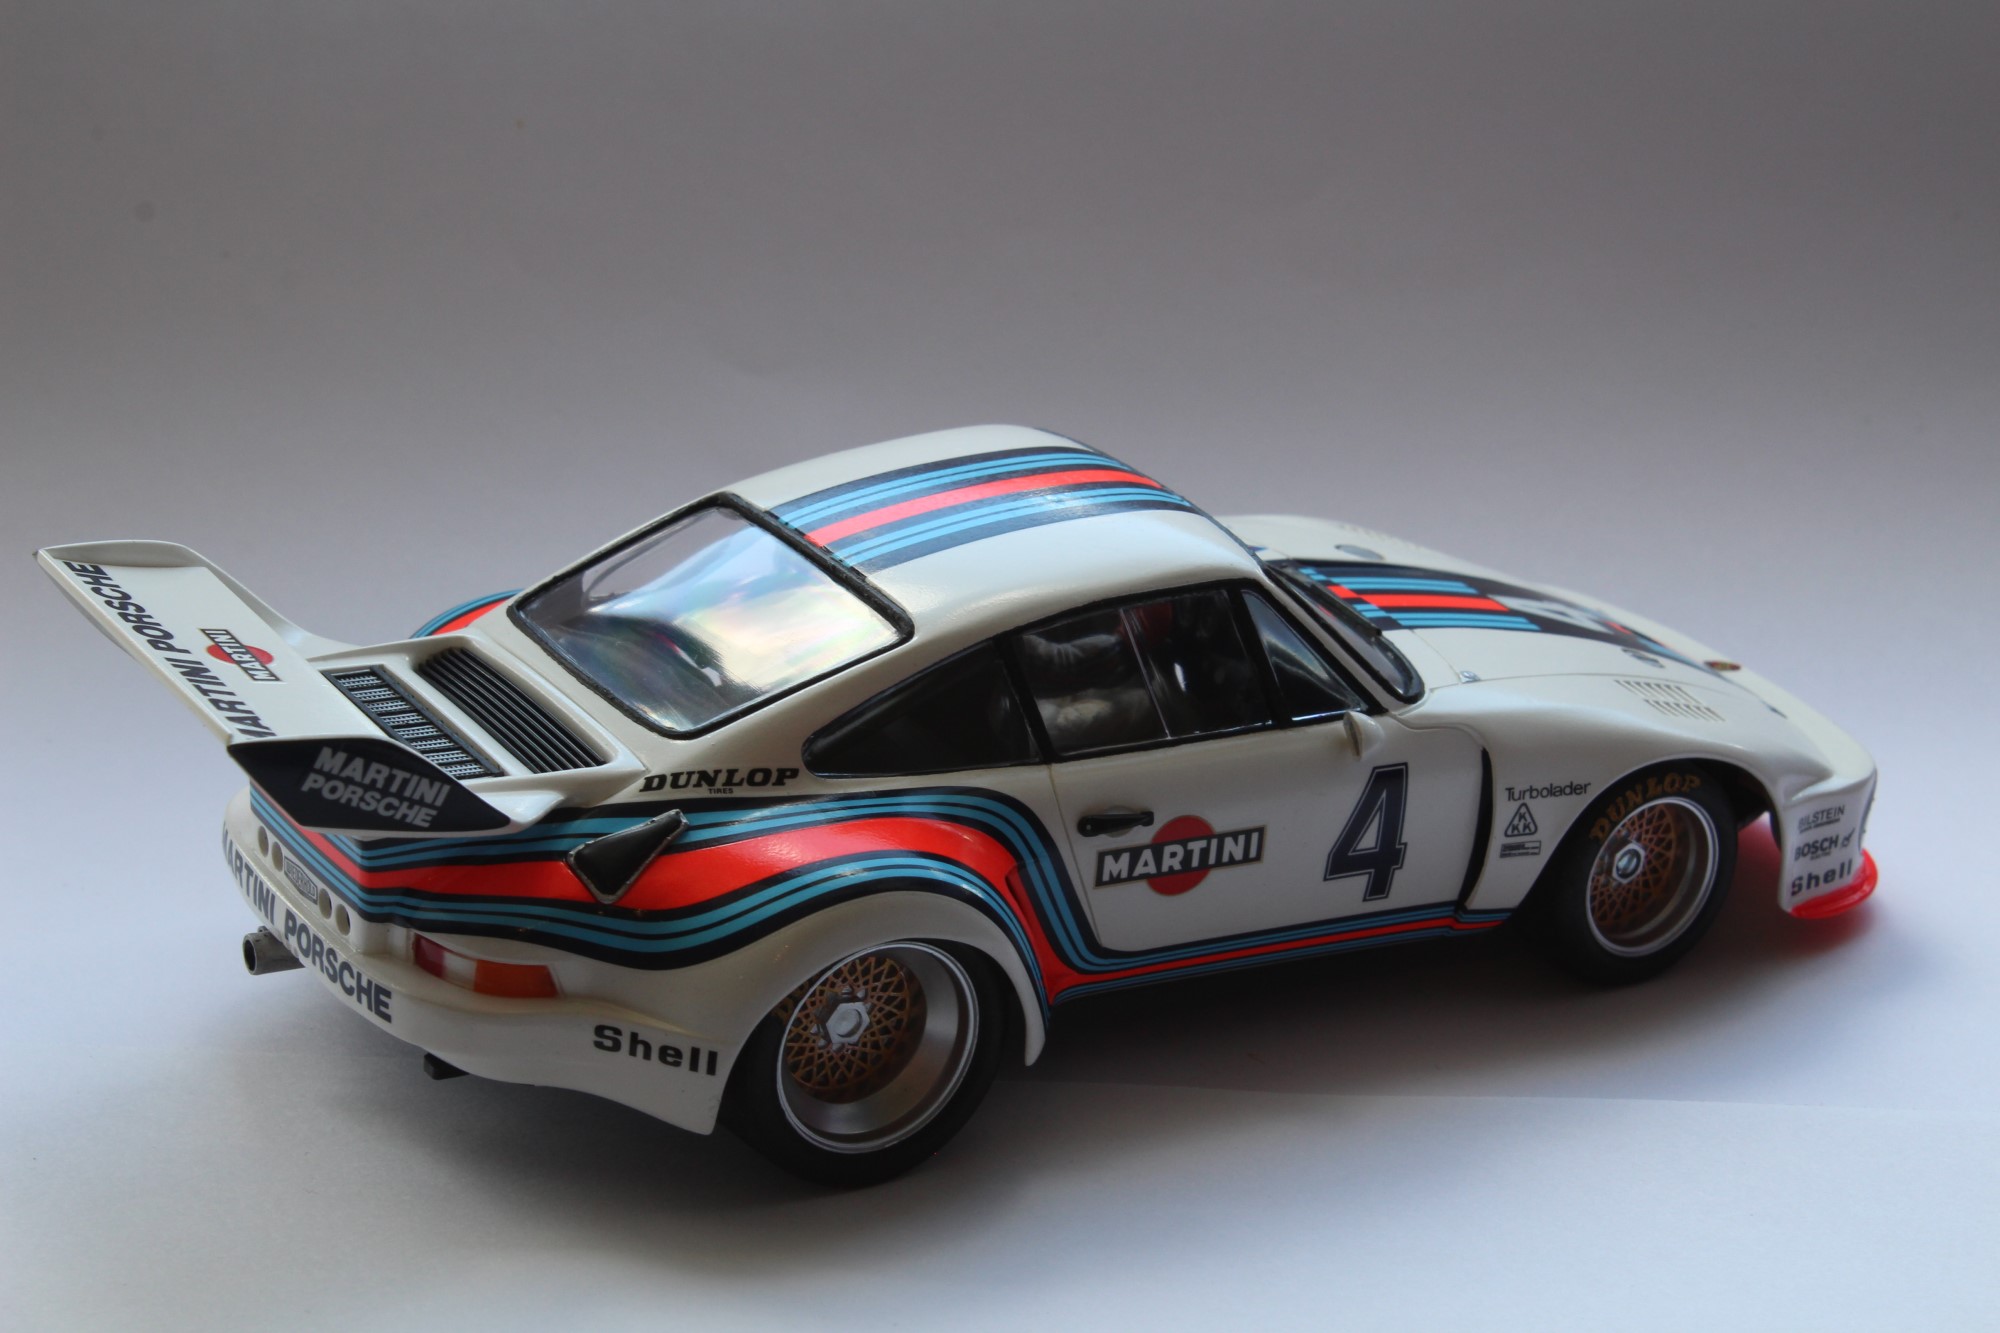
A further benefit of using the Shunko replacement decals was the extra options available for different races. But as the car’s bodywork differed from race to race I chose to stick with the #4 livery used in the 1976 6 Hours of Mugello. The original kit is based on this car. It was driven by Jochen Mass and Jacky Ickx who won that race and would win two of the other six races in the championship that year.
But how to do a good job with those decals?
The decal application job was fun. The Martini stripe decals from Shunko are a faithful reproduction of the Tamiya ones, a testament I suppose to Tamiya getting them right first time. The decals fit together like puzzle pieces but the alignment is a real test. Thankfully Shunko’s decals are quite durable yet also flexible and permit a lot of repositioning. Nevertheless, I didn’t quite get them right and a few touch-ups were needed. As always my faithful Micro Set and Micro Sol were invaluable, especially around the more curvaceous parts.
Make no mistake, the decal job for the Porsche 935 is easily the hardest part of the kit. Take a deep breath, leave plenty of time and have a lot of patience in reserve before attempting these decals. You’ll find that as you tweak the position of one, the rest all need to be adjusted too. Achieving a good result is all about taking it slow, keeping the decals moist and doing one at a time.
I worked from one end to the other when applying the long continuous stripe that runs around the rear of the car. This gave an acceptable result, but I found that slight innaccuracies in positioning can tend to have a knock on effect on each subsequent piece. You can end up with one side looking totally out of position compared to the other. A better option might have been to start with the middle section underneath the rear wing. With that in place, work forwards on either side, over the wheel arches and along the doors.
Making life difficult by not planning ahead
Despite the relative simplicity of the Tamiya kit, and the lack of engine detail, there’s opportunity to make it stand out. For instance, the grilles above the front wheels can be opened up to give extra depth. I made the mistake of only realising this after painting and decalling the body. Luckily removing the excess plastic didn’t damage the paintwork. Careful drilling, cutting and filing of each gap produced an acceptable result. However that type of work should always be carried out before the paint goes on ideally.
Another aspect of poor planning on my part was failing to paint the fastenings and brackets on the bonnet before the decals were applied. Instead I had to carefully mask out the areas after applying the clear coat over the decals to protect them. Spraying these small areas instead of brush painting them gives a much smoother finish.
Finishing touches to the 935
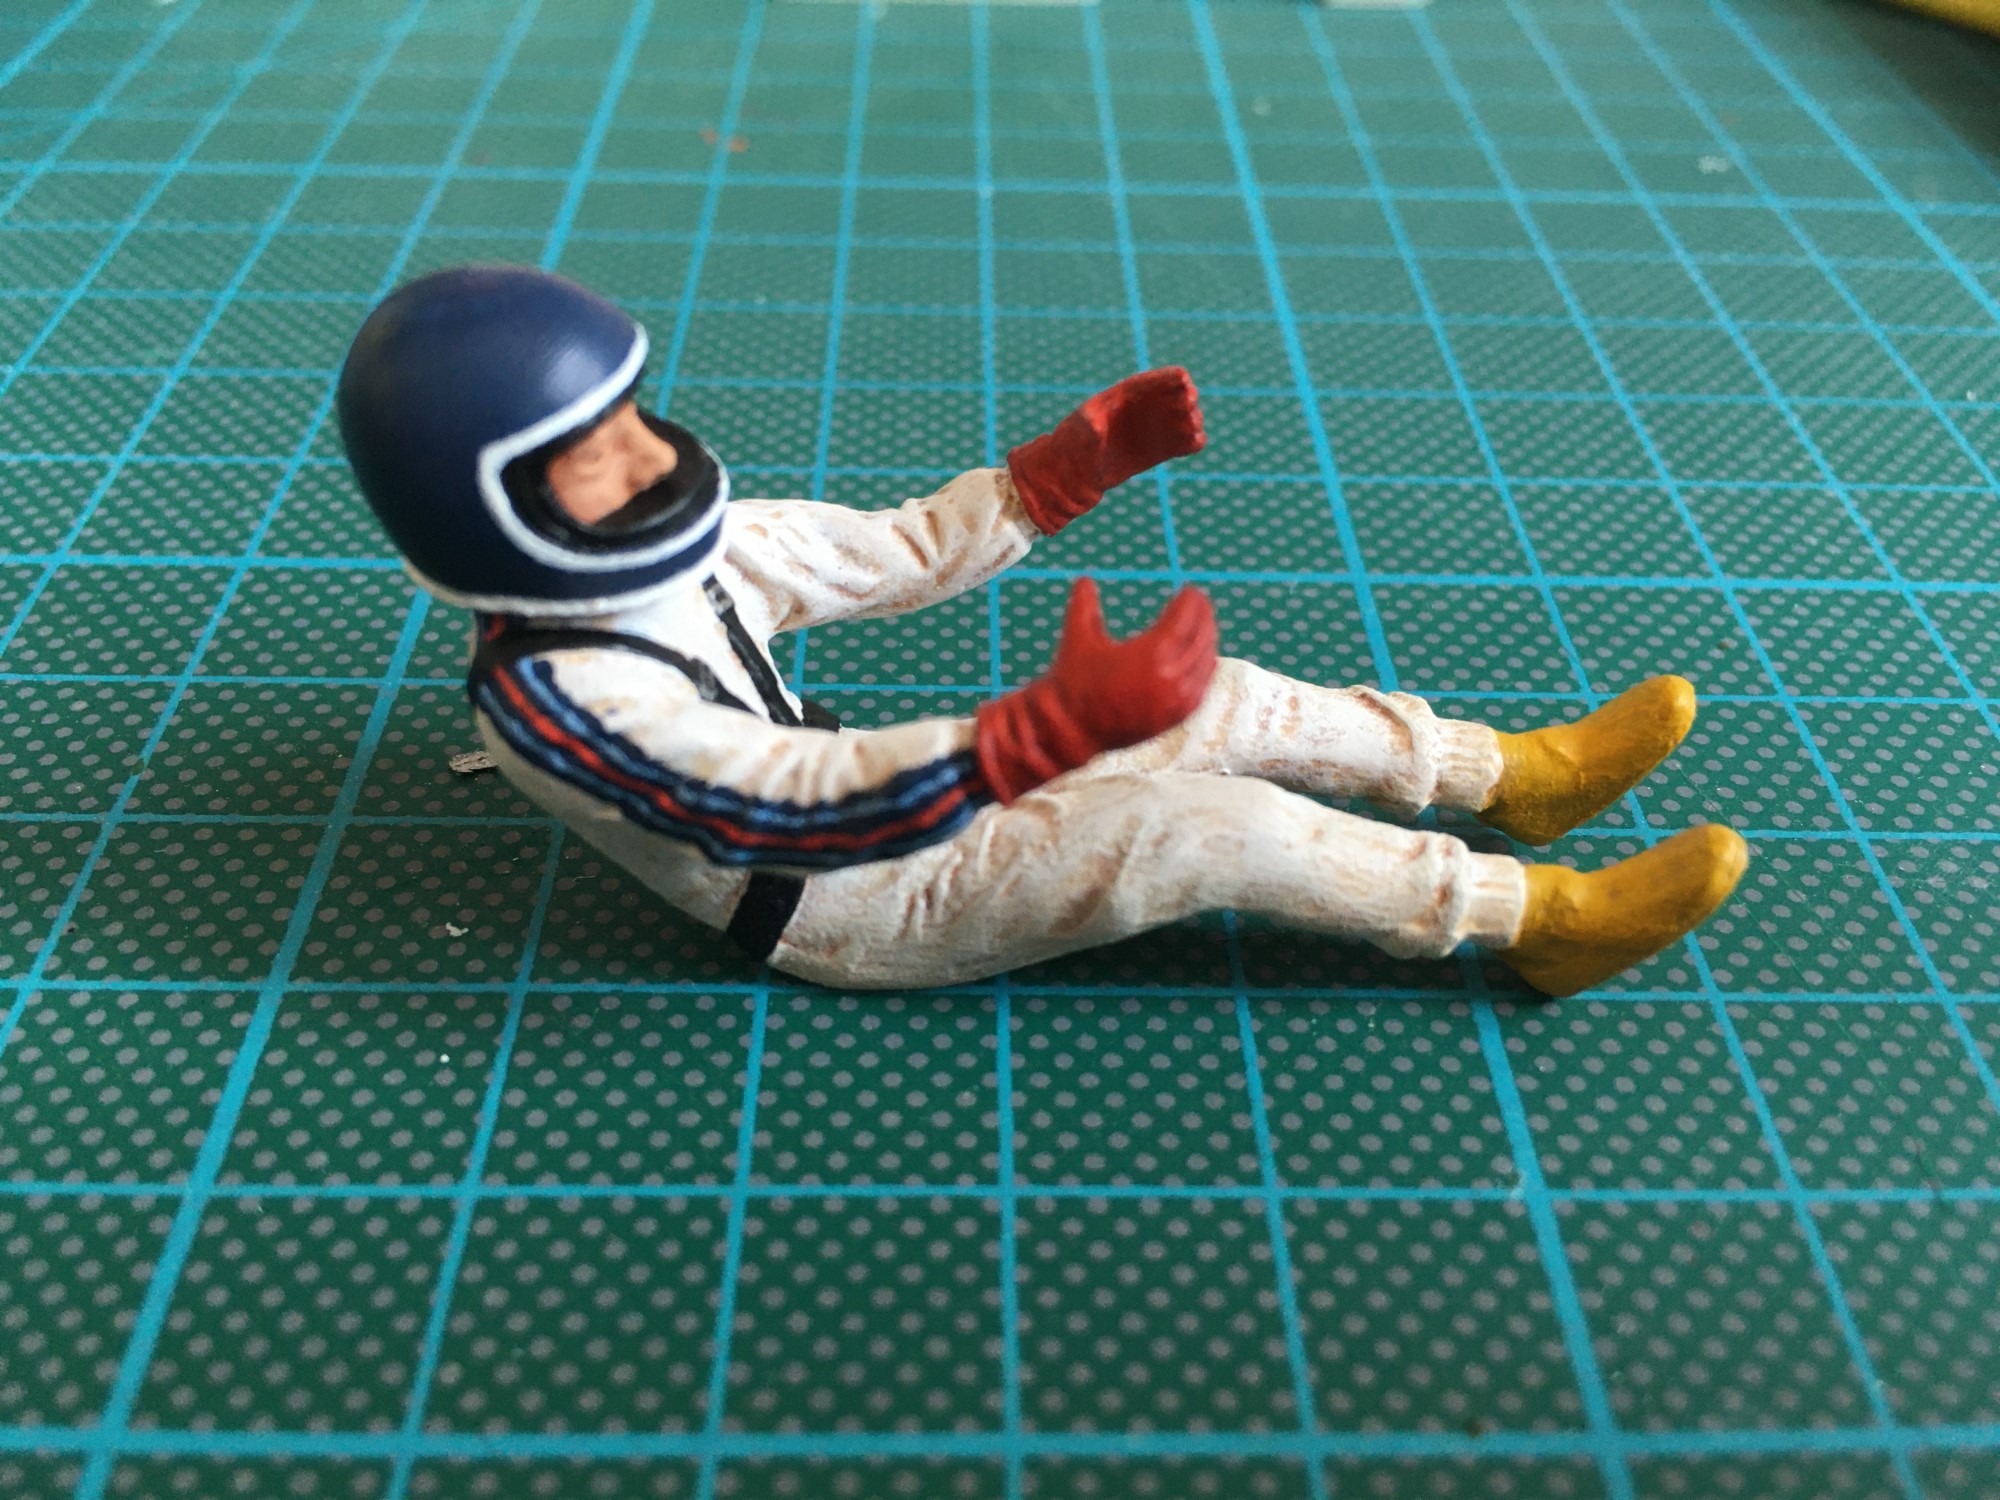
For interior detail, I decided to add decals to the dashboard for the gauges and clocks. This was before I’d purchased the Shunko decals which do in fact come with appropriate ones. Instead, I used equivalent versions on a sheet of cockpit decals from Bestbalsakits (BBK). I also spent a bit of time on the detail painting of the driver. It’s relatively unusual to get drivers included with car kits and I wanted to do this one justice. I chose to paint the driver as Jacky Ickx. The hardest part was keeping a steady hand for the Martini stripes on his arms!
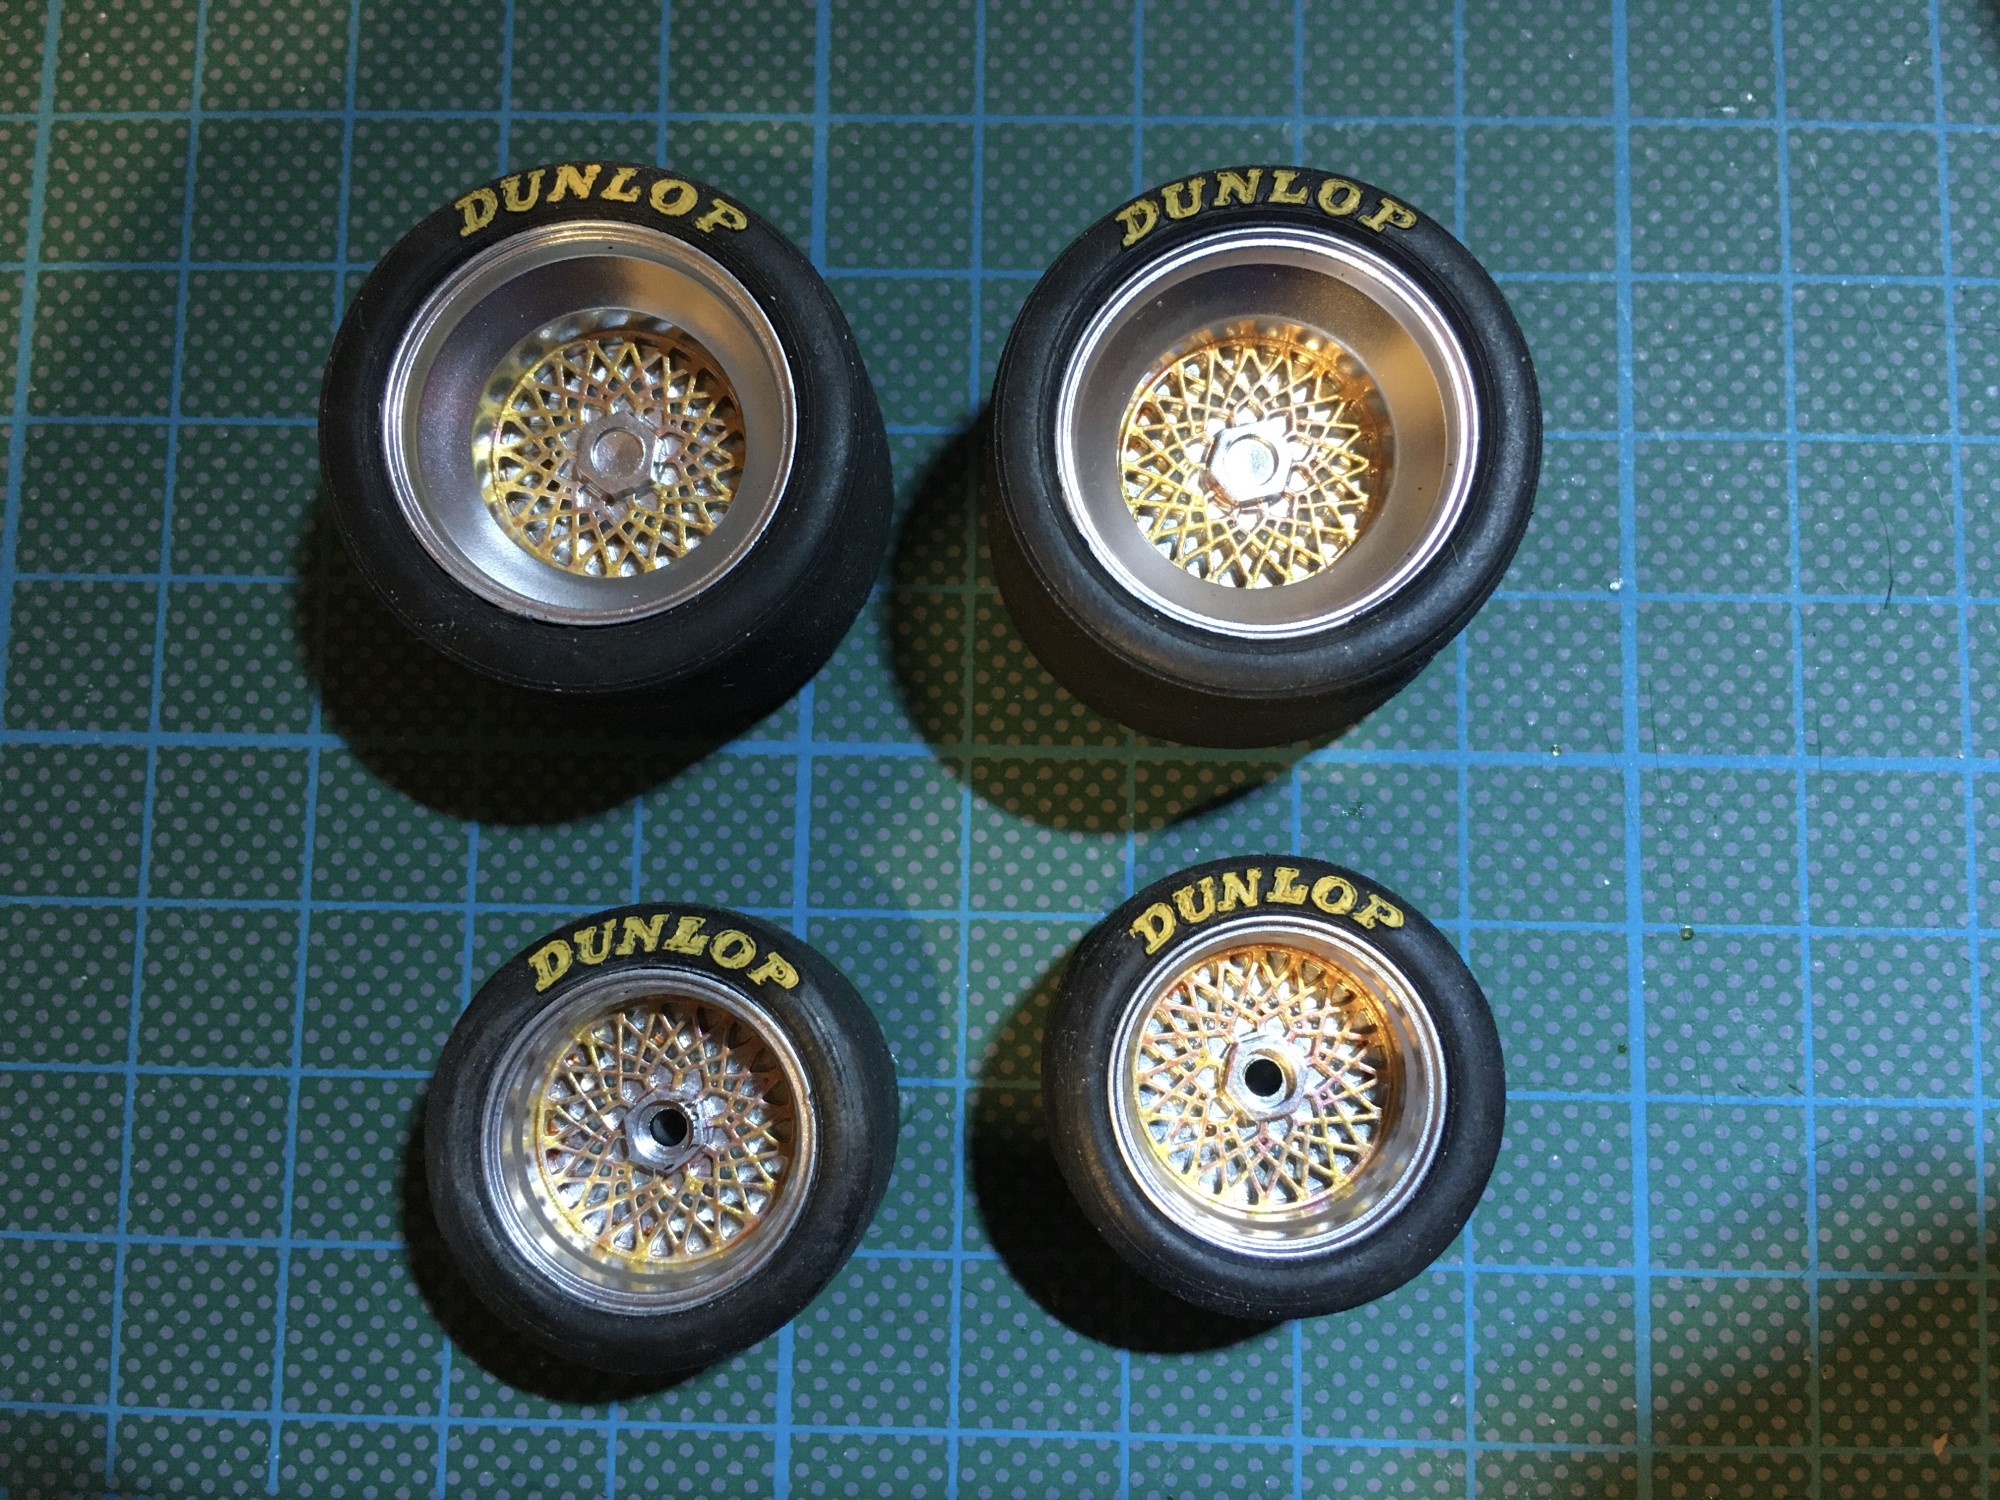
The wheels and tyres received a bit of attention too. Tamiya supplied the original wheels chrome plated which never looks realistic. I sprayed them with an aluminium colour automotive paint and carefully brush painted the gold spokes. The wheels definitely had more shine in real life but I’m happy with the outcome. For the tyres, Shunko include yellow Dunlop decals on their sheet. I was apprehensive about using these, fearing they may perish in future. Instead I chose to simply paint the Dunlop logos that were moulded on the tyre sidewalls. It’s not that accurate but looks okay, and I know it will last.
My verdict on the Tamiya Porsche 935 Turbo
The build was a challenge, or rather, the decals were a challenge! Many Martini cars use the stripes in quite a simple way – the Lancia 037 is an example of that. The Porsche 935 Turbo definitely isn’t. But as another Martini liveried kit, and an interesting one at that, I was glad to have it completed and without any major issues.
The inclusion of the electric motor adds another level of interest to an already interesting kit. I’ve deliberately not fixed the body to the floor to maintain access to the motor and in case anyone wants to see it. It’s one more discussion topic for a kit that has plenty of tales to tell.
Building the Porsche kit was a lot of fun, its age and significance made it all the more so. I’m proud to have done what I consider by my standards to be a decent job, instead of just leaving it in a box. I think older and rarer kits are increasingly susceptible to hoarders and completionists which is driving prices up. To those people who have no intention of building their kits, I ask, why? As I wrote at the top, the kits are there to be built. In a hobby that is gradually becoming extinct (Covid-induced rebounds aside) squirrelling these unbuilt kits away is helping no-one.
I’m very happy to have the Porsche on my shelf of completed kits. Now it’s time to expand that collection of Martini liveries further with the addition of another Lancia…

Leave a Reply