Tl;dr – take me to the pictures!
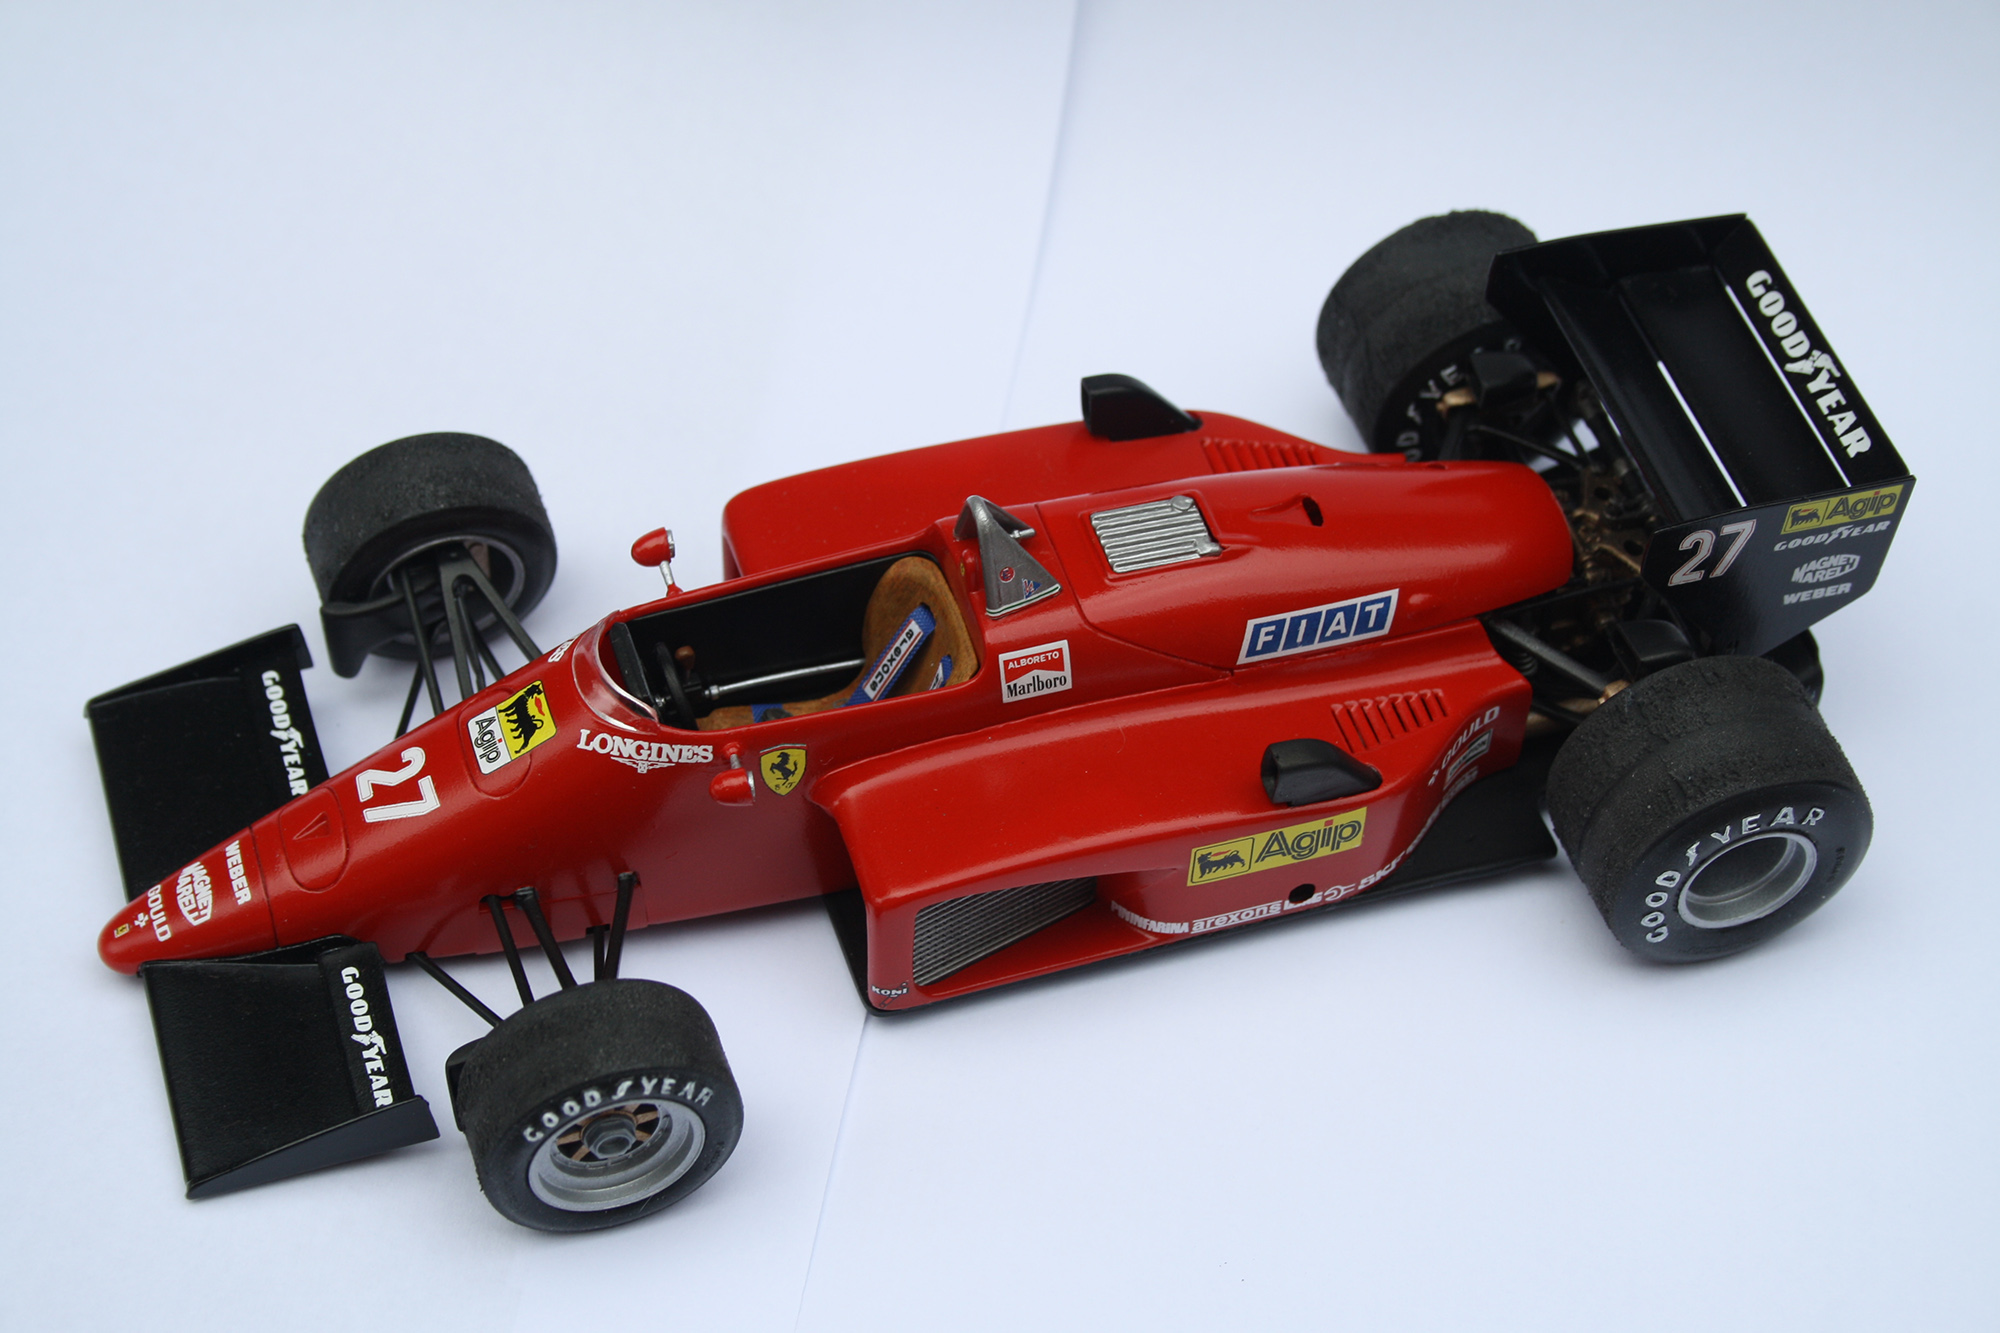
Here’s my short build diary of the 1:24 scale Protar Ferrari 156/85. Michele Alboreto came close to winning the F1 title in 1985 but for some shocking late-season reliability. He retired from the last five races of the year having led the championship until the Dutch GP, leaving the way clear for Prost to become champion.
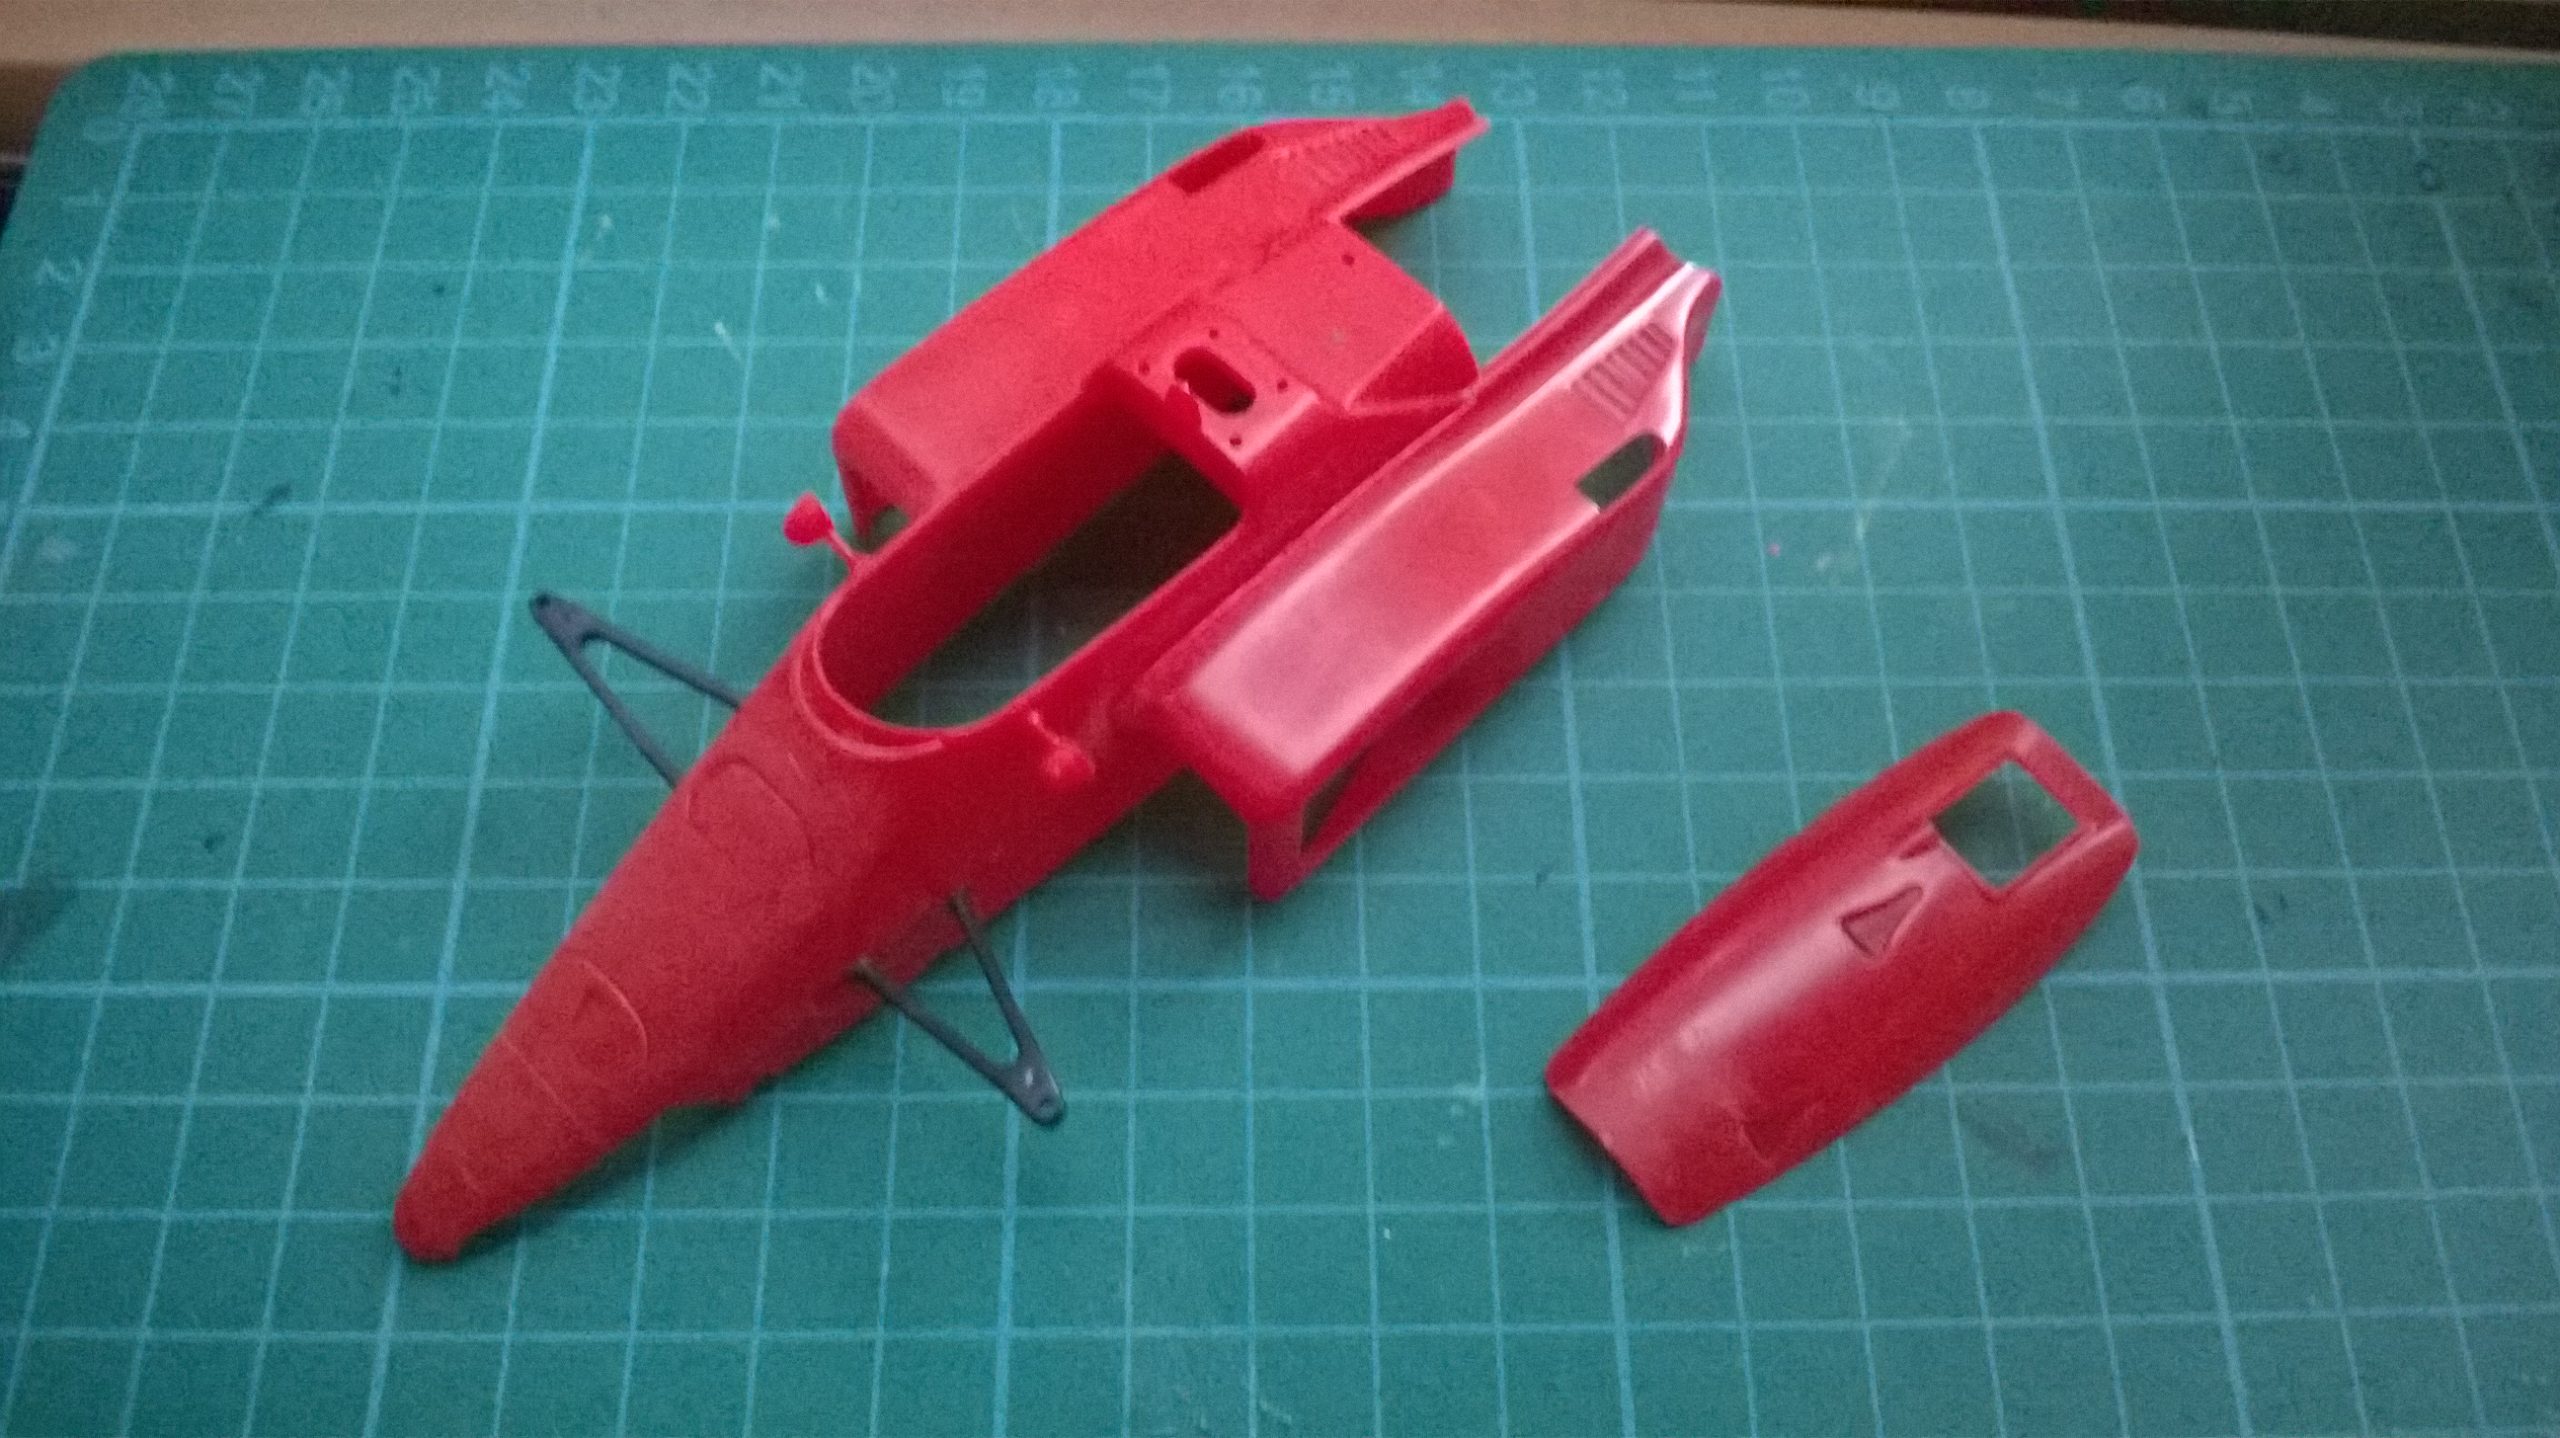
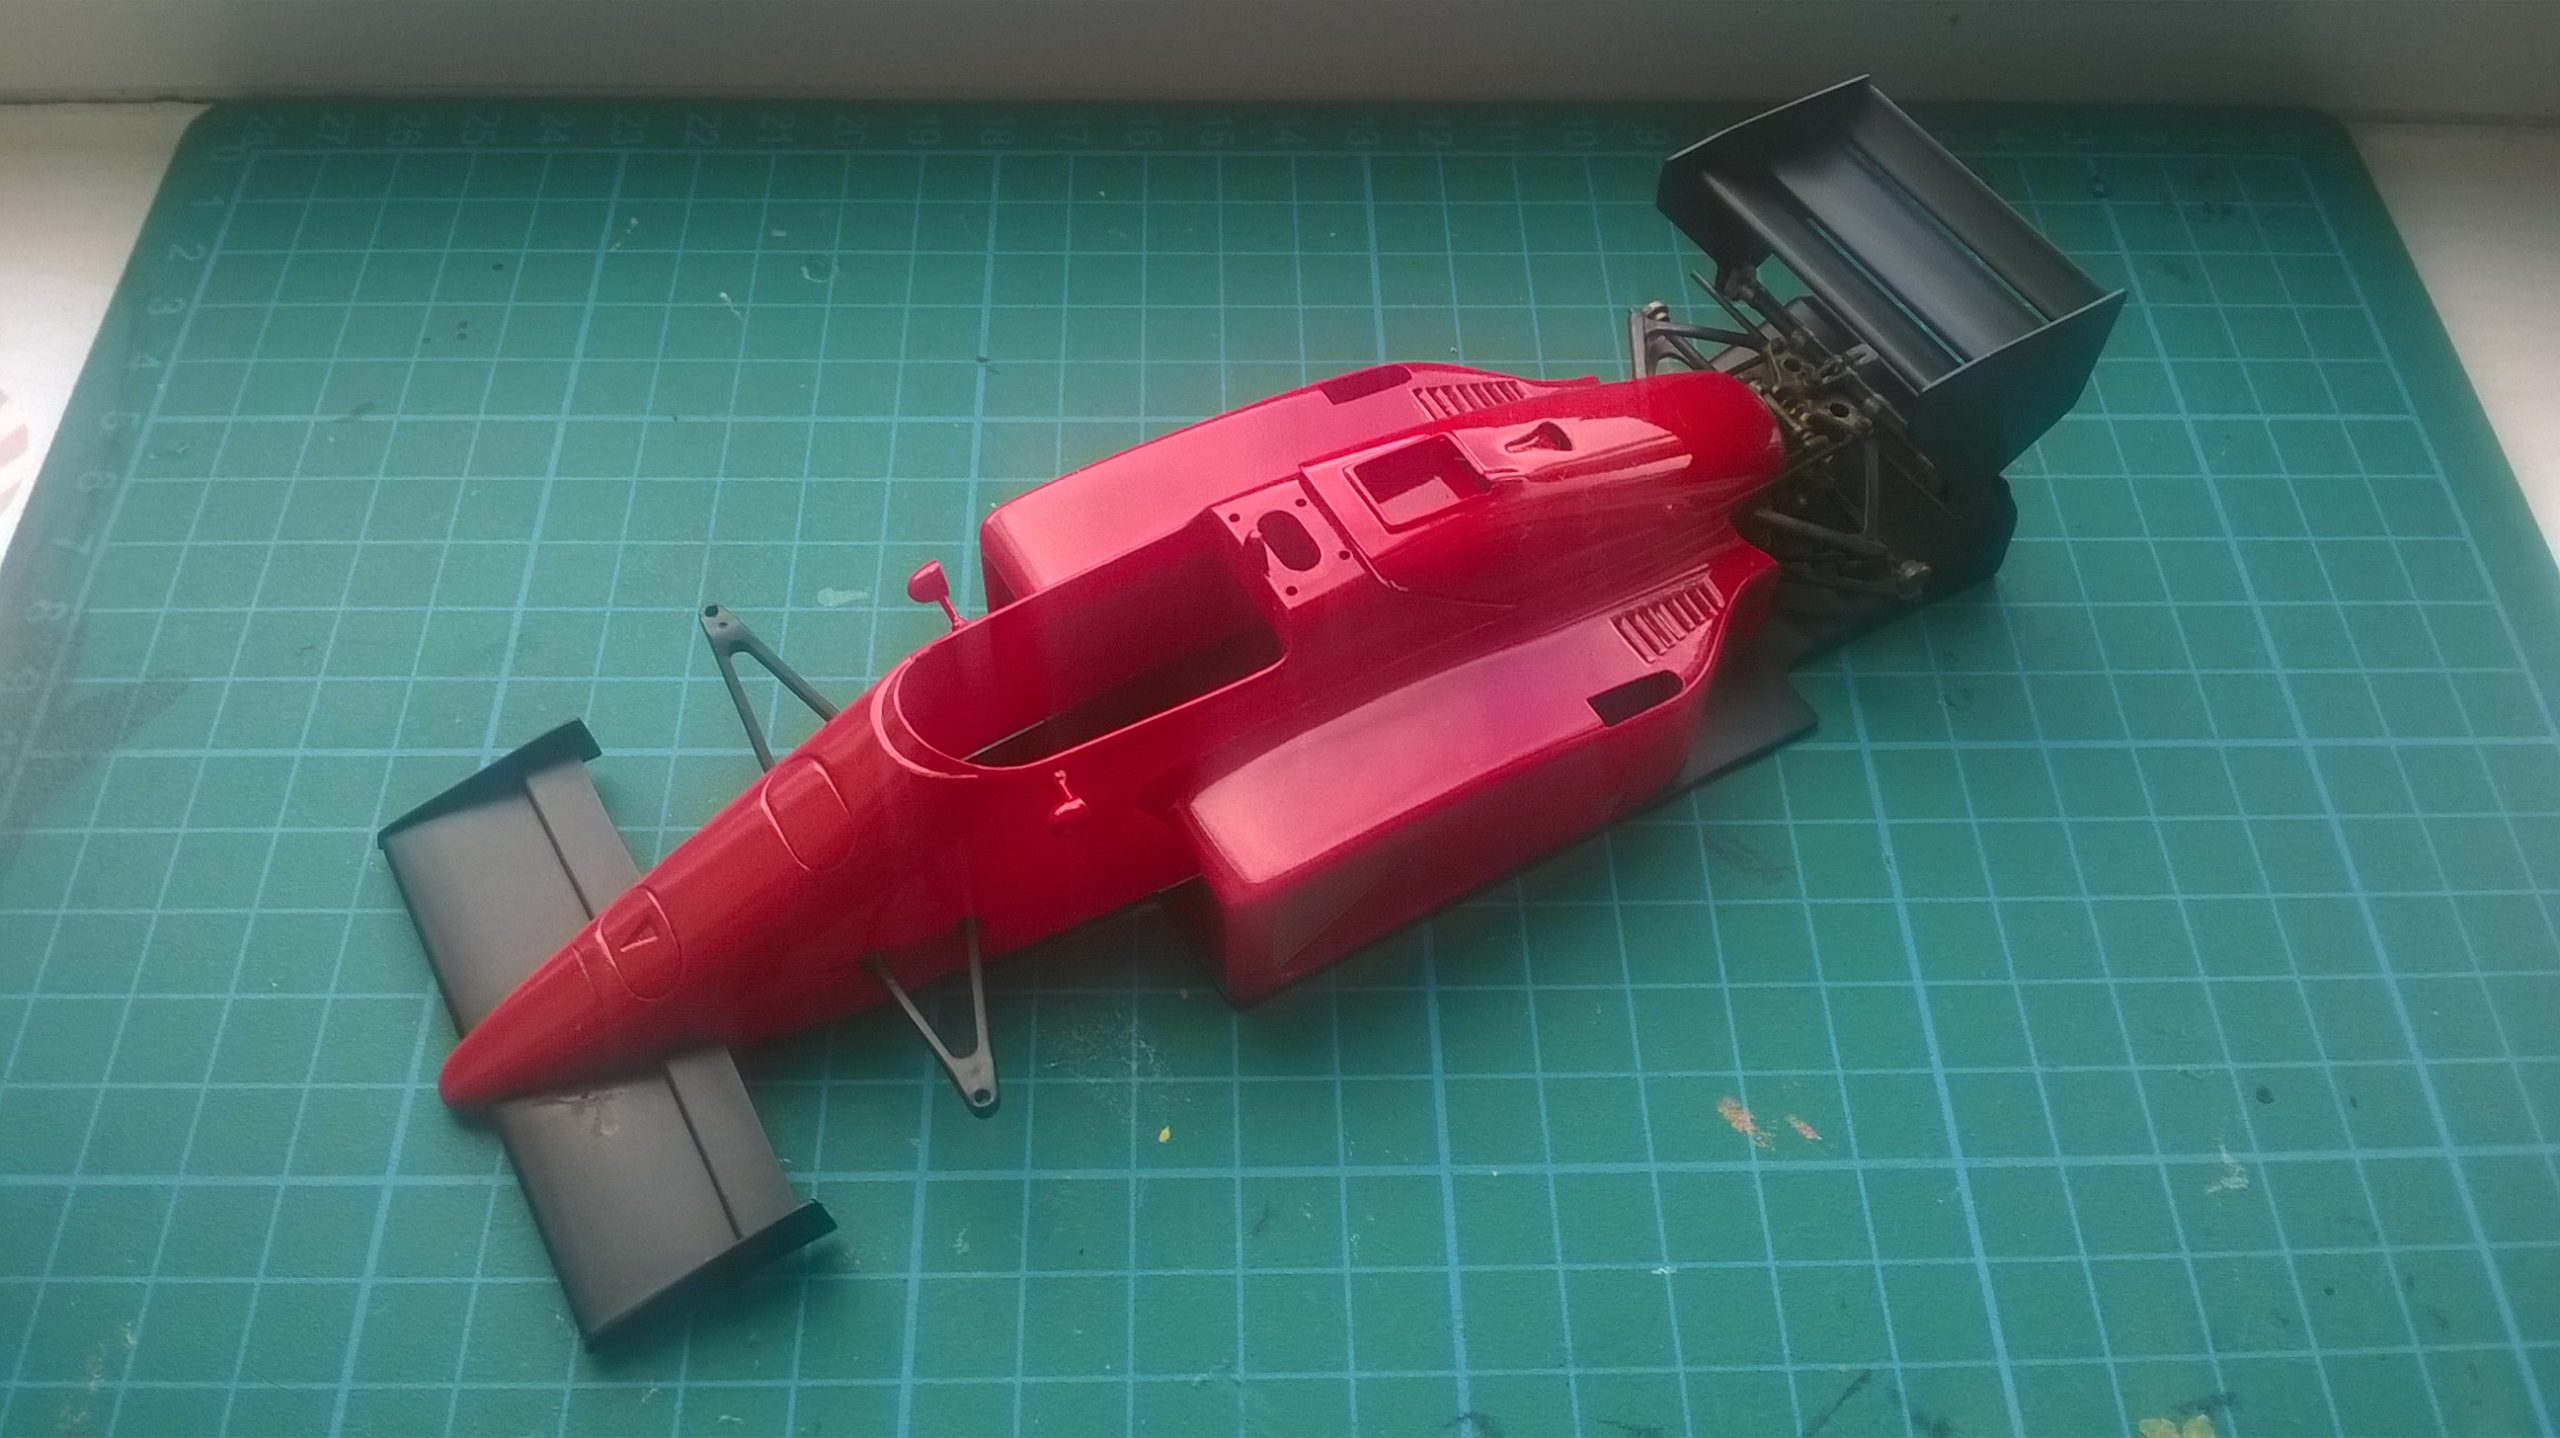
I built this model kit back in 2014 after finishing the Larrousse LC90 and it was a fairly straightforward project. However, I’m sure that most reading this will know that Protar’s quality assurance was sometimes lacking! This kit was no different, and featured some hefty warps in the bodywork, meaning fitment wasn’t perfect.

Building the Protar kit
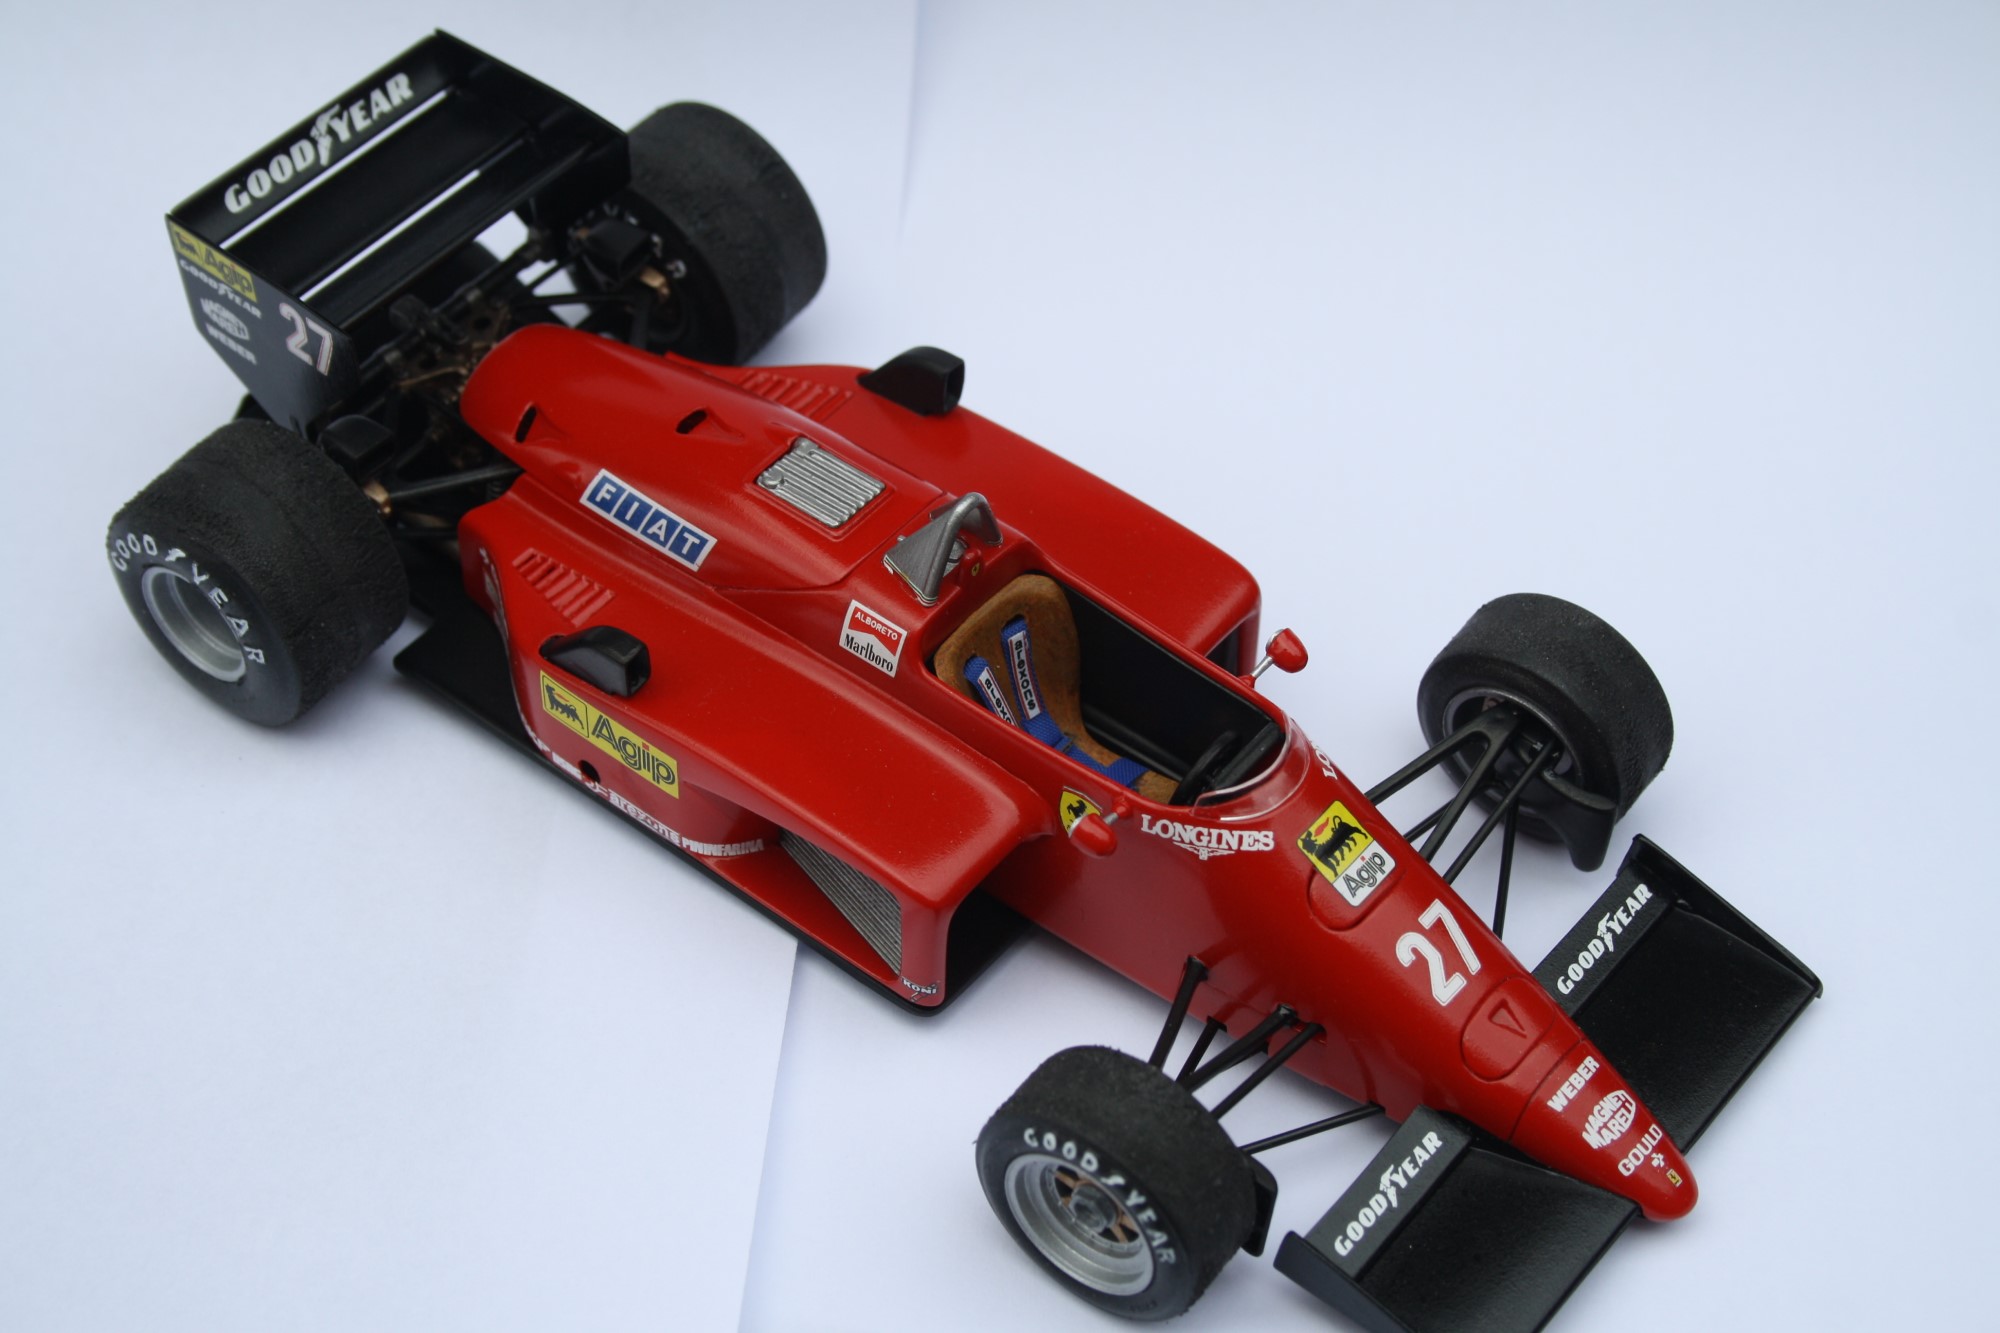
Nevertheless, despite some fitment issues, it was a fun little kit to build. It wasn’t completely untouched – the Ferrari had been partially started when I bought it. The front suspension arms and the sidepod covers had already been glued to the tub. This assembly was cleaned up, and along with the top engine cover, all received a few coats of Tamiya TS8 red spray paint, straight out of the can. At this time I also ensured the front and rear wing components were sprayed in TS29 semi-gloss black.
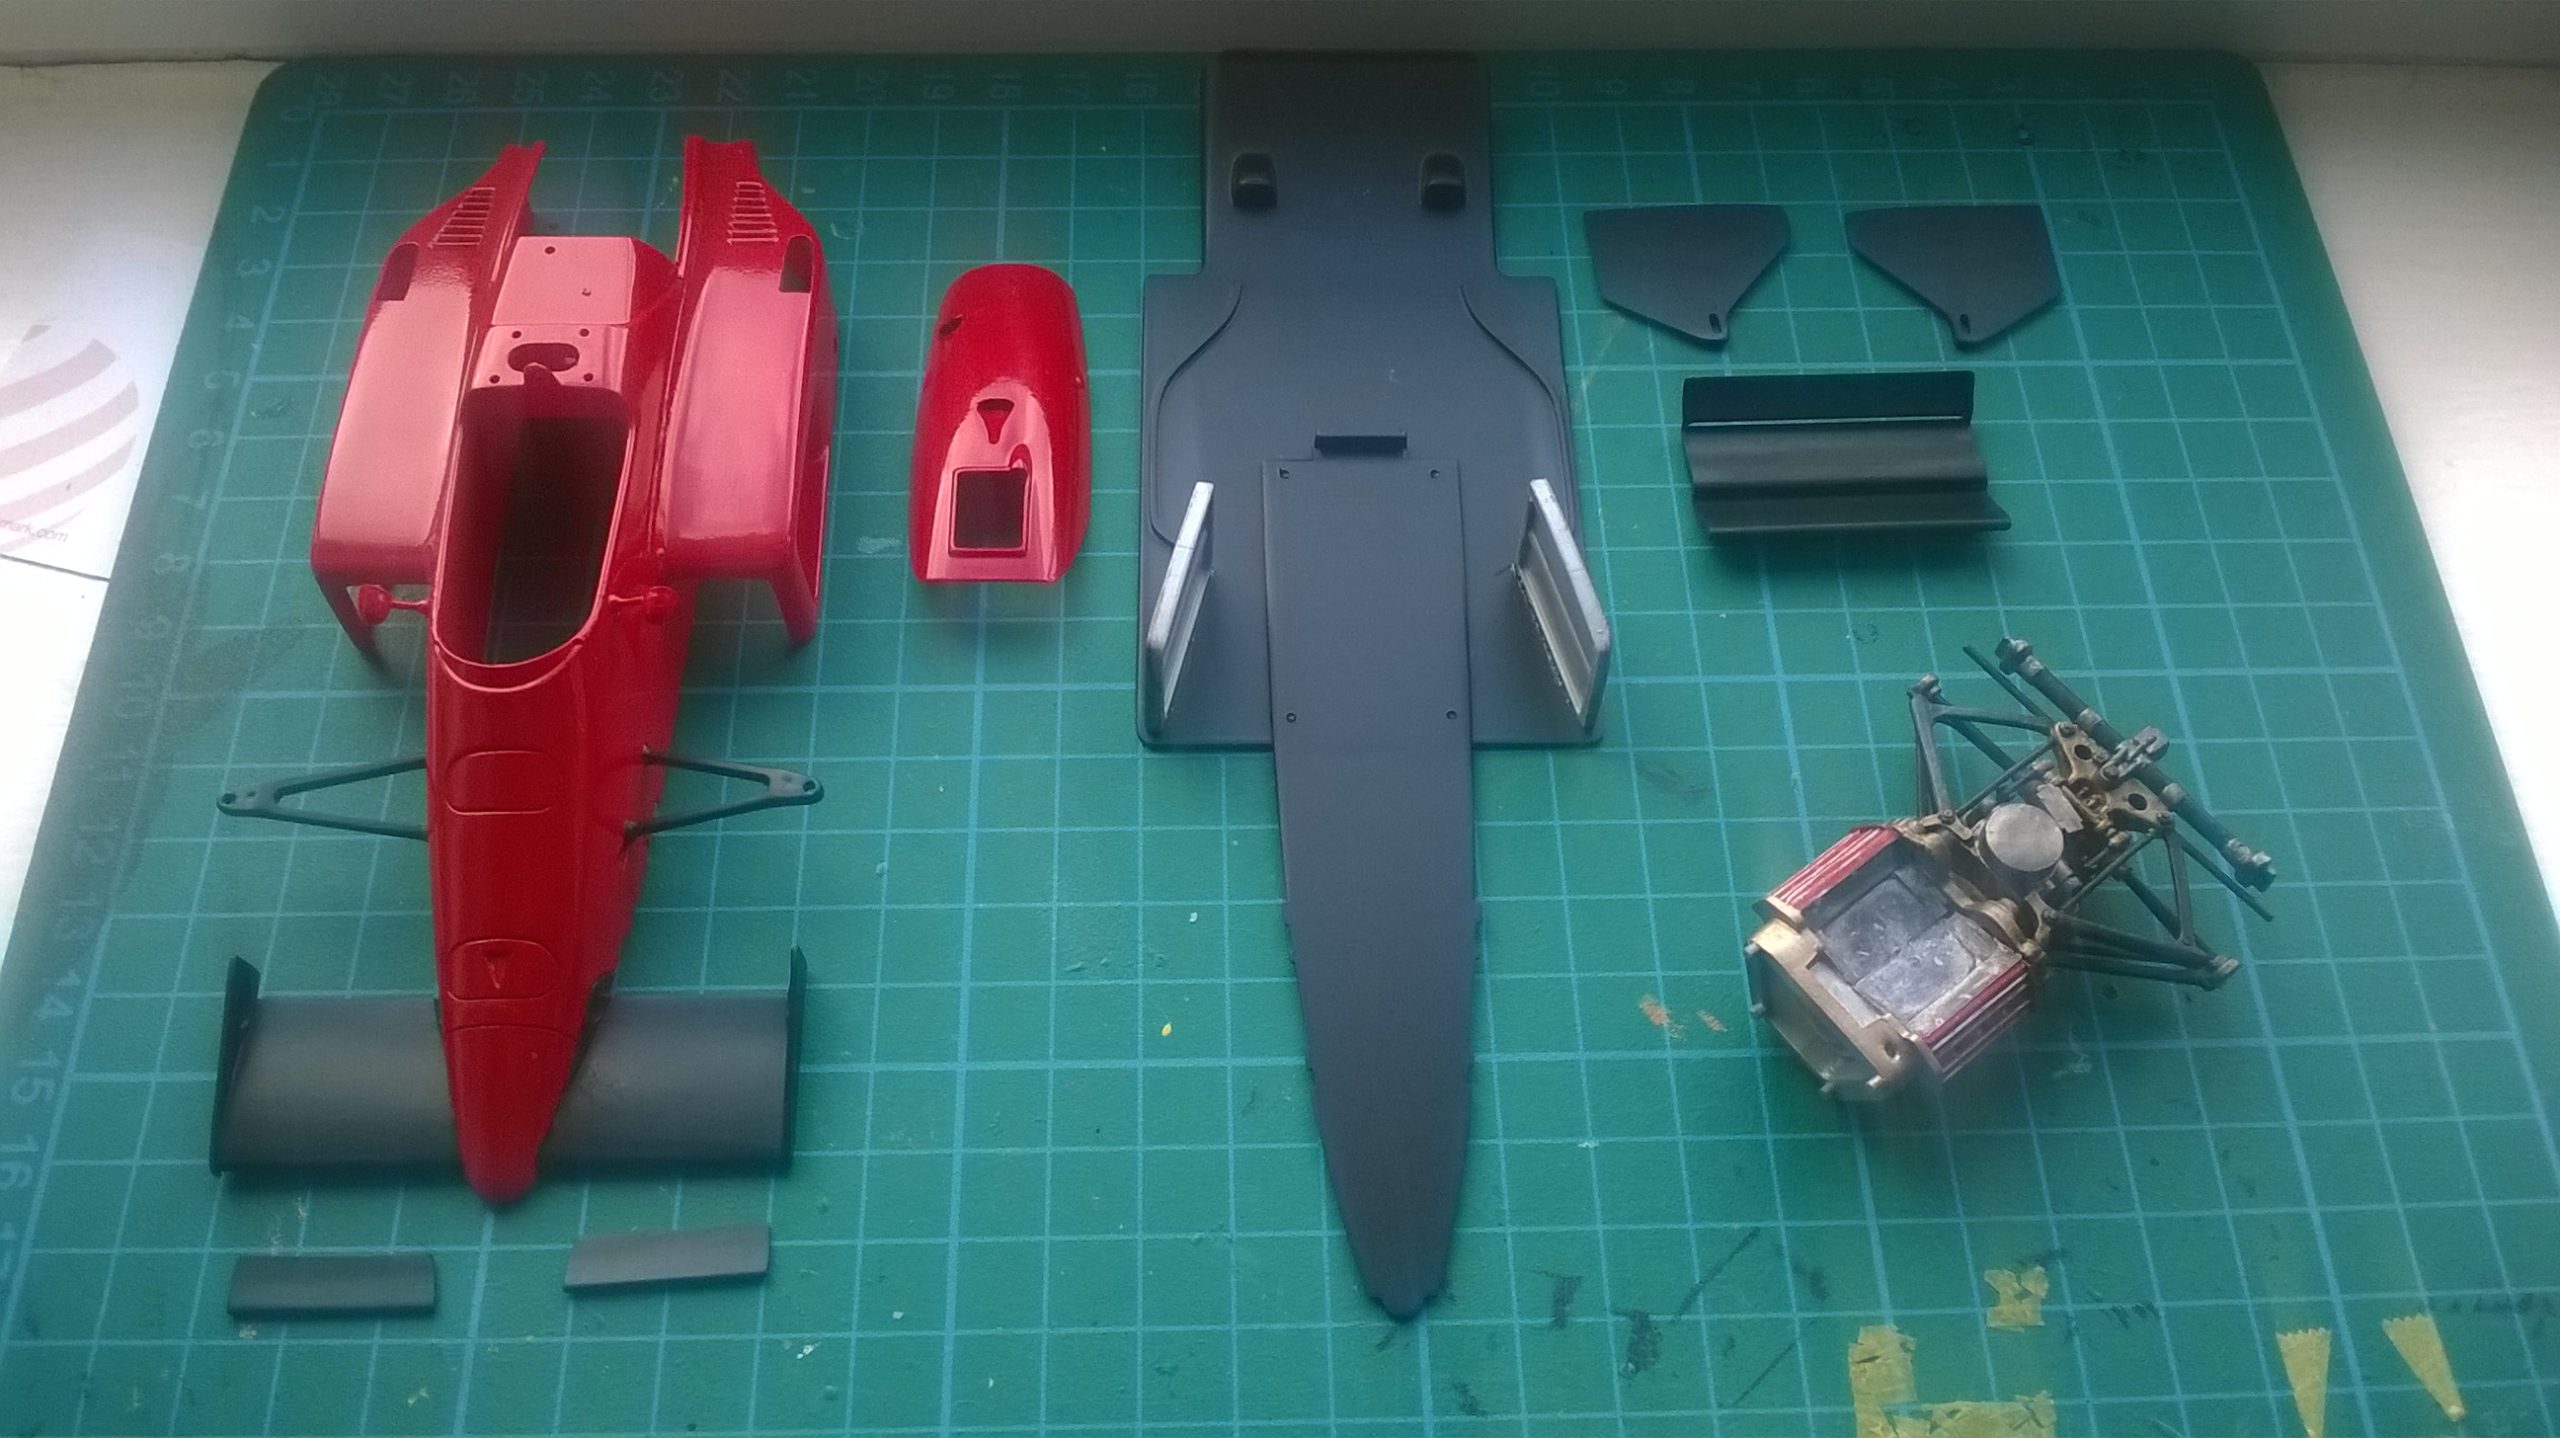
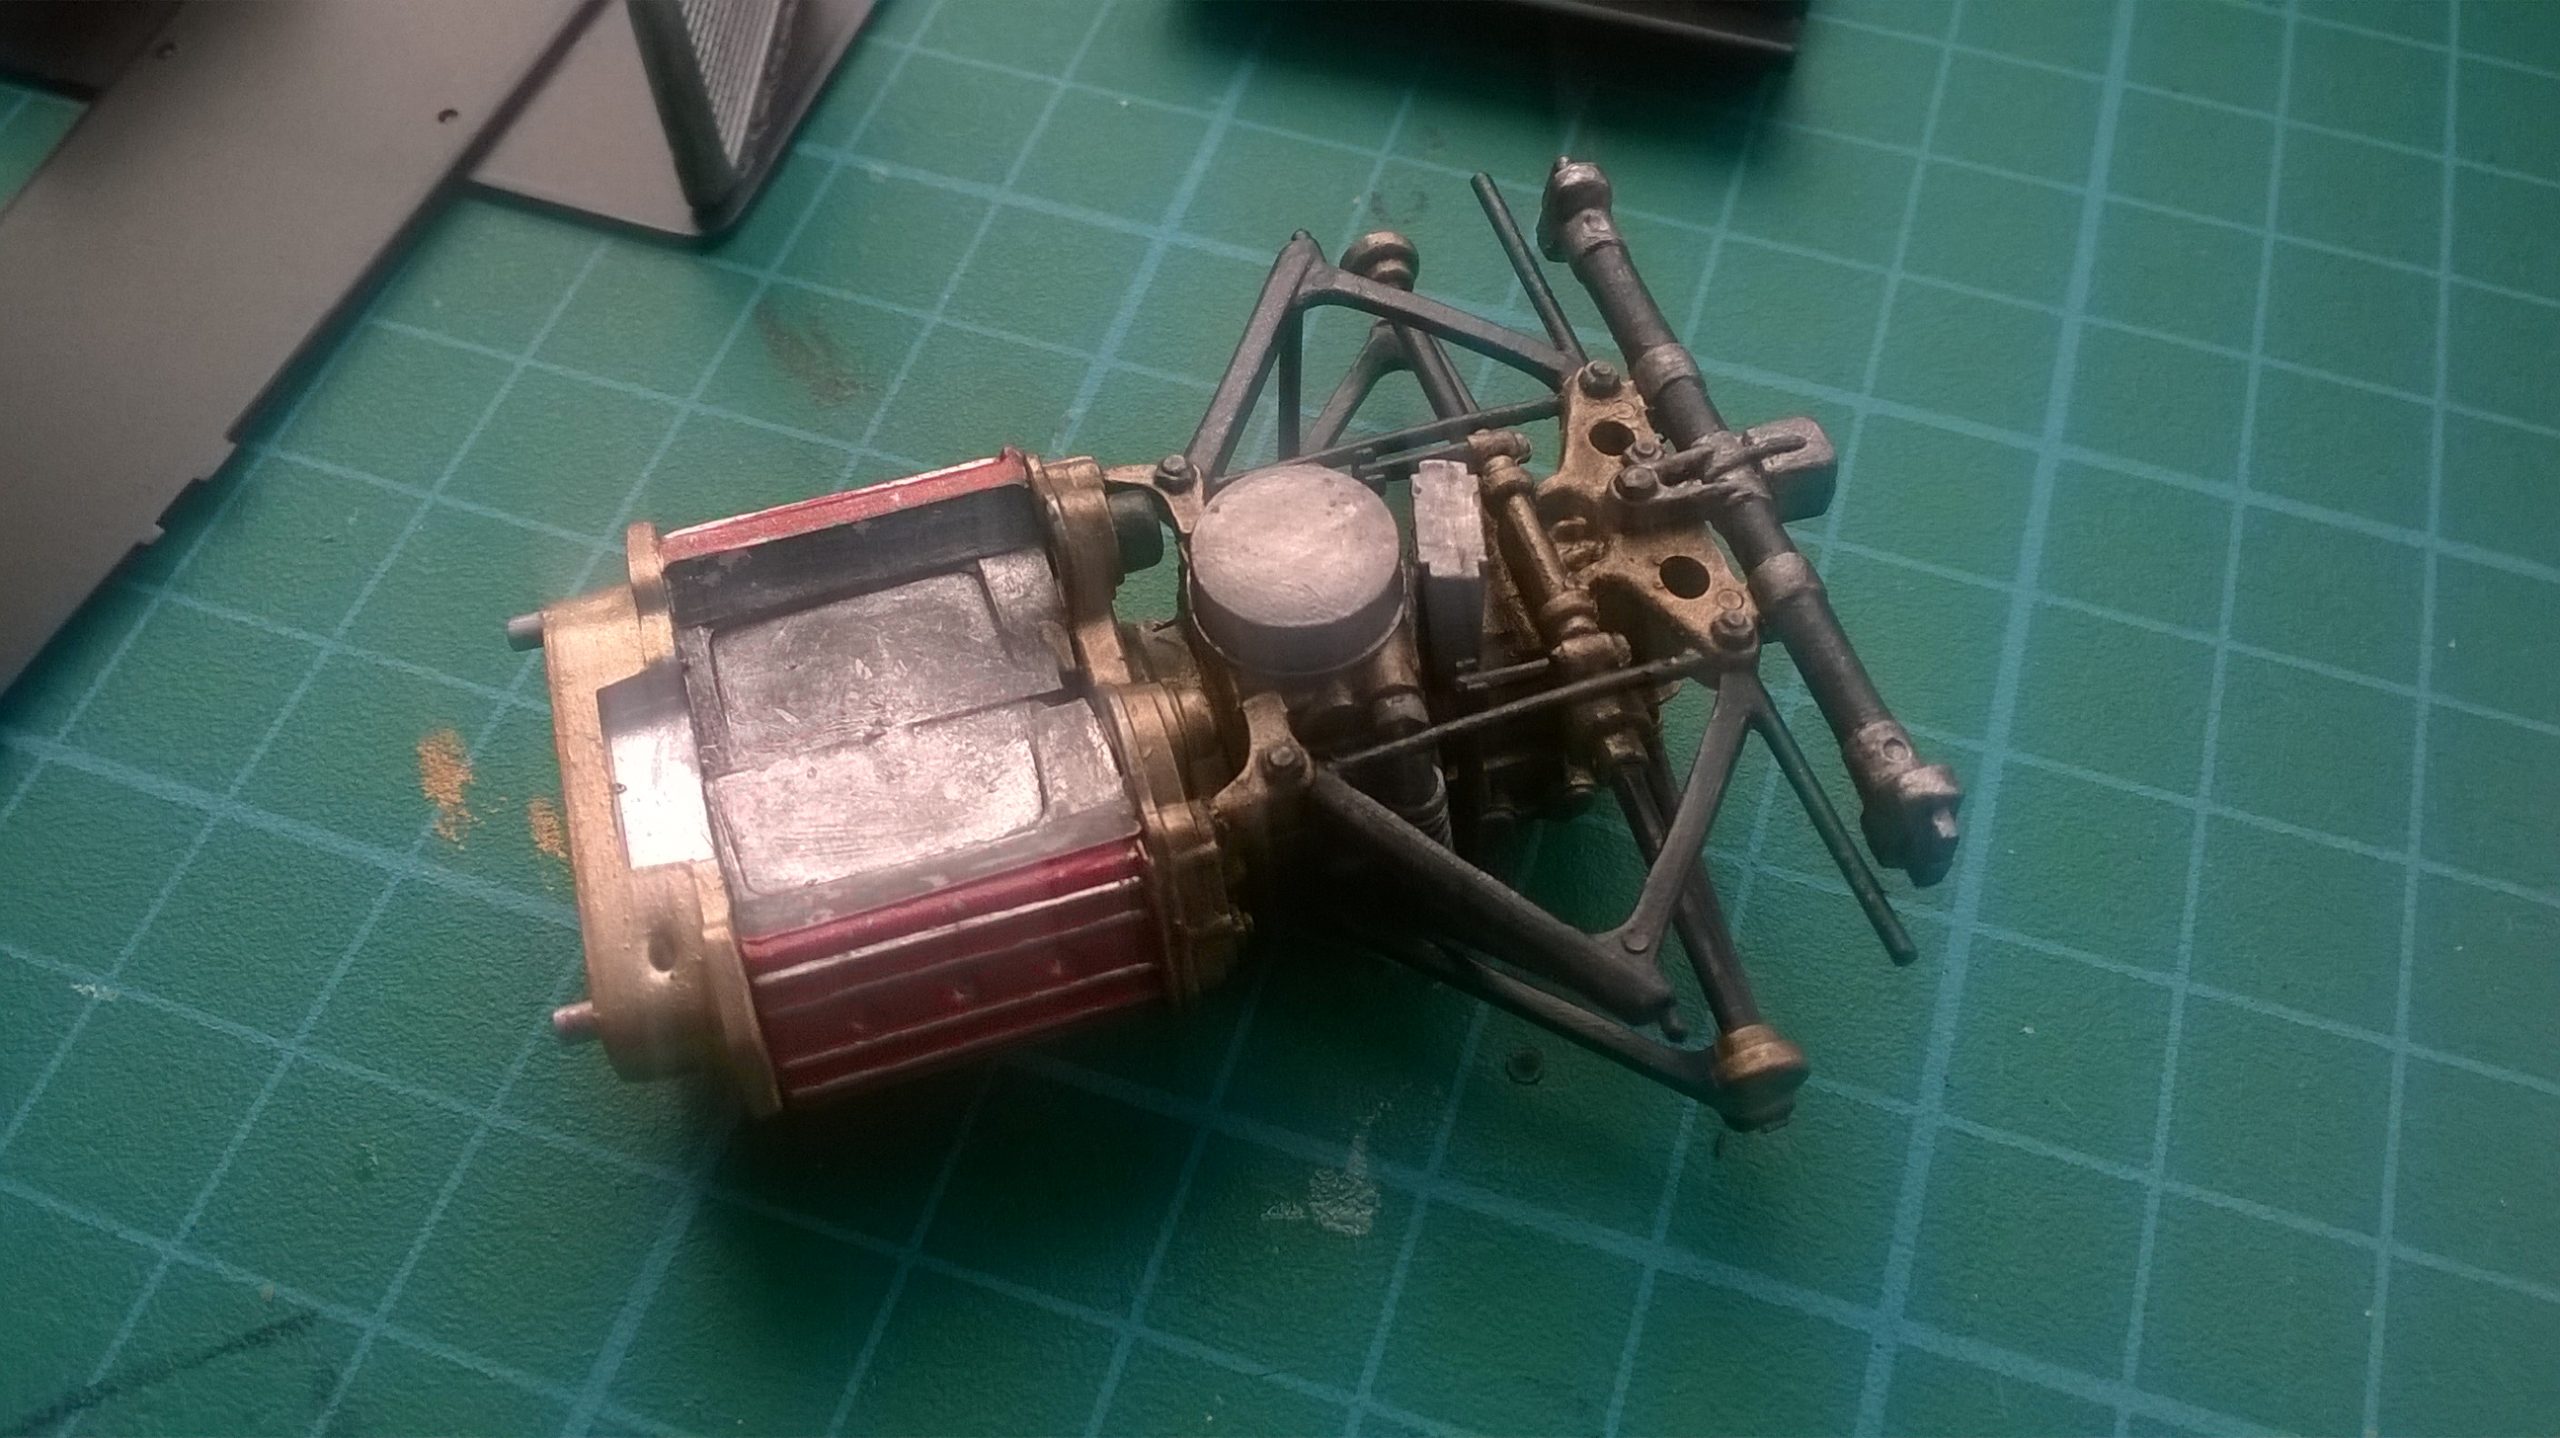
I then assembled and painted the rear suspension, engine and gearbox. I wanted a slightly weathered look, and to bring out some of the detail, but I went in a bit hot with the black wash. The engine definitely looks like it’s done a few race distances! It’s therefore not very historically accurate, seeing as poor Alboreto coudn’t get one of these lumps to last more than about 10 laps before a fresh engine was needed!
Decal replacement and restoration
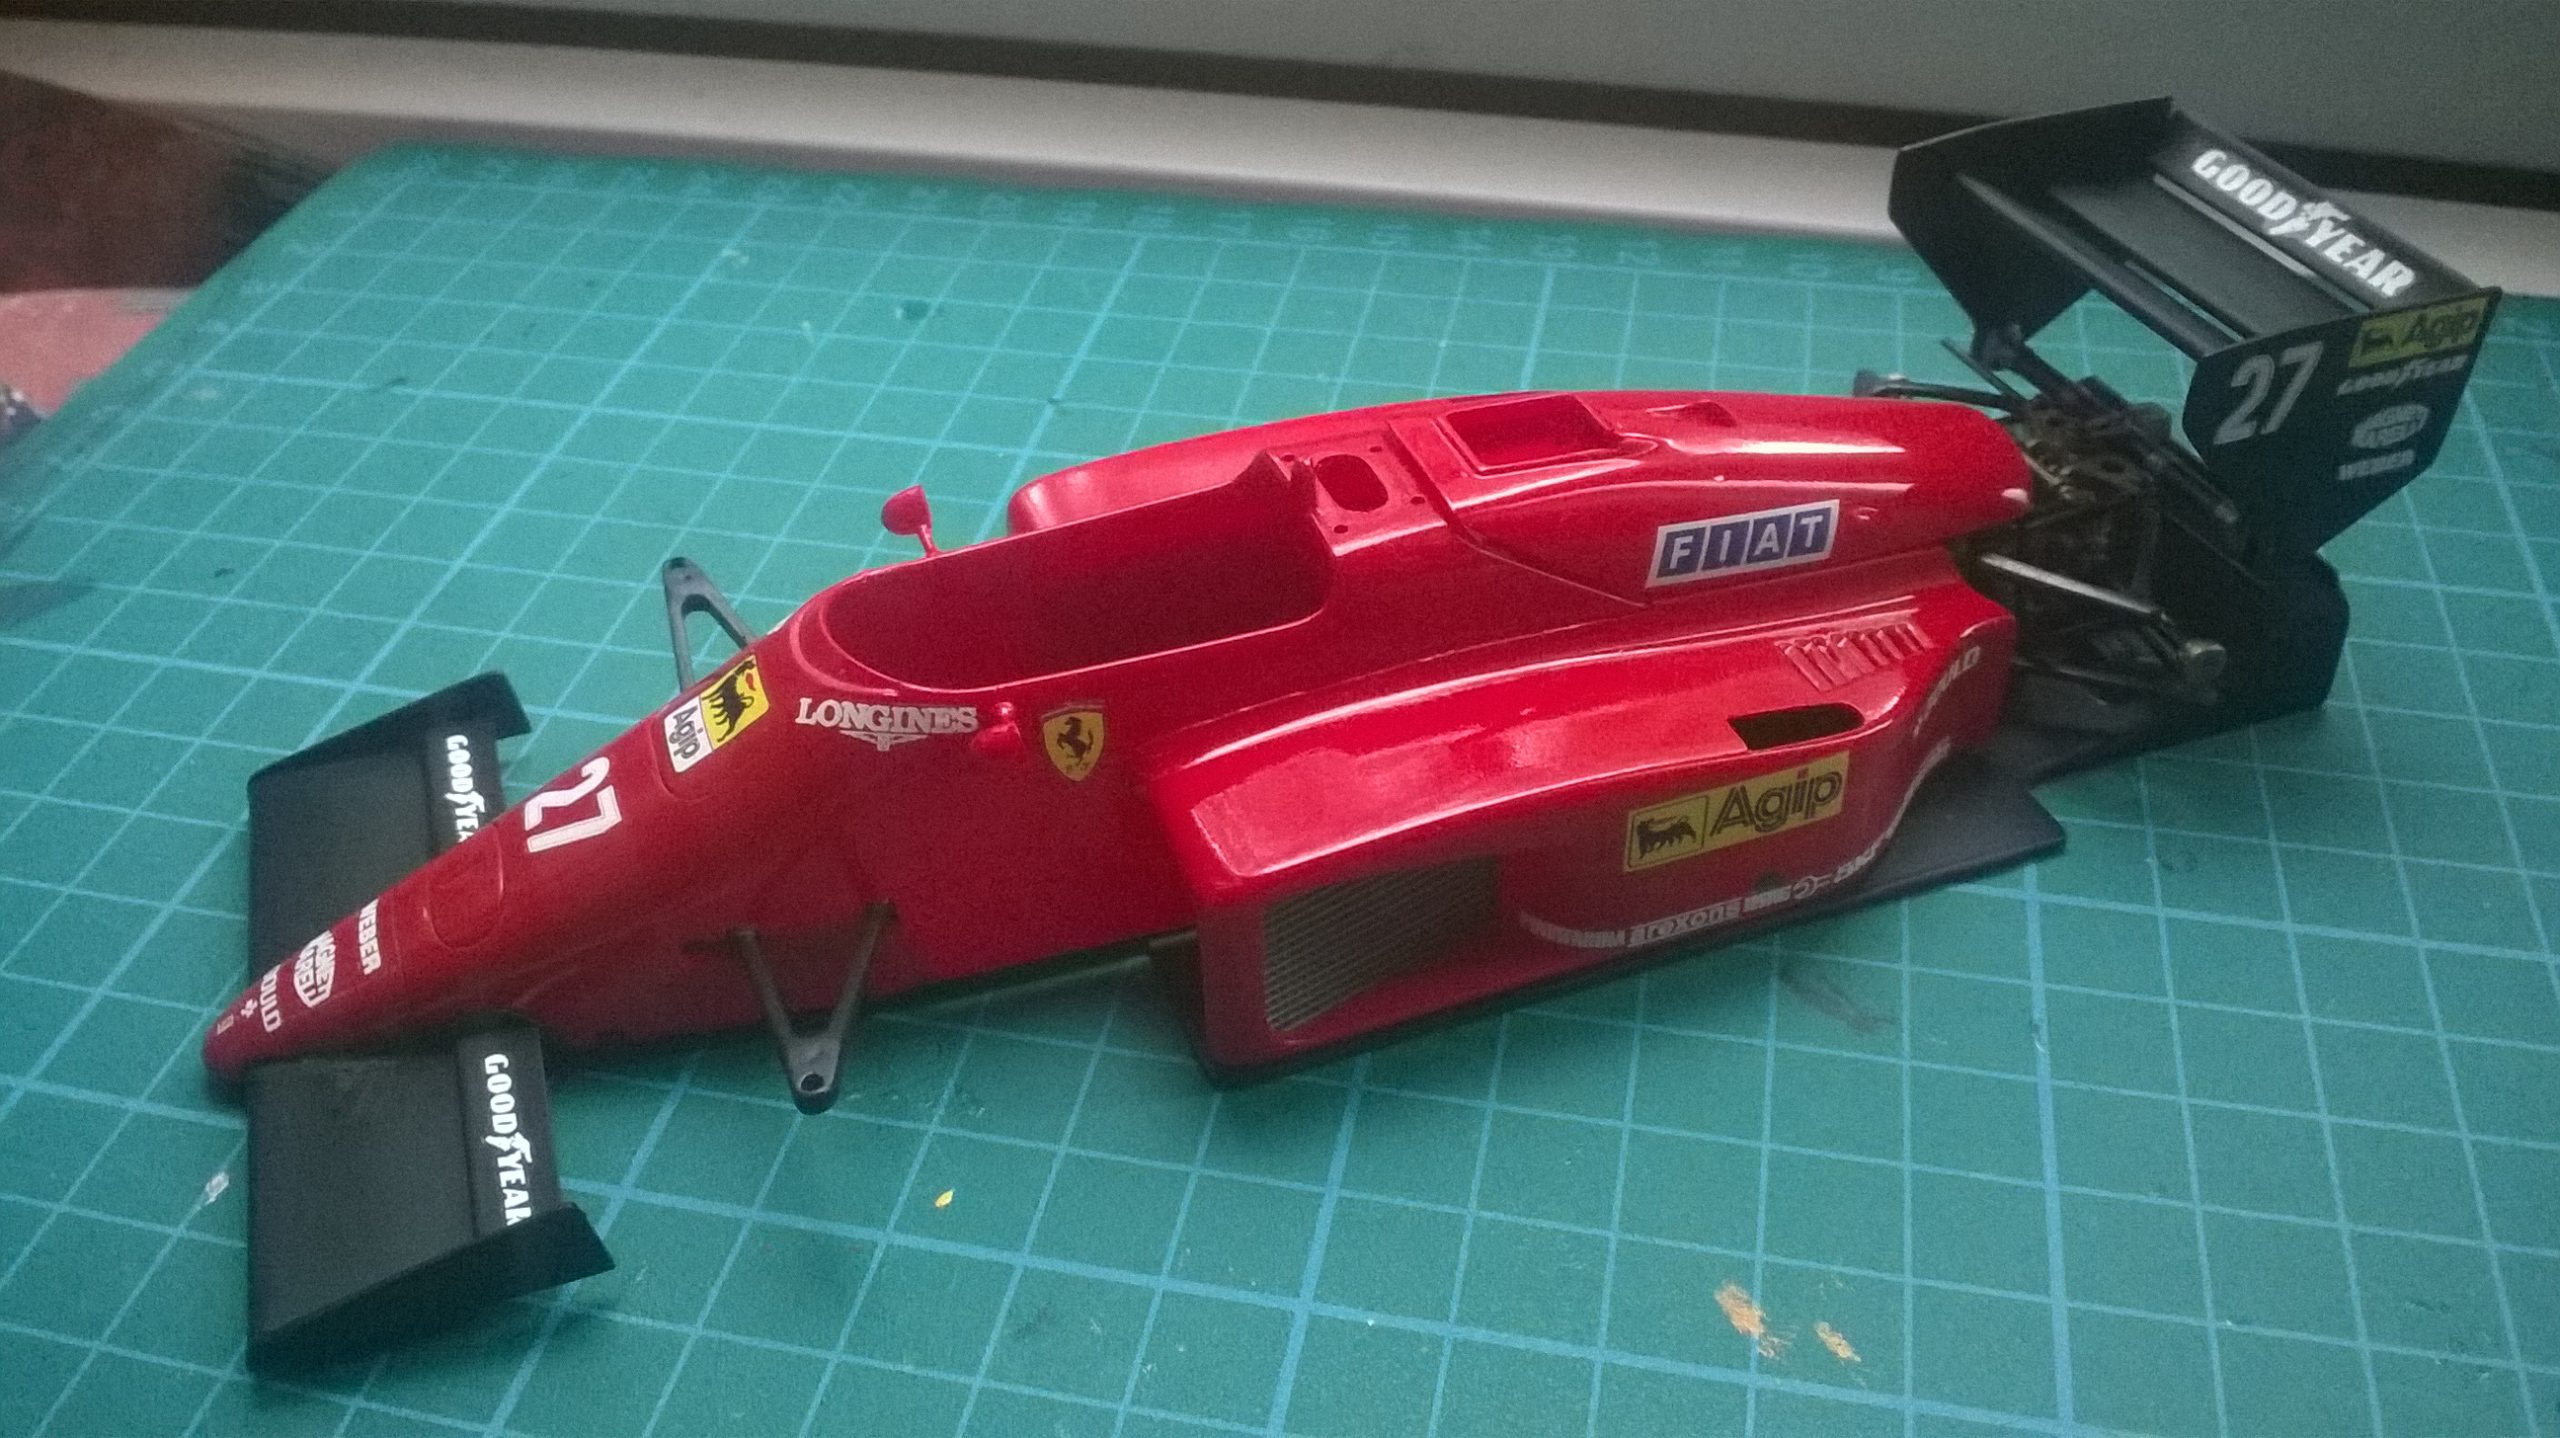
After a dry-fit of the parts so far, it was time to move onto the decals. An initial inspection of the kit decal sheet looked positive – not much yellowing and also seemingly no damage. What wasn’t obvious was the decals had cracked, so as soon as the first one touched the water, it exploded into a million tiny white shards…
Fortunately, Indycals make a replacement sheet, which made things a lot easier. Despite that, the replacement sheet doesn’t include the Marlboro, Champion or Koni logos. After some research, I decided to use Microscale liquid decal film to restore these missing decals on the original kit decal sheet. This involved simply painting the clear liquid onto the decal sheet, waiting for it to dry, and then soaking the decal in water and applying as normal. I was delighted to discover this worked a treat, allowing the car’s full livery to be displayed. However, the Koni and Champion decals are optional anyway. Champion moved around on the car depending on the race, and sometimes Koni wasn’t on the car at all.
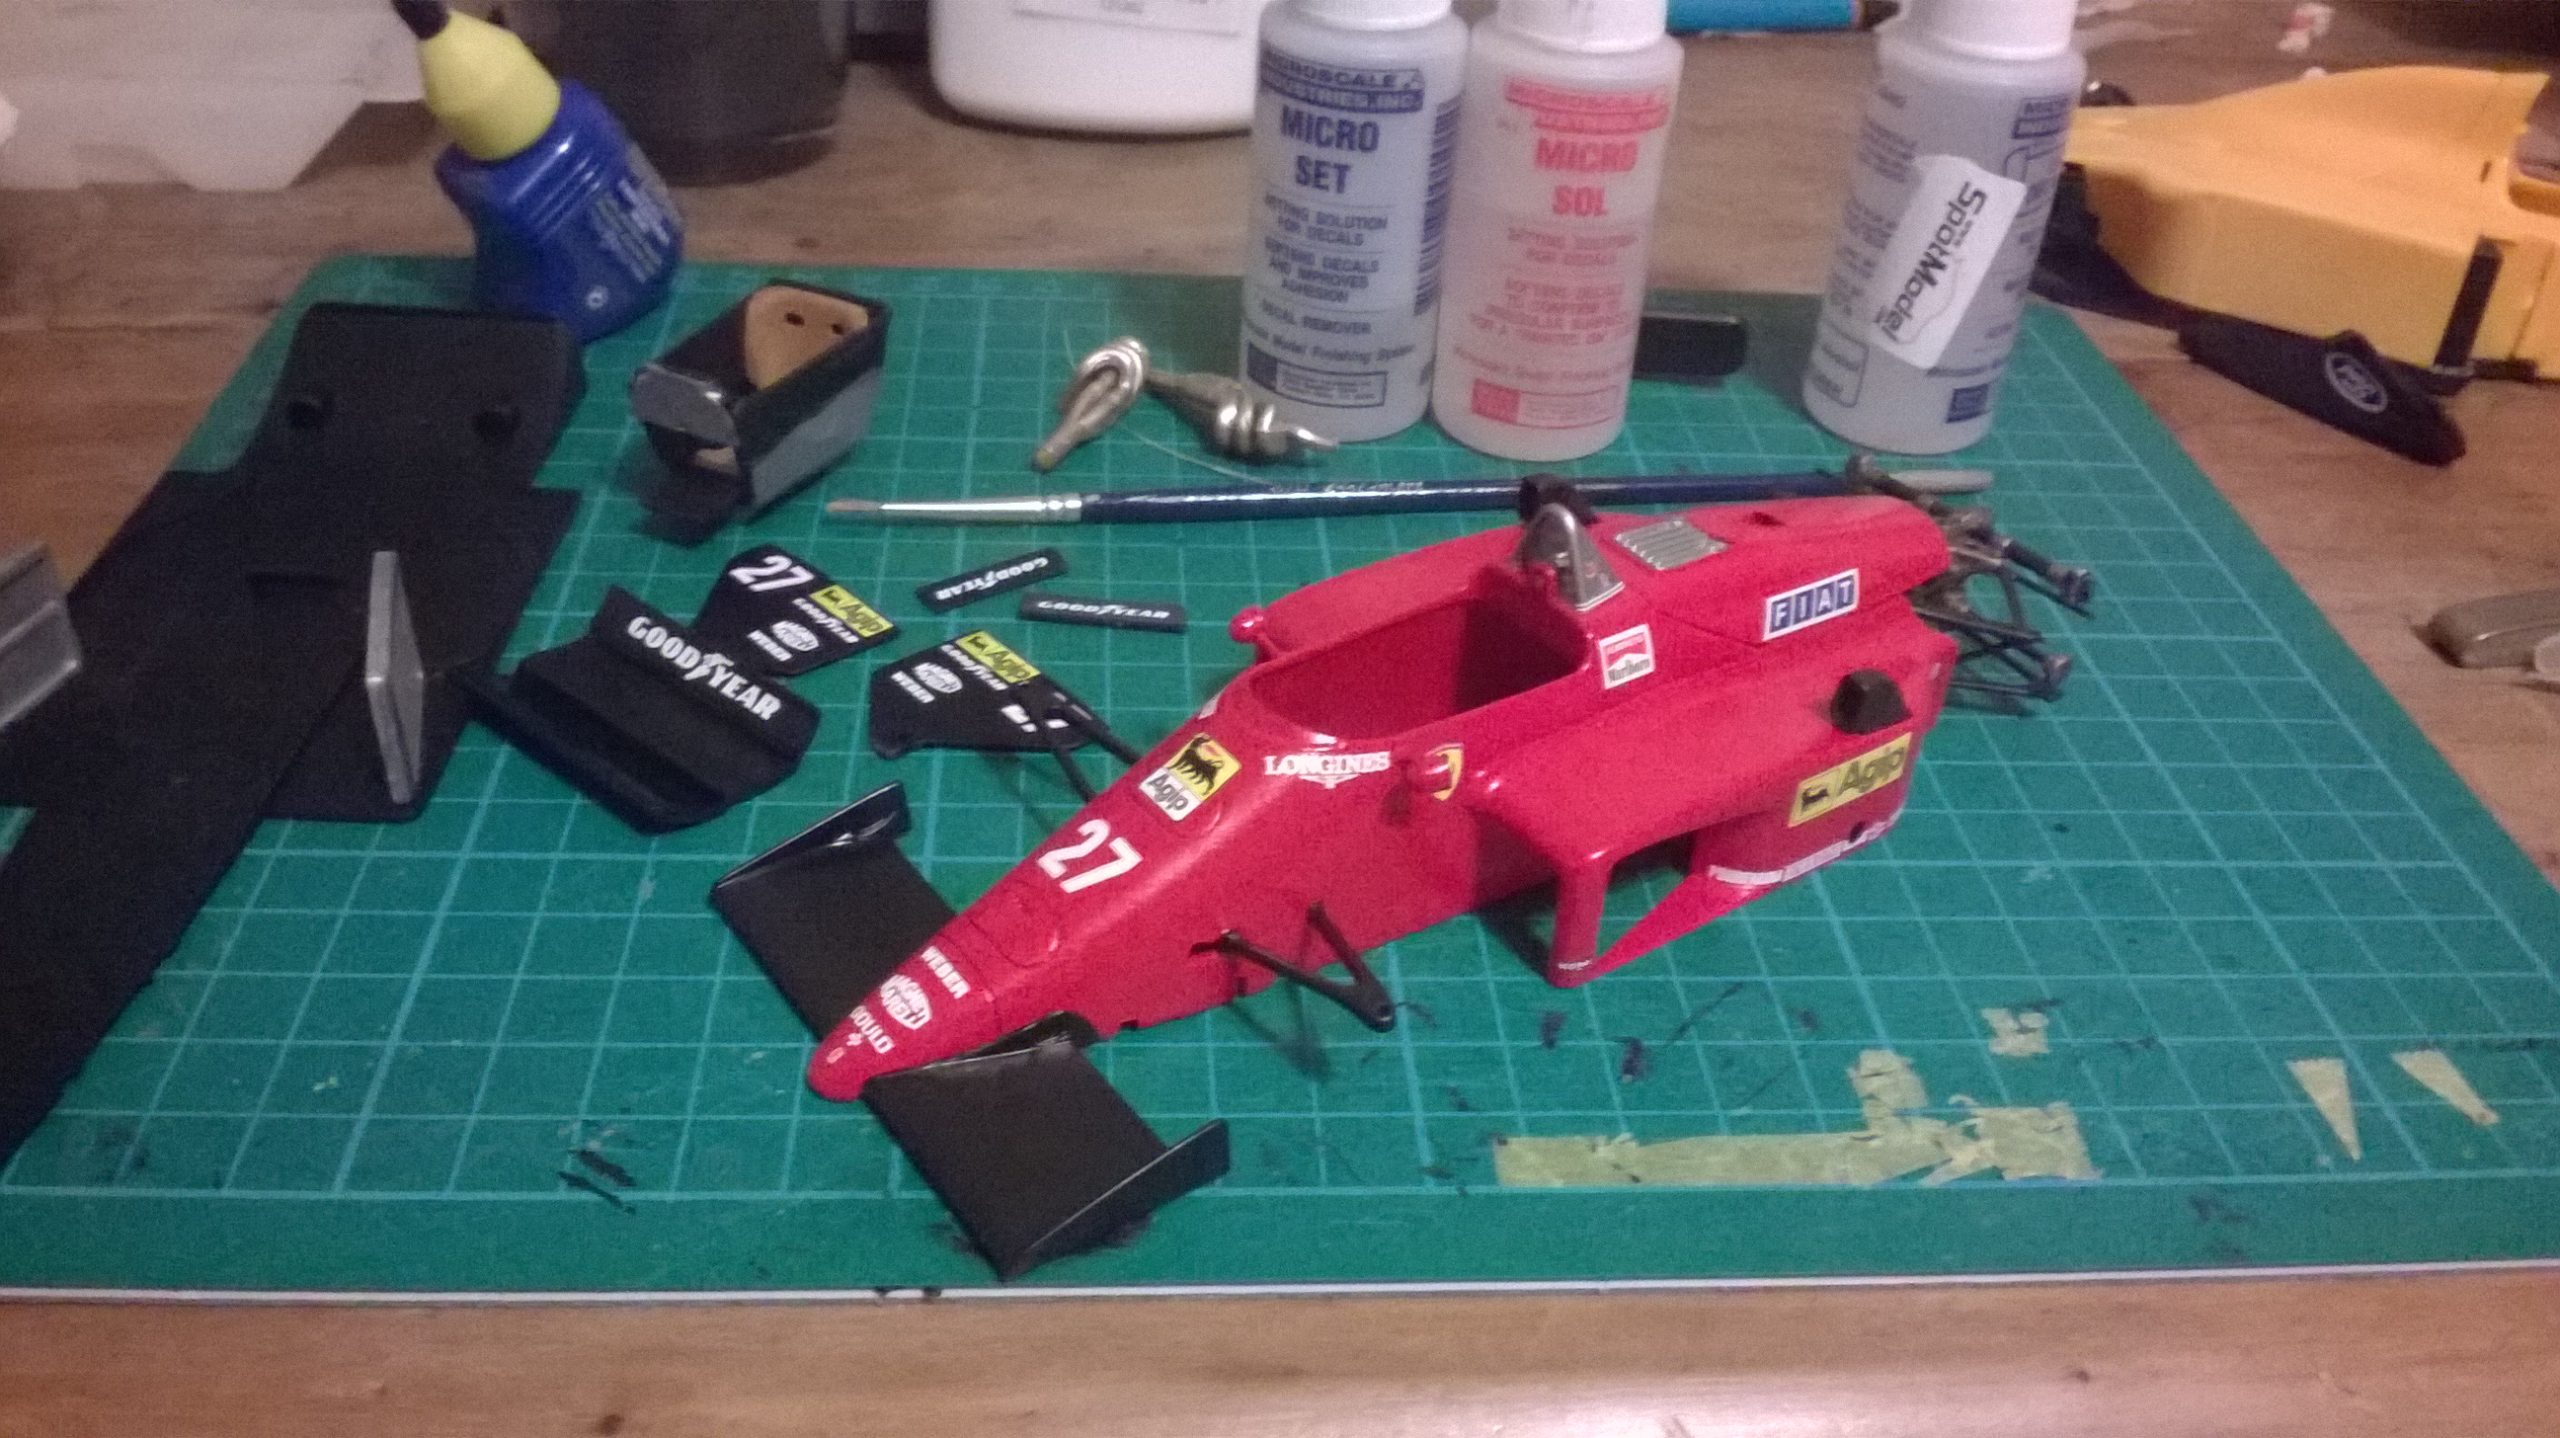
The Ferrari’s finishing touches
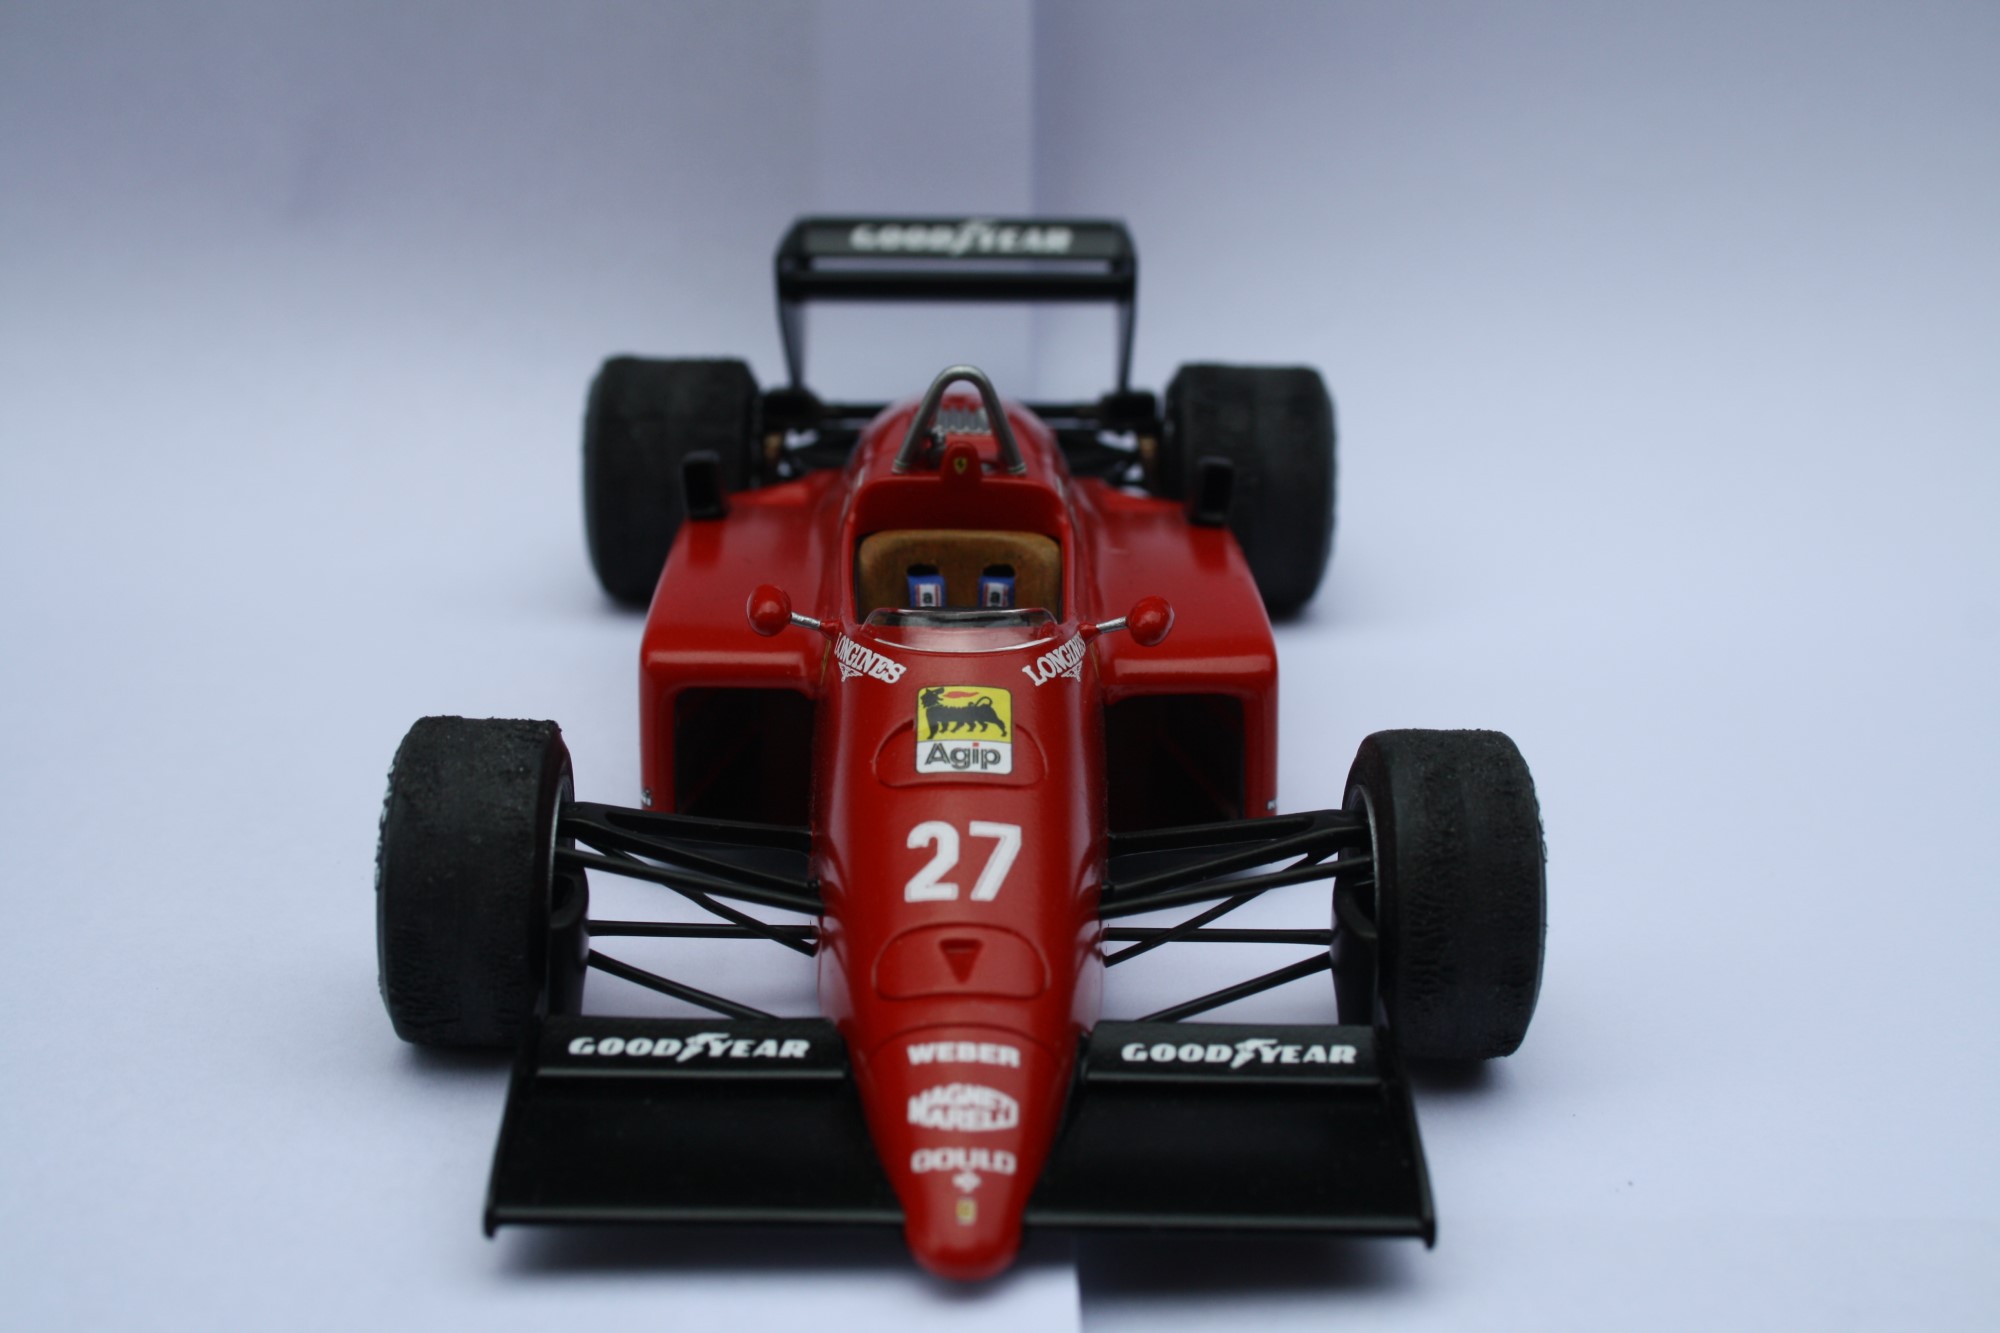
The cockpit, front suspension, and wheels and tyres were the final major areas remaining. The cockpit was a simple assembly, to which I added a set of blue Tamiya seatbelts. The tyres were basic, with the Goodyear logos moulded into them. I brush painted the logos in white, but in hindsight, I’d find some 1:24 scale Goodyear logos and sand off the mouldings instead. At this scale, the imperfections on the sidewalls of the tyres look totally wrong.
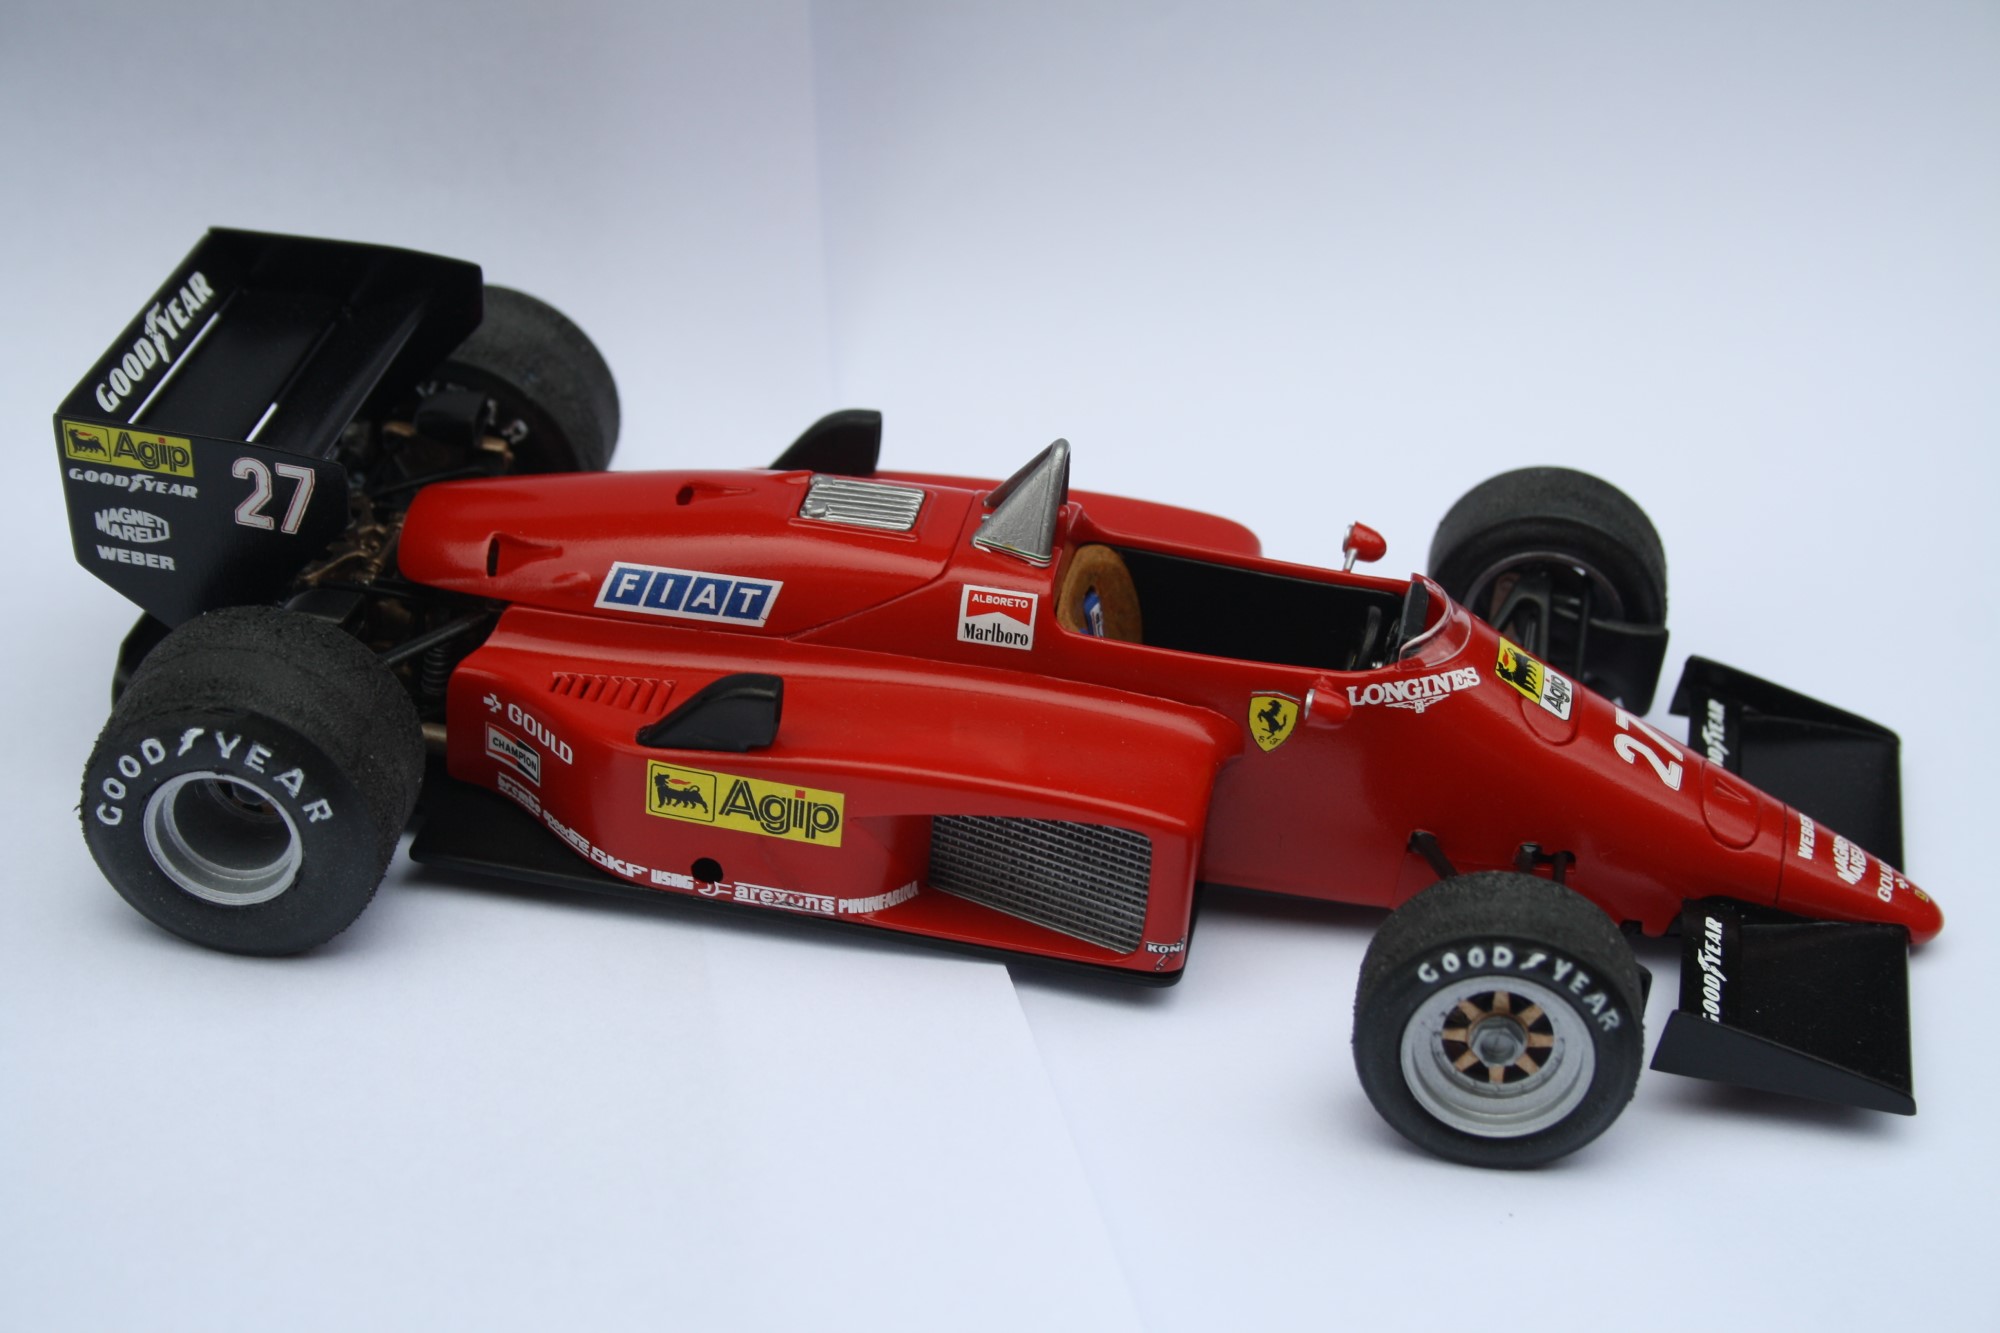
With that, the Protar Ferrari 156/85 was complete. It’s a simple kit to build, helped by the simplicity of the car designs from that era. For instance, the front and rear wings are bereft of detail, having been simplified after 1984 with the little winglets cleared away. This made it a quick and enjoyable project, a model kit that you don’t need to get bogged down in. I enjoy being able to build and complete cars at a good pace, though it rarely happens! Protar’s Ferrari is exactly that sort of kit.
My advice when building the Protar Ferrari 156/85
There’s a few things you can do to really make this kit stand out:
- Make sure you have good replacement decals, and if using Indycals, an alternative for the Marlboro, Champion and Koni logos.
- Scrub the moulded Goodyear logos off the tyre sidewalls, and find a stencil to paint them on, or decals instead.
- Watch for warped bodywork, and try and correct any issues by soaking and adjusting the affected parts in hot water or with hot air from a hairdryer.
- Consider building the kit with the engine on show. There are a lot of reference photos of the engine bay online which can be used to add some great detail. I was limited with the sidepod panels already stuck down, but leaving these separate opens up the whole rear end. This could also be an alternate solution if your body panels are warped.
This build diary was originally published in stages on f1m.com over 2014 and 2015.
Leave a Reply